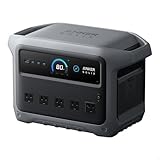
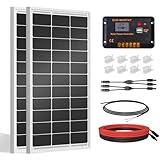
- Top Pick: ECO-WORTHY 200 Watts 12 Volt/24 Volt Solar Panel Kit with High Efficiency Monocrystalline Solar Panel and 30A PWM Charge Controller for RV, Camper, Vehicle, Caravan and Other Off Grid Applications
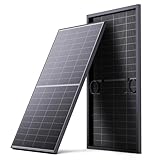
- Best Value: Callsun N-Type 16BB 200W Bifacial Solar Panel, 200 Watt Solar Panel for 12V Battery Systems, 25.6% High Efficiency, Dual-Module Parallel Anti-Shade Design, for RV Van Marine Home Rooftop Off-Grid
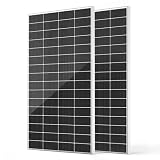
- Premium Choice: HQST 400W Solar Panel, 2 * 200W, N-Type, 16BB, up to 25.4% Efficiency, IP65
Last updated: September 18, 2026
Buying a 200-watt solar system for a van sounds straightforward: choose a panel, add a charge controller, and connect it to a battery. In practice, many buyers compare wattage alone and overlook the details that determine whether the system fits the roof, survives vibration, charges efficiently, and works with the rest of the electrical setup. A “200W” kit can mean one rigid panel, two smaller panels, a flexible panel, or a package that includes only basic wiring and a controller.
This van solar buying guide for 200 watt systems focuses on the specifications that matter in real use. A 200W array is a sensible starting point for lights, phones, laptops, fans, and efficient refrigeration, but it is not an unlimited power source. Before shopping, identify your roof space, battery voltage, daily energy use, and tolerance for drilling, weight, and installation work.
As an Amazon Associate we earn from qualifying purchases at no extra cost to you. Product prices and availability are accurate as of the date shown and are subject to change.

- Decide These 3 Things First
- Size: Measure the Roof and the Installation Envelope
- Material: Rigid, Flexible, Monocrystalline, or Bifacial
- Construction: Check the Frame, Connectors, and Mounting Plan
- Comfort and Performance: Match Output to How You Travel
- Price Tiers: Know What the Package Actually Includes
- Warranty: Separate Product Coverage from Installation Risk
- Delivery and Assembly: Budget Time and Small Parts
- Spec Checklist
- Red Flags
- FAQ
Decide These 3 Things First
- How much energy do you use each day? A 200W array may produce roughly 500 to 900 watt-hours per day in useful conditions, but shade, clouds, roof angle, heat, and charging losses can reduce that substantially. A 12V compressor refrigerator might use 300 to 600Wh per day, while a laptop, lights, phones, and a small fan could add another 150 to 400Wh.
- What battery will you charge? A 200W panel array pairs naturally with a 12V battery bank from 100Ah to 200Ah. That represents about 1,280Wh to 2,560Wh of nominal energy with lithium iron phosphate batteries, or less usable energy with lead-acid batteries. Confirm that the controller supports your battery chemistry.
- Can your roof accept the panel type? Rigid panels usually offer better ventilation and long-term durability but add height and require mounting hardware. Flexible panels are lighter and lower profile, but they can run hotter, are more vulnerable to surface damage, and often require a carefully prepared mounting surface.
Size: Measure the Roof and the Installation Envelope
See also: How to Clean Solar Panels on Van (2026): Step-by-Step • How to Set Up Van Solar Panels (2026): Step-by-Step
A typical 200W rigid panel measures approximately 55 to 60 inches long by 27 to 31 inches wide and weighs about 25 to 35 pounds. Some systems use two 100W panels instead, each roughly 42 to 48 inches by 20 to 23 inches. Two panels can be easier to arrange around roof vents, but they require more mounting points and additional connections.
Measure the usable roof area, not the entire roof. Leave room for a roof fan, antenna, ladder, air conditioner, and a service gap around the panel. A practical clearance of 2 to 4 inches around panel edges makes installation and cleaning easier. Also measure the route from the roof gland to the battery compartment. Long cable runs can cause voltage drop, especially on a 12V system.
Do not assume a panel advertised as “12V” produces exactly 12 volts. Most nominal 12V solar panels have an operating voltage around 18 to 22 volts, which gives the controller room to charge a 12V battery. A 24V-compatible kit can still work with a 12V bank if the controller is designed for it.
Material: Rigid, Flexible, Monocrystalline, or Bifacial
Monocrystalline cells are the usual choice for vans because they provide strong output in a relatively compact footprint. Rigid panels generally use tempered glass over an aluminum frame. This construction handles weather and cleaning well, but the glass and frame increase weight.
Flexible panels commonly use polymer surfaces and can weigh around 8 to 15 pounds for a 200W model. Their low profile can reduce wind exposure and may suit a curved roof, but many should not be bent beyond the manufacturer’s stated radius. Avoid permanently walking on them, placing heavy objects over them, or bonding them to a roof that traps heat.
Bifacial panels can collect light from the rear as well as the front, but the benefit depends on rear clearance and a reflective mounting environment. A panel mounted directly against a dark van roof has little opportunity to receive useful rear light. Callsun’s 200W bifacial example lists N-type cells, 16 busbars, and up to 25.6% stated efficiency; those specifications are worth noting, but the real-world advantage depends heavily on installation.
Construction: Check the Frame, Connectors, and Mounting Plan
For a rigid van installation, look for an aluminum frame, tempered glass, sealed junction-box connections, and standard MC4-style connectors. An IP65 junction box is a reasonable baseline for protection against dust and water jets, although the complete installation is only as weather-resistant as its glands, cable entries, and seals.
Roof mounting hardware should include brackets or rails suited to the van roof, stainless or corrosion-resistant fasteners, and a clear sealing method. A panel that weighs 30 pounds can experience much greater forces at highway speed. Do not rely on adhesive alone unless the mounting system specifically permits it and the roof surface has been prepared according to instructions.
Flexible panels need special attention to cable exits and strain relief. A cable that bends sharply at the panel edge can become a failure point. Plan for a gentle loop, secure the cable against movement, and protect every roof penetration from standing water. Keep panels away from areas where cargo, branches, or routine maintenance could damage the surface.
Comfort and Performance: Match Output to How You Travel
A 200W system is best for moderate electrical use. It can support LED lighting, device charging, a router, a laptop, and an efficient 12V refrigerator when the battery is sized appropriately and the van receives reasonable sunlight. It is less suitable for electric cooking, heating, air conditioning, hair dryers, or induction appliances. A 1,000W appliance can consume the array’s theoretical one-hour output in about five minutes.
For a 12V battery, a 200W array can deliver approximately 14 to 17 amps under favorable charging conditions. That makes a 20A to 30A controller a practical size. A 30A controller leaves room for modest future expansion, but check its maximum solar input voltage and current before adding panels.
PWM controllers cost less and can work acceptably with a simple, well-matched array. MPPT controllers generally harvest more energy when panel voltage is higher than battery voltage, during colder conditions, or when cable runs are longer. If the van is used in mixed weather or the panels are frequently affected by partial shade, an MPPT controller is usually the more capable choice.
Price Tiers: Know What the Package Actually Includes
Budget 200W kits typically cost about $160 to $230. The ECO-WORTHY 200W example is listed at $219.99 and includes a 30A PWM controller. Packages in this range may include a panel, controller, basic cable, and mounting accessories, but verify whether roof brackets, fuses, battery cables, and a roof gland are included.
Mid-range systems generally cost $220 to $400 once a better controller, proper protection, mounting hardware, and longer cables are included. A panel-only option may appear inexpensive: the Callsun 200W example is listed at $174.99, while a two-panel HQST package with 400W total capacity is listed at $229.99. Compare total system cost, not just panel prices. A 400W package may be a bargain only if your roof, battery, controller, and daily usage can support it.
Premium 200W installations often reach $400 to $800 after adding an MPPT controller, roof rails, fused distribution, quality cable, monitoring, and professional installation. The extra cost is most defensible when the van travels frequently, access to shore power is limited, or reliability matters more than the lowest initial price.
Warranty: Separate Product Coverage from Installation Risk
Read the warranty for the panel, controller, cables, and mounting hardware separately. Solar panels often carry longer performance or materials warranties than controllers, but the coverage may exclude improper mounting, water intrusion, physical impact, unauthorized modification, or installation labor.
Check whether the seller provides a clear return period, a domestic service address, and replacement procedures for damaged deliveries. Keep the invoice, model number, and photographs of the product before installation. A warranty is less useful if the brand cannot identify the exact kit revision or requires costly international shipping.
Delivery and Assembly: Budget Time and Small Parts
Glass panels are vulnerable during shipping. Inspect the box before signing, photograph crushed corners, and check the panel for cracks before connecting it. Delivery packaging should protect the glass and frame on all sides.
Allow at least 4 to 8 hours for a careful DIY installation, including roof preparation, mounting, cable routing, fusing, and testing. A professional installation may take 3 to 6 hours depending on the van and electrical layout. Commonly forgotten parts include a roof entry gland, 10A to 20A inline fuses for smaller circuits, appropriately rated battery fuses, cable glands, MC4 tools, and a disconnect switch.
Use appropriately sized cable. For many 200W, 12V installations, 10 AWG wire is a practical choice for moderate roof-to-controller runs, while longer distances may justify larger conductors. Calculate voltage drop rather than copying a cable size from another van.
Spec Checklist
| Spec | Budget | Mid | Premium |
|---|---|---|---|
| Array size | 200W total | 200W with expansion room | 200W to 400W planned system |
| Panel type | Rigid monocrystalline or basic flexible | Rigid monocrystalline, N-type optional | High-efficiency rigid panels or carefully installed flexible panels |
| Typical panel weight | 25–35 lb rigid; 8–15 lb flexible | 25–35 lb rigid | Based on roof load and mounting design |
| Controller | 20A–30A PWM | 20A–30A MPPT | 30A MPPT with monitoring |
| Battery match | 12V, 100Ah–150Ah | 12V, 100Ah–200Ah | 12V, 200Ah or a documented expansion plan |
| Roof-to-controller cable | 10–12 AWG, sized to distance | 10 AWG, with voltage-drop check | 8–10 AWG where distance requires it |
| Approximate system price | $160–$230 | $220–$400 | $400–$800 installed |
Red Flags
- A 200W kit that does not clearly state panel dimensions, operating voltage, current, or controller limits.
- “High efficiency” claims without a stated cell type, efficiency range, or complete electrical specifications.
- A flexible panel marketed for a curved roof without a maximum bend radius or installation guidance.
- A controller described as 30A without identifying whether that rating applies to solar input, battery output, or both.
- Included cables that are extremely thin, unusually short, or missing fuse recommendations.
- Promises of full output regardless of shade, heat, cloud cover, or panel orientation.
- No information about returns, damaged delivery, warranty exclusions, or replacement parts.
FAQ
Is 200W enough solar for a van?
It is enough for moderate loads such as a refrigerator, lights, electronics, and occasional laptop use when paired with an appropriately sized battery. It is not generally enough for electric heating, air conditioning, or regular induction cooking without shore power, alternator charging, or a much larger array.
Should I choose one 200W panel or two 100W panels?
Choose one panel when roof space is open and you want fewer connections. Choose two panels when vents, curves, or roof accessories make placement difficult. Two panels can also offer more layout flexibility, but partial shade on one panel may affect the array depending on how the panels are wired.
Do I need an MPPT controller for a 200W system?
No, but MPPT is often the better long-term choice. A 20A or 30A PWM controller can be suitable for a simple, short-run installation. MPPT is more useful with longer cables, cooler conditions, higher-voltage panels, or plans to expand the array.
Can I install a flexible panel directly on the van roof?
Only if the panel’s instructions allow that method. The roof must be clean, smooth, and properly prepared, with no sharp edges or standing-water areas. Leave room for cable strain relief and expect the panel to run hotter when there is little airflow beneath it. For many vans, a raised rigid panel is the more durable choice.
Ready to decide? Our #1 pick for 2026 is the Array size.
Live price & availability on Amazon.