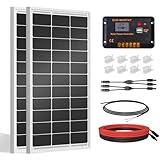
- Top Pick: LINK SOLAR Weatherproof ABS Solar Double Cable Entry Gland
- Best Value: Oududianzi Solar Extension Cable 50Ft, 10AWG Solar Wires, 10 Gauge Tinned Copper PV Wire, Solar Panel Cables and Connectors for Home Roofs Balcony RVs Boat Camping Solar Panels
- Premium Choice: 6 Gauge Marine Wire, 6 AWG Tinned Copper Electrical Wire, Boat Cable for Automotive, Solar, Car Audio, Trailer, Camper & Marine Wiring(6 AWG, 20FT Red + 20FT Black)
Last updated: September 18, 2026
Most camper solar problems start with buying cable by “what looks heavy enough” instead of matching the wire to the circuit. A 10 AWG solar extension cable can be an excellent choice between a portable panel and charge controller, yet be dangerously undersized for a large inverter battery bank. Likewise, a thick 6 AWG marine cable is useful for short, high-current battery connections but is not automatically the right cable for exposed rooftop panel runs.
The common mistakes are mixing up solar-panel current with battery-side current, ignoring round-trip cable length, choosing copper-clad aluminum to save a few dollars, and treating connectors or roof-entry glands as afterthoughts. This camper solar cable buying guide wire gauge breakdown focuses on what actually affects safety, voltage drop, weather resistance, and long-term reliability in 2026.
As an Amazon Associate we earn from qualifying purchases at no extra cost to you. Product prices and availability are accurate as of the date shown and are subject to change.


- Decide These 3 Things First
- Wire Gauge: Size for Amps and Distance
- Conductor Material: Choose Real Copper for Critical Runs
- Insulation and Construction: Match the Cable to Its Job
- Performance: Control Voltage Drop and Heat
- Price Tiers: Spend Where Failure Is Expensive
- Warranty and Documentation: Buy Traceable Electrical Components
- Delivery, Fit, and Installation Planning
- Spec Checklist
- Red Flags
- FAQ
Decide These 3 Things First
- Where will the cable sit? Panel-to-controller cable needs UV-resistant PV wire and weatherproof connectors. Controller-to-battery and battery-to-inverter cable needs flexible, appropriately rated copper cable, often marine-grade tinned copper in damp compartments.
- How many amps will flow? Calculate the expected continuous current, then size the wire and fuse for the circuit. A 200-watt, 12-volt panel may produce roughly 10 to 12 amps; a 2,000-watt inverter on a 12-volt battery system can draw more than 165 amps before allowing for inefficiency.
- How long is the complete circuit? Use the one-way distance from source to load, but remember that voltage-drop calculations use the full out-and-back circuit length. A 20-foot one-way run means approximately 40 feet of conductor path.
Write down panel wattage, system voltage, controller type, maximum current, and measured cable route before shopping. That five-minute step prevents most expensive sizing errors.
Wire Gauge: Size for Amps and Distance
See also: How to Clean Solar Panels on Van (2026): Step-by-Step • How to Set Up Van Solar Panels (2026): Step-by-Step
American Wire Gauge works backward from what some buyers expect: smaller AWG numbers mean thicker wire. For camper solar installations, 10 AWG, 8 AWG, 6 AWG, 4 AWG, 2 AWG, and 1/0 AWG are common sizes. The right choice depends on both amperage and length, not wattage alone.
For a typical 100- to 200-watt portable solar panel feeding a charge controller, 10 AWG PV cable is usually practical for a 10- to 20-foot extension run. A 50-foot 10 AWG extension, such as the Oududianzi 50-foot solar cable example at about $50, can work for modest-current panels, but voltage drop becomes more relevant as distance and current rise. If a portable 200-watt panel delivers 11 amps, keeping the cable shorter than 25 feet one way is preferable when using 10 AWG.
For fixed rooftop arrays, 10 AWG is common on the panel-string side where voltage is higher and current is modest. However, the cable from an MPPT controller to a 12-volt battery bank often needs to be larger. A 40-amp controller on a short 5- to 8-foot one-way run may call for 8 AWG or 6 AWG, depending on manufacturer requirements and fuse size. At 60 amps, 6 AWG is often a sensible starting point for short runs.
Battery-to-inverter cables require the most attention. A 1,000-watt inverter on a 12-volt system can draw around 90 to 110 amps under load. A 2,000-watt inverter may need 2 AWG, 1/0 AWG, or larger cable depending on the cable length and the inverter manual. Keep these runs exceptionally short: ideally 3 to 6 feet one way. Do not use a 10 AWG inverter cable for a high-output inverter simply because the terminals fit.
Conductor Material: Choose Real Copper for Critical Runs
Look for 100% copper conductors. For rooftop solar cable, bare copper with proper PV insulation is standard. For battery compartments, boats, trailers, and under-seat storage areas, tinned copper is worth the extra cost because the tin coating helps resist corrosion in humid conditions.
A 6 AWG tinned copper marine wire set, such as the 20-foot red plus 20-foot black example priced around $65, is useful for medium-current battery, controller, or DC distribution work. Verify that “20-foot red + 20-foot black” means two separate 20-foot conductors; it provides 40 feet of wire total, not a 40-foot reach for one circuit.
Avoid copper-clad aluminum (CCA) for camper solar battery cables and inverter cables. CCA is lighter and cheaper, but it has higher resistance than equivalently sized copper. It may be acceptable only where a manufacturer explicitly designs and rates a low-current product around it; for a DIY camper electrical system, it creates needless uncertainty. If a listing says “copper” without stating “pure copper,” “100% copper,” or conductor construction, read carefully before buying.
Insulation and Construction: Match the Cable to Its Job
Solar panel cable should be labeled PV wire or solar cable and carry an appropriate outdoor rating, commonly 600-volt or 1,000-volt DC depending on the product. It should have UV-resistant, weather-resistant insulation and be intended for sunlight exposure. Most solar extension leads use red and black 10 AWG cable with molded MC4-style connectors; confirm connector compatibility before assuming every “MC4” connector mates perfectly with another brand.
Battery and inverter cable should be finely stranded for flexibility and protected by abrasion-resistant insulation. Marine-grade cable is especially useful in campers because it bends around cabinetry, resists vibration better than stiff building wire, and tolerates occasional moisture. Choose clearly marked red for positive and black for negative whenever possible. For a 12-volt system, color discipline makes troubleshooting much safer.
Do not run unprotected cable through a sharp aluminum roof, plywood panel, or metal frame. Use rubber grommets, conduit, loom, or cable glands at penetrations. A weatherproof ABS double cable entry gland, such as the LINK SOLAR example around $10, can provide a neat roof pass-through for two solar cables. It must be installed on a clean, flat surface with compatible sealant; the gland itself does not replace correct roof sealing.
Performance: Control Voltage Drop and Heat
Voltage drop is wasted energy and, in severe cases, a source of heat. For low-voltage 12-volt circuits, aim for about 3% voltage drop or less on important charging and load circuits. On a 12-volt system, 3% is only 0.36 volt, so cable sizing matters quickly.
Higher-voltage panel strings are more forgiving. For example, two panels wired in series may send 40 volts or more to an MPPT controller while carrying the same current as one panel. That can reduce losses over a long roof-to-controller run compared with parallel wiring. However, never exceed the controller’s maximum PV input voltage, including the panels’ cold-weather open-circuit voltage.
Keep battery-side connections short and direct. A 1-meter, 10 AWG battery cable set, like the XMSJSIY example at roughly $13, may suit a small 10- to 20-amp accessory circuit, compact charge controller, or low-power DC device. It is not a universal inverter cable. Check the cable’s stated amp rating, terminal-hole size, and the device manufacturer’s minimum cable specification.
Price Tiers: Spend Where Failure Is Expensive
Budget: Expect to spend $10 to $30 for short 10 AWG solar adapters, 1-meter battery leads, basic glands, or 10- to 20-foot solar extensions. Budget products can be useful for low-current portable setups, but inspect connector molding, conductor labeling, and insulation thickness.
Midrange: Roughly $35 to $90 buys 25- to 50-foot 10 AWG PV extensions, quality roof-entry glands, 6 AWG copper cable sets, and better crimped lugs. This is the practical range for many 100- to 400-watt camper solar systems.
Premium: Plan on $90 to $250 or more for large-gauge tinned copper battery cable, professionally crimped lugs, heavy-duty fusing, cable protection, and longer custom-length runs. A 2 AWG or 1/0 AWG inverter cable kit can cost more than the solar extension cable, and that is normal. The battery side carries far more current.
Do not save $15 on cable only to lose charging performance or create a difficult-to-find fault behind a cabinet wall.
Warranty and Documentation: Buy Traceable Electrical Components
Choose cable with clearly printed gauge, voltage rating, temperature rating, and conductor material along its jacket. Reputable sellers provide a stated warranty or return window and publish usable specifications rather than only marketing claims. For connectors, glands, and preassembled battery cables, inspect the package immediately: look for cracked insulation, loose lugs, uneven crimping, and mismatched connector genders.
Keep receipts and photograph the labels before installation. If a cable later needs replacement, knowing whether it was 10 AWG PV wire, 6 AWG tinned marine cable, or 2 AWG battery cable saves time and prevents accidental downsizing.
Delivery, Fit, and Installation Planning
Cable is sold in several formats: paired red/black duplex cable, separate single-conductor lengths, preterminated solar extensions, and lugged battery leads. Measure the actual route with string first, then add 10% to 15% for bends, service loops, and routing around cabinets. For a measured 18-foot roof route, buy at least 20 feet of each conductor; for a 25-foot run, a 30-foot cable length is more forgiving.
Check terminal dimensions before ordering. Battery lugs commonly use 1/4-inch, 5/16-inch, or 3/8-inch stud holes. Inverter terminals vary. A cable with the right gauge but the wrong lug hole is not ready to install. Plan for a fuse or circuit breaker close to the battery positive terminal—typically within 7 inches when practical—using a rating matched to the wire and equipment instructions.
Spec Checklist
| Spec | Budget | Mid | Premium |
|---|---|---|---|
| Typical solar cable | 10 AWG, 10–20 ft | 10 AWG, 25–50 ft PV extension | 8 AWG or 10 AWG branded PV wire sized to system |
| Battery-side cable | 10 AWG for low-current accessories | 6–8 AWG for 30–60 amp short runs | 2 AWG to 1/0 AWG for large inverter runs |
| Conductor | Clearly labeled copper | 100% copper | Tinned, finely stranded copper |
| Insulation | Outdoor-rated for exposed panel lead | UV-resistant PV cable or flexible marine jacket | PV-rated roof wire plus marine-grade battery cable |
| Typical system size | 100–200 watts | 200–600 watts | 600+ watts or inverter-heavy system |
| Expected spend | $10–$30 | $35–$90 | $90–$250+ |
Red Flags
- “10 gauge” cable with no statement that it is 100% copper.
- CCA cable marketed for high-current inverter or battery use.
- No voltage, temperature, UV, or outdoor rating printed on exposed solar cable.
- Pre-crimped lugs that rotate, have exposed strands, or use thin stamped metal.
- A 2,000-watt inverter kit supplied with 8 AWG or 10 AWG cable.
- Solar extensions with vague connector descriptions and no polarity confirmation.
- Roof cable entries installed without a gland, strain relief, and compatible sealant.
- Long battery cable runs routed without a fuse near the battery positive terminal.
FAQ
Is 10 AWG wire enough for camper solar panels?
For many 100- to 400-watt panel-side installations, yes—especially on short runs carrying roughly 10 to 20 amps. It may not be enough from the charge controller to a 12-volt battery bank, or for any substantial inverter connection. Calculate current and full circuit length first.
Should I use 6 AWG cable from my solar controller to my battery?
Six AWG is commonly appropriate for short, higher-current controller-to-battery runs, such as a 40- to 60-amp controller located within several feet of the battery. Follow the controller manufacturer’s specified minimum gauge and fuse guidance, because terminal ratings and cable length matter.
What is the difference between solar cable and marine wire?
Solar cable is designed for UV exposure, outdoor weather, and photovoltaic DC circuits. Marine wire is typically flexible, finely stranded, and often tinned for corrosion resistance. Use PV cable on the roof and exposed panel runs; use properly sized marine-grade cable in battery compartments and interior high-current DC runs.
How long can a solar extension cable be?
It can be 25, 50, or more feet, but longer runs need thicker wire or a higher-voltage array to manage voltage drop. A 50-foot 10 AWG extension is more suitable for modest-current portable panels than for a high-output low-voltage battery circuit. When in doubt, shorten the run or move up to 8 AWG.
Ready to decide? Our #1 pick for 2026 is the Typical solar cable.
Live price & availability on Amazon.