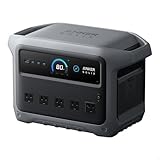
- Top Pick: ECO-WORTHY 200 Watts 12 Volt/24 Volt Solar Panel Kit with High Efficiency Monocrystalline Solar Panel and 30A PWM Charge Controller for RV, Camper, Vehicle, Caravan and Other Off Grid Applications
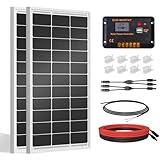
- Best Value: Callsun N-Type 16BB 400W Bifacial Solar Panel, 2Pcs 200 Watt Solar Panel for 12V/24V Systems, 25.6% High Efficiency, Dual-Module Parallel Anti-Shade Design, for RV Van Marine Home Rooftop Off-Grid
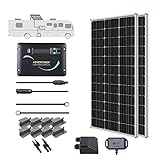
- Premium Choice: Renogy 200W 12V N-Type RV Solar Panel Kit with Adventurer 30A Controller
Last updated: September 18, 2026
The Short Answer
For most camper vans, a 200-watt solar panel system is the best starting point. It can usually support a 12-volt refrigerator, LED lighting, phone charging, cameras, and small electronics when paired with a properly sized battery. A compact van with light electrical use may need only 100 to 150 watts, while a larger van with a refrigerator, laptop, vent fan, and inverter may benefit from 300 to 400 watts.
The answer to “what size solar panel for camper van” depends on three measurements: your daily energy use, the roof area available, and your battery capacity. As a practical planning estimate, one 100-watt panel may produce about 25 to 35 amp-hours per day in good sun through a 12-volt system. Weather, shade, panel angle, wiring, and controller efficiency can reduce that output.
As an Amazon Associate we earn from qualifying purchases at no extra cost to you. Product prices and availability are accurate as of the date shown and are subject to change.


For a typical 12-volt camper van:
- 100 to 150 watts: Light use, occasional travel, and small batteries.
- 200 watts: A balanced choice for most weekend and full-time van setups.
- 300 to 400 watts: Better for refrigerators, laptops, fans, and frequent off-grid stays.
- 500 watts or more: Useful for high energy demand, but roof space, battery size, and controller capacity become major considerations.
Standard Sizes
See also: How to Clean Solar Panels on Van (2026): Step-by-Step • How to Set Up Van Solar Panels (2026): Step-by-Step
Rigid residential-style solar panels are often more efficient per square inch than flexible panels, but they are thicker and heavier. Flexible panels can fit curved roofs and reduce installation height, though they may have shorter service lives and can be more vulnerable to heat buildup.
| System size | Typical panel layout | Approximate dimensions | Approximate weight | Best for |
|---|---|---|---|---|
| 100 watts | One compact rigid panel | 41.8 x 20.9 in (106.2 x 53.1 cm) | 14 to 16 lb (6.4 to 7.3 kg) | Minimal electrical loads |
| 200 watts | One large panel or two 100-watt panels | 58.7 x 26.8 in (149.1 x 68.1 cm) for a common large panel | 25 to 30 lb (11.3 to 13.6 kg) | Most basic camper vans |
| 300 watts | Three 100-watt panels or one 300-watt panel | About 62 x 39 in (157.5 x 99.1 cm) for a typical large panel | 40 to 48 lb (18.1 to 21.8 kg) | Moderate daily use |
| 400 watts | Two 200-watt panels | About 58.7 x 53.6 in (149.1 x 136.1 cm), arranged side by side | 50 to 60 lb (22.7 to 27.2 kg) | Full-time van living and larger batteries |
| 550 watts | Two 275-watt panels | About 87 x 45 in (221 x 114 cm), depending on orientation | 65 to 80 lb (29.5 to 36.3 kg) | High-demand systems with ample roof space |
Dimensions vary by manufacturer, so use the product specification sheet rather than the wattage alone when planning your roof. For example, a 200-watt kit may cost roughly $220 to $290, depending on whether it includes a PWM or MPPT controller, mounting hardware, wiring, and monitoring equipment. A two-panel 400-watt kit commonly falls around $340 to $400, while a two-panel 550-watt setup may cost approximately $420 or more before installation.
Do not confuse panel wattage with usable daily energy. A 200-watt array may produce roughly 600 to 900 watt-hours on a sunny day after normal losses, but much less under clouds or partial shade. A 12-volt, 200 amp-hour lithium battery stores about 2,560 watt-hours before recommended usage limits; lead-acid batteries generally provide less usable capacity from the same labeled rating.
How to Measure Your Space
- Measure the usable roof length and width. Exclude roof vents, fans, skylights, air conditioners, antennas, roof racks, and the curved edges of the van. Measure in several places because roof width can change along the vehicle.
- Mark permanent obstructions. Shade from a roof vent or rack can reduce the output of a panel. Leave enough clearance to open service panels and clean around the mounting feet.
- Check the roof’s weight limit. Add the weight of panels, brackets, cable glands, wiring, and sealant. A 400-watt rigid array may add 50 to 60 pounds before mounting components.
- Draw the panel footprint to scale. Use cardboard templates or painter’s tape. Include a small service gap between panels and avoid placing hardware where it could interfere with roof ribs.
- Confirm panel voltage and controller limits. A 12-volt battery system does not require a panel labeled exactly 12 volts. Check the panel’s operating voltage, open-circuit voltage, controller input limit, and maximum charging current.
- Match the array to the battery. A 200-watt array can charge a 12-volt battery at roughly 14 to 17 amps in strong conditions. Your charge controller should safely handle the array’s maximum current, with some headroom.
- Plan cable routing. The shortest practical route usually reduces voltage loss. Use outdoor-rated cable, a sealed roof entry, properly sized fuses, and strain relief at connection points.
By Room or Use Case
Weekend camper van
If you use the van for short trips and mainly charge phones, lights, a camera, and a water pump, 100 to 150 watts may be enough. Pair it with a 50- to 100-amp-hour battery and avoid running an inverter for high-wattage appliances. A 100-watt panel also takes less roof space and is easier to install on a small van.
Van with a 12-volt refrigerator
A refrigerator is one of the most important loads to include in your calculation. Depending on its size, ambient temperature, ventilation, and thermostat setting, it can use approximately 300 to 700 watt-hours per day. A 200-watt solar array and a 100- to 200-amp-hour battery are a reasonable starting point for a refrigerator-equipped van.
Full-time van living
For daily refrigerator use, LED lights, a vent fan, laptops, phones, camera batteries, and occasional inverter loads, plan on 300 to 400 watts if your roof allows it. A 400-watt array is often more useful than a single large panel because two panels can offer more flexible placement and may perform better when part of the roof is shaded.
Work-from-van setup
Laptops, monitors, cellular routers, and charging equipment can add several hundred watt-hours each day. Start with your actual device wattage and hours of use rather than relying on averages. A 300- to 400-watt array, a 200-amp-hour lithium battery, and an MPPT controller may be appropriate, but cloudy climates may require shore power, a vehicle-to-vehicle charger, or a generator backup.
Small van or limited roof area
When roof space is tight, prioritize efficiency and battery charging flexibility. Two smaller 100-watt panels may fit around a vent better than one 200-watt panel. Keep portable folding panels in mind if you park in shade and can place the panels in direct sunlight away from the vehicle.
Common Sizing Mistakes
- Buying the largest panel that fits: More watts are not useful if the battery or charge controller cannot accept the additional charging power.
- Ignoring shade: A roof rack, vent, or nearby tree can reduce output substantially. Panel placement matters as much as the rated wattage.
- Using roof dimensions from the vehicle brochure: The full roof measurement often includes curved edges and areas occupied by factory equipment.
- Forgetting installation space: Cable glands, brackets, clamps, and maintenance access need room around the panels.
- Underestimating inverter losses: Converting 12-volt battery power to household AC adds losses. Whenever possible, use efficient 12-volt versions of refrigerators, fans, and chargers.
- Pairing a large array with a small battery: Solar panels cannot store energy. A battery that is too small will fill quickly, leaving excess daytime production unused.
- Choosing a controller by appearance: Verify its voltage and current ratings. MPPT controllers generally make better use of higher-voltage panels, while PWM controllers can be suitable for simpler, smaller systems.
FAQ
Is 200 watts of solar enough for a camper van?
For many vans, yes. Two hundred watts can support a refrigerator, lights, phone charging, and moderate electronics when paired with an adequately sized battery and good sun. It may not cover heavy inverter use, electric cooking, heating, or extended cloudy weather.
How many solar panels do I need for a camper van?
You may need one 100- or 200-watt panel for light use, two 200-watt panels for a 400-watt system, or several smaller panels when roof obstructions make one large panel impractical. Count total watts, then confirm the combined footprint, voltage, and controller rating.
Can I use a 400-watt solar panel on a 12-volt camper van?
Yes, provided the charge controller is designed for the panel’s voltage and charging current, and the wiring and fusing are sized correctly. A 400-watt array can deliver roughly 25 to 35 amps to a 12-volt battery under strong charging conditions, so a 40-amp or larger controller may be appropriate depending on the system design.
What is the best solar panel size for a camper van in 2026?
For a general-purpose build, 200 watts remains the most practical balance of roof space, cost, and performance. Choose 300 to 400 watts for full-time use or several electronic devices, and measure the roof first so the selected panels, battery, controller, and mounting hardware work as one complete system.
Ready to decide? Our #1 pick for 2026 is the 100 watts.
Live price & availability on Amazon.