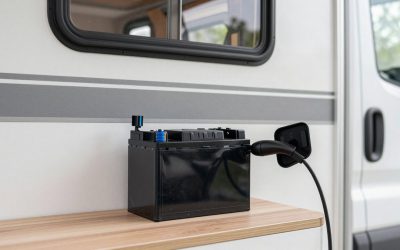
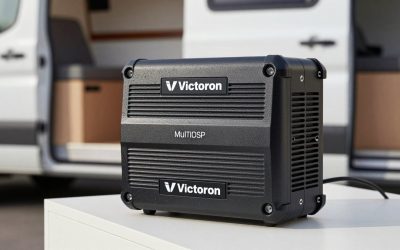
TL;DR: Your MPPT solar charge controller is the most underrated part of a van solar system — it determines how much of your panel’s output actually reaches your battery. This guide covers sizing, programming, wiring, and the settings most vanlifers get wrong.
MPPT Solar Charge Controller Guide for Vanlife: Size, Wire, and Program It Right (2026)
Most vanlifers spend hours researching solar panels and batteries, then buy whatever MPPT charge controller is cheapest. That’s backwards. The controller is the brain of your solar system — it converts the raw panel voltage to the correct charging voltage for your battery chemistry, maximizes harvest through Maximum Power Point Tracking, and protects your battery from overcharge, overdischarge, and thermal damage.
As an Amazon Associate we earn from qualifying purchases at no extra cost to you.


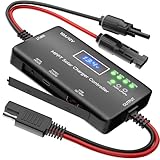


Get this component wrong and your $500 LiFePO4 battery charges at AGM settings, ages prematurely, and under-performs for years. Get it right and your whole system runs at peak efficiency on autopilot.
🛒 Best Price Today on Amazon
Prime members get fast, free shipping on everything above, plus member-only deals. New members get a 30-day free trial — cancel anytime.
Start 30-Day Prime Free Trial →See Today’s Amazon Deals- MPPT vs. PWM: Why It Matters for Vanlife
- Top Picks at a Glance
- How to Size Your MPPT Controller
- Top MPPT Controllers for Vanlife: Comparison
- LiFePO4 Charge Settings: The Critical Configuration
- Wiring the MPPT Controller: Common Mistakes
- Monitoring and Troubleshooting
- FAQ
- Frequently Asked Questions
- Related Articles
- Related Guides
MPPT vs. PWM: Why It Matters for Vanlife
PWM (Pulse Width Modulation) controllers are cheap and still widely sold. They work by rapidly switching the panel connection on and off to regulate voltage — functional, but they clamp the panel to battery voltage, wasting any excess panel voltage as heat. On a 12V battery with a 20V open-circuit panel, a PWM controller throws away roughly 30–40% of available power.
MPPT controllers continuously track the panel’s maximum power point — the voltage/current combination that delivers the highest wattage — and step down that voltage to the battery’s charging voltage at maximum current. Real-world result: 15–30% more energy harvested from the same panel, especially pronounced in cold weather (when panels run higher-than-rated voltage) and partial shading.
For any 100W+ panel and LiFePO4 battery, MPPT is the only sensible choice. PWM is adequate only for tiny (under 50W) panels charging AGM batteries where the price difference matters more than efficiency.
Top Picks at a Glance
See also: How Long Will a 100Ah Battery Last in a Van? Runtime Math Explained • Best Level 2 EV Chargers for Home


As an Amazon Associate we earn from qualifying purchases. Product prices and availability are accurate as of the date/time indicated.

WAYSKA Diesel Heater 12V, 5L Tank, Diesel Heater 2KW, Muffler, Diesel Parking Heater with LCD Monitor & Remote Control for Trucks, Trailer, Boat and Motor-Home


As an Amazon Associate we earn from qualifying purchases. Product prices and availability are accurate as of the date/time indicated.


As an Amazon Associate we earn from qualifying purchases. Product prices and availability are accurate as of the date/time indicated.
How to Size Your MPPT Controller
Controller sizing is based on two numbers: maximum input voltage (Voc of your panels) and output current (amps to the battery). Both must be within the controller’s rated limits.
Step 1 — Calculate maximum input voltage: Take your panel’s open-circuit voltage (Voc, listed on the spec sheet) and multiply by 1.25 for temperature derating (panels produce higher voltage in cold). A 200W panel with 24V Voc peaks at ~30V in cold weather. Your controller’s maximum input voltage must exceed this. Most 12V system MPPT controllers are rated 50V or 100V input — plenty of headroom for 1–2 panels.
Step 2 — Calculate maximum charge current: Divide total panel wattage by battery voltage, then add 25% safety margin. Formula: (Panel Watts ÷ Battery Volts) × 1.25 = Minimum Controller Amps.
| Panel Setup | Calculation | Minimum Controller Size |
|---|---|---|
| 200W, 12V system | (200 ÷ 12) × 1.25 = 20.8A | 20A MPPT |
| 400W, 12V system | (400 ÷ 12) × 1.25 = 41.7A | 40A MPPT |
| 600W, 12V system | (600 ÷ 12) × 1.25 = 62.5A | 60A MPPT |
| 400W, 24V system | (400 ÷ 24) × 1.25 = 20.8A | 20A MPPT |
Sizing tip: buy one size up from minimum if you plan to add panels later. A 40A controller costs only ~$20–30 more than a 20A unit and doubles your future expansion capacity.
Top MPPT Controllers for Vanlife: Comparison
| Model | Max Amps | Max Input Voltage | LiFePO4 Support | Price | Best For |
|---|---|---|---|---|---|
| Victron SmartSolar 100/20 | 20A | 100V | Yes — programmable | ~$110 | 100–200W builds, best monitoring |
| Victron SmartSolar 100/30 | 30A | 100V | Yes — programmable | ~$140 | 200–400W builds |
| Renogy Wanderer 30A MPPT | 30A | 50V | Yes — preset | ~$90 | Budget 200–300W builds |
| Epever Tracer 4210AN | 40A | 150V | Yes — programmable | ~$100 | High-voltage panel strings |
| Victron SmartSolar 150/45 | 45A | 150V | Yes — programmable | ~$220 | 400–600W builds, large systems |
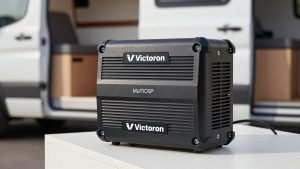
Victron’s SmartSolar line is the gold standard for vanlife MPPT controllers. Bluetooth monitoring via the VictronConnect app lets you see real-time harvest, battery state, and charge history from your phone — invaluable for system troubleshooting and efficiency tracking. The Renogy units work well for budget builds but lack the depth of data Victron provides.
LiFePO4 Charge Settings: The Critical Configuration
Most MPPT controllers ship with AGM or flooded lead-acid default settings. Using these with a LiFePO4 battery will undercharge it (AGM absorption voltage is 14.4–14.7V, which is actually fine), but more importantly, the float voltage (13.5–13.8V typical AGM setting) is too high for LiFePO4 — it keeps the battery at high state of charge continuously, accelerating cell degradation.
Correct LiFePO4 charge settings for a 12V system:
- Bulk/Absorption voltage: 14.2–14.6V (check your battery manufacturer’s spec — most LiFePO4 BMS are set for 14.4–14.6V max)
- Float voltage: 13.3–13.5V (lower than AGM — keeps battery from sitting at 100% SOC perpetually)
- Absorption time: 1–2 hours maximum (LiFePO4 doesn’t need long absorption — once it hits absorption voltage, it fills quickly)
- Low voltage disconnect: 11.5–12.0V if your controller handles load output
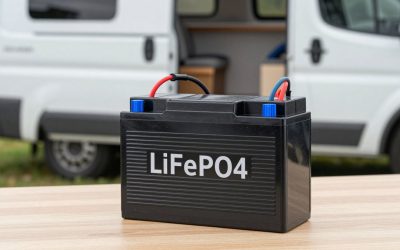
If your MPPT controller has a “LiFePO4” preset, use it — these settings are usually factory-optimized and correct. If programming manually, use the values above. Pair correctly with a quality learn about best 12v lifepo4 battery 100ah that has a built-in BMS to catch any charging faults the controller misses.
Wiring the MPPT Controller: Common Mistakes
- Connect battery first, then panels — always. Never connect panels to an MPPT controller before connecting the battery. The controller needs battery voltage to initialize correctly. Reverse order can damage the unit.
- Wire gauge matters: The battery-to-controller cable carries full output current. Use the correct AWG for your amperage and cable length. A 30A controller with a 5-foot cable run needs minimum 10AWG; 10 feet needs 8AWG.
- Fuse within 18 inches of the battery: Both the battery cable and the panel cable need fuses or breakers close to their source. For a 30A controller: 40A fuse on the battery side, 20A fuse on the panel side.
- Panel wire polarity: MPPT controllers have separate PV+ and PV- terminals. Reverse polarity on the panel input side won’t usually damage a quality MPPT controller (most have reverse polarity protection) but will prevent charging. Double-check MC4 connector orientation before connecting.
- Temperature sensor: Many MPPT controllers include a battery temperature sensor. Use it — temperature-compensated charging prevents overcharging in summer heat and undercharging in winter cold. Connect it to the battery’s negative terminal.
Monitoring and Troubleshooting
A good MPPT controller with Bluetooth monitoring (Victron’s VictronConnect or Renogy’s BT module) shows you daily yield in kWh, current panel wattage, battery voltage, and charge state. Check this data regularly to catch problems early:
- Panel wattage lower than expected: Check for shading (even partial shade from a roof vent destroys MPPT panel output), dirty panels, loose MC4 connections, or thermal throttling (panels above 25°C lose ~0.4% efficiency per degree)
- Battery not reaching absorption voltage: Undersized controller, weak panel output, or battery BMS hitting a current limit — check each in sequence
- Controller running hot: Normal up to 40°C case temperature; over 60°C means inadequate ventilation or overcurrent. Mount in a ventilated location, not sealed in a cabinet
For the full solar picture — panels, batteries, and inverters — see our 200W portable solar panel guide and more on rv accessories must have. The MPPT controller connects all three components — size it for the system you want to end up with, not just where you’re starting.
FAQ
What size MPPT charge controller do I need for a van?
For 200W of solar on a 12V system, a 20A MPPT controller is the minimum. For future expansion, buy a 30–40A unit. Calculate: (total panel watts ÷ battery voltage) × 1.25 = minimum amps. Always check that the controller’s maximum input voltage exceeds your panel’s cold-weather Voc × 1.25.
Can I use an MPPT controller with LiFePO4 batteries?
Yes — and you should. LiFePO4 batteries charge more efficiently with MPPT than PWM due to the precise voltage control. The critical step is programming the correct charge voltages for LiFePO4 chemistry (absorption 14.2–14.6V, float 13.3–13.5V) rather than using AGM defaults. Many controllers now have a dedicated LiFePO4 preset that handles this automatically.
Is Victron MPPT worth the price for vanlife?
For full-time vanlife, yes. The Bluetooth monitoring via VictronConnect app is genuinely useful — seeing real-time watts from your panels and daily harvest history helps you optimize parking position, plan power use, and catch problems early. The units are also exceptionally reliable; Victron has been the marine and RV standard for a reason. Budget builds can use Renogy or Epever and work fine, but you lose the monitoring depth.
How many solar panels can I connect to one MPPT controller?
As many as the controller’s input voltage and current limits allow. On a 100V input controller with 200W panels (Voc ~24V), you can string up to three panels in series (72V total — within the 100V limit) and stay within the output current spec if using a 40A+ controller. Consult the controller’s manual for maximum PV input wattage, which is often listed directly.
What’s the difference between MPPT and PWM solar charge controllers?
MPPT controllers harvest 15–30% more power from the same panels by tracking the panel’s maximum power point and stepping down voltage efficiently. PWM controllers waste excess panel voltage as heat. For any system with panels above 50W or batteries larger than 50Ah, MPPT is the better choice. The price premium is $30–60 over PWM and pays back within weeks of use through extra harvested power.
See our Best 12V Lifepo4 Battery 100Ah and solar panel guide for the other two components of a complete van solar system.
Frequently Asked Questions
Is MPPT worth the extra cost over PWM?
Yes for almost every van build. MPPT harvests 20-30 percent more energy in real conditions because it converts excess panel voltage into charging current, and the advantage grows in cold weather and low light. PWM only makes sense with a single small 12V panel where the price difference matters more.
How do I size the controller?
Divide array watts by battery voltage: 400W of panels on a 12V bank needs at least 33 amps, so a 40A or 50A controller is right. Also check the maximum input voltage, since panels in series in cold weather produce higher open-circuit voltage than their rating and can exceed the controller limit.
Should I wire panels in series or parallel?
Series raises voltage, which lets MPPT start earlier in the morning, work better in low light and use thinner wire, so it suits roofs with uniform sun. Parallel handles partial shading better because one shaded panel does not drag the string down. Two panels in series is the common compromise.
How much power does the controller itself consume?
Around 10-30 milliamps of self-consumption, or under 1Ah per day, which is negligible. What matters far more is placing it close to the battery with short heavy cable, since voltage drop between controller and battery directly reduces charging efficiency and can confuse the absorption stage.
Do I need temperature compensation for lithium?
LiFePO4 needs no voltage temperature compensation, unlike lead-acid, but it absolutely needs a low-temperature charge cutoff. Either use a controller that reads a battery temperature sensor and stops charging below freezing, or rely on a BMS with that protection built in. Charging cold lithium causes permanent damage.