Last updated: October 4, 2026
Setting up a dependable electrical system for off-grid van life in 2026 requires looking past clever marketing and focusing on how components work together as a unified ecosystem. Whether you are building a weekend camper or a full-time mobile homestead, your solar setup dictates how long you can park off the beaten path without hunting for shore power or idling your engine.
Navigating the sheer volume of available packages can quickly overwhelm builders. Understanding core technical specifications, the physical constraints of a van roof, and your daily power consumption patterns will help you select a kit that delivers reliable performance without breaking your budget or adding unnecessary vehicle weight.
As an Amazon Associate we earn from qualifying purchases at no extra cost to you.

- Understanding Your Daily Amp-Hour Needs
- Monocrystalline vs. Flexible Panels: Weighing Efficiency and Durability
- MPPT vs. PWM Charge Controllers: Maximizing Harvest
- Roof Space Constraints and Mounting Hardware
- System Voltage: 12V, 24V, or 48V Configurations
- Wiring, Fuses, and Safety Components
- When to Expand Your Kit vs. Upgrading Batteries
- Related Guides
- FAQ
- Related Guides
Understanding Your Daily Amp-Hour Needs
Before purchasing any solar bundle, you must calculate your exact daily power consumption. Tally up the wattage and run-time of every appliance you plan to use, including refrigerators, vent fans, device chargers, and interior lights. Convert these watt-hours into amp-hours based on your system voltage to understand your baseline deficit. A well-sized kit should comfortably replenish this daily usage during peak sunlight hours while accounting for less-than-ideal weather days.
Many beginners make the mistake of guessing their energy use and purchasing a small entry-level setup, only to find themselves constantly monitoring battery percentages. Track your actual needs or build in a safety buffer by increasing your estimated consumption by at least twenty percent. This ensures your system can handle unexpected power draws or days spent parked under heavy tree cover.
Monocrystalline vs. Flexible Panels: Weighing Efficiency and Durability
See also: How Long Will a 100Ah Battery Last in a Van? Runtime Math Explained • Best Level 2 EV Chargers for Home
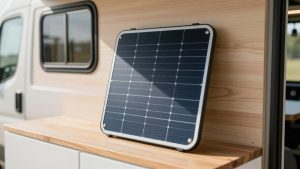
Solar panels included in van kits generally fall into two categories: rigid monocrystalline panels in aluminum frames and lightweight flexible panels. Monocrystalline panels boast higher efficiency ratings, better longevity, and improved airflow underneath the panel, which keeps operating temperatures lower and energy harvest higher. They do require a solid mounting rack, but their reliability makes them the gold standard for full-time off-grid living.
Flexible panels appeal to builders with strict height clearances or curved fiberglass roofs because they can be glued directly down without heavy brackets. However, they trap heat against the van ceiling, degrading efficiency and shortening their lifespan. If you choose flexible panels, ensure they use high-grade laminate and are installed with a tiny air gap to mitigate heat buildup.
MPPT vs. PWM Charge Controllers: Maximizing Harvest
The charge controller is the brain of your solar array, regulating voltage and current sent to your house battery bank. Kits typically come with either a Pulse Width Modulation or a Maximum Power Point Tracking controller. PWM controllers are cheaper and work fine for small, matched-voltage setups, but they waste a significant amount of potential energy generated by higher-voltage panels.
Always opt for an MPPT charge controller if your budget allows. MPPT units convert excess voltage from the panels into increased amperage, boosting your overall power harvest by up to thirty percent, especially during overcast days or early morning hours. This efficiency boost often outweighs the initial cost difference over the lifespan of your electrical system.
Roof Space Constraints and Mounting Hardware
A van roof layout requires careful measuring before buying a kit. Air conditioners, vent fans, roof decks, and skylights limit the available square footage for solar arrays. Map out your roof dimensions and check the physical footprint of the panels included in any prospective kit to ensure everything fits safely without overhanging the edges.
Pay close attention to the mounting hardware provided in the package. Z-brackets, mounting feet, and rails must be robust enough to handle highway speeds and high winds. Avoid kits that rely solely on adhesive tape for rigid panels; mechanical fasteners paired with proper structural sealant are essential to keep your investment secure on the open road.
System Voltage: 12V, 24V, or 48V Configurations
Traditional van builds operate on a twelve-volt DC architecture, but modern solar kits increasingly support twenty-four-volt or higher configurations. Higher system voltages allow you to run thinner gauge wiring over longer distances while minimizing power loss through resistance. This is especially beneficial if your solar array sits far from your battery bank in a large extended-wheelbase van.
Wiring, Fuses, and Safety Components
A complete solar kit should include all necessary cabling, circuit breakers, fuses, and battery interconnects. Undersized wires can create dangerous resistance hot spots and drop your charging efficiency. Verify that the kit supplies thick enough copper wire to handle the maximum potential current output of your panels without significant voltage drop.
Fuses and breakers are not optional safety upgrades; they are critical components that protect your van from electrical fires if a short circuit occurs. Ensure the kit includes properly rated fuses placed as close to the battery bank as possible, along with a disconnect switch to safely isolate the solar panels during maintenance.
When to Expand Your Kit vs. Upgrading Batteries
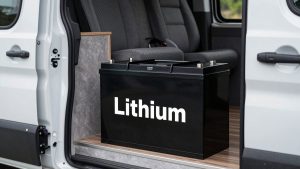
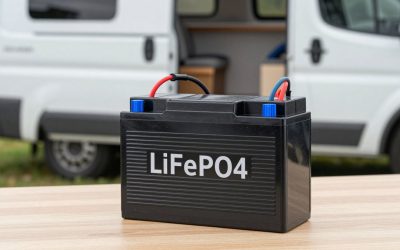
As you spend more time off-grid, you may notice your system falling short of your expectations. Before buying additional solar panels, evaluate your battery bank capacity. If your batteries are fully charged by noon, adding more solar panels is pointless because your system has nowhere to store the extra energy. In that scenario, upgrading your lithium battery bank is the correct move.
Conversely, if your batteries take all day to charge or rarely reach one hundred percent capacity during standard daylight hours, your solar array is the bottleneck. Expanding your kit with matching panels or upgrading your charge controller will resolve the harvest deficit and keep your off-grid adventures running smoothly.
Related Guides
To ensure your mobile setup covers all your needs, check out our comprehensive roundup of top solar kits. Additionally, if you are looking to streamline daily chores while living on the road, explore our guide on best RV washer dryer combo units to optimize your living layout.
FAQ
How many watts of solar do I need for full-time van life?
Most full-time van lifers find that a solar array between 300 to 600 watts provides a comfortable baseline for running a 12V fridge, lights, and device chargers. Your exact requirement depends heavily on your daily power consumption and geographic sunlight availability.
Can I mix different brands or wattages of solar panels?
Mixing different panels is generally discouraged because mismatched voltage and amperage ratings will cause the system to default to the lowest performing panel’s output. If you must expand your array later, always try to use identical panels or consult an expert on proper wiring configurations.
Do I need an inverter if I have a solar kit?
Solar kits charge your 12V or 24V DC battery bank, which powers direct-current appliances natively. If you need to plug in standard household AC appliances like laptops, induction cooktops, or blenders, you will need to add a separate power inverter to your build.
How do I clean and maintain van solar panels?
Dust, tree sap, and road grime accumulate quickly on a van roof and can reduce your energy harvest by up to twenty percent. Clean your panels every few months using a soft brush, mild soap, and water, ideally early in the morning when the glass is cool.