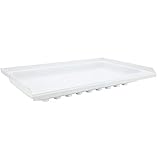
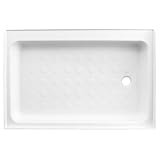
- Top Pick: RecPro RV Shower Pan | 36" x 24" x 5" Right Drain in White | RV Shower Base | Camper Shower Pan
- Best Value: Tottist Upgraded Portable Shower Pan 41"x41"x5" – Heavy-Duty Non-Slip Base with Drain Hole & Mesh Storage Bag | Collapsible Camp Shower Tray for RV, Beach, Glamping | Leakproof Outdoor Bath Floor
- Premium Choice: Tough Grade 24" x 36" White Shower Pan with Drain | Right or Left Side | with or Without Drain Fitting | for RV, Camper, Travel Trailers, 5th Wheels (Drain Fitting Included, Right Drain)
Van Shower Pan: Best Trays, Drains & Waterproofing for Your Build
TL;DR Quick Answer
A van shower pan is the waterproof floor layer that catches water and channels it to your drain. The right pan choice — prefab tray vs. custom fiberglass vs. tile-over liner — determines whether your bathroom stays dry for years or develops rot behind the walls. Expect to spend $50–$300 for the pan alone, plus drain hardware. Get the drain positioned before you frame anything.
Building a shower into a van is one of the most rewarding (and most leak-prone) projects in the vanlife world. The van shower pan is the foundation of the whole system — get it wrong and you’re pulling out subfloor six months later. Get it right and you have a functional, water-tight bathroom that holds up to daily use on the road.
As an Amazon Associate we earn from qualifying purchases.



This guide covers pan types, drain selection, waterproofing methods, and how it all connects to grey water management in a real van build.
🛒 Best Price Today on Amazon
Prime members get fast, free shipping on everything above, plus member-only deals. New members get a 30-day free trial — cancel anytime.
Start 30-Day Prime Free Trial →See Today’s Amazon Deals- Top Picks: Van Shower Pan & Drain Solutions
- Types of Van Shower Pans
- Drain Selection: The Most Critical Decision
- Waterproofing the Shower Pan Area
- Van Shower Pan Spec Comparison
- Grey Water: Where Does the Water Go?
- Installation Tips from Real Van Builders
- FAQ: Van Shower Pan Questions
- Frequently Asked Questions
- Related Articles
- Related Guides
Top Picks: Van Shower Pan & Drain Solutions
BEST OVERALL — PREFAB SHOWER TRAY
Compact RV/Van Shower Pan with Center Drain


As an Amazon Associate we earn from qualifying purchases. Product prices and availability are accurate as of the date/time indicated.
BEST DRAIN ASSEMBLY
Low-Profile Shower Drain with Hair Catcher

WAYSKA Diesel Heater 12V, 5L Tank, Diesel Heater 2KW, Muffler, Diesel Parking Heater with LCD Monitor & Remote Control for Trucks, Trailer, Boat and Motor-Home


As an Amazon Associate we earn from qualifying purchases. Product prices and availability are accurate as of the date/time indicated.
BEST BUDGET OPTION
Portable Shower Floor Mat with Drain Hole

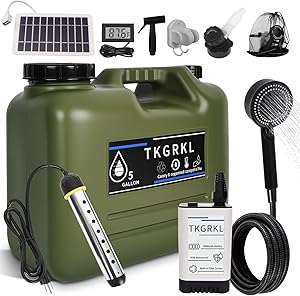
Ivation Portable Camping Shower | Compact Handheld & Hands-Free Rechargeable Outdoor Shower Head & Cleaning System w/ 3.7V Pump, 6-Ft Hose, Bidet Head, Removable Filter, Multiuse Hook & USB Cable


As an Amazon Associate we earn from qualifying purchases. Product prices and availability are accurate as of the date/time indicated.
Types of Van Shower Pans
See also: MaxxFan Deluxe vs Fantastic Fan for Vans: Which to Choose? • Can I Lay LVP in a Van? Van Flooring Guide
Not all van builds need the same solution. Here are the four main approaches, with real trade-offs for each.
1. Prefab RV/Compact Shower Trays
These are purpose-built plastic or acrylic pans designed for small spaces. Sizes typically run 24″x24″ up to 32″x36″. They come with a built-in slope toward a center or corner drain and are the fastest way to get a functional shower floor. The main downside: they’re rigid, so fitting them into a van with wheel wells or uneven subfloor requires careful planning. Many builders cut notches or build a raised platform to accommodate.
Best for: builders who want a fast, reliable install with minimal custom work.
2. Custom Fiberglass or HDPE Pan
A custom-fabricated pan can be shaped to fit any footprint, including builds with wheel well intrusions. Fiberglass pans are light and durable. HDPE (high-density polyethylene) is nearly indestructible and completely waterproof. Custom fabrication runs $150–$400 but gives you exact dimensions and drain placement. If you’re building a permanent van home, this is worth the investment.
3. Tile-Over Waterproof Liner
Advanced builders sometimes build a custom mortar bed or foam-core base, apply a waterproof membrane (like Schluter KERDI or RedGard), and tile over it. The result is beautiful and can be shaped to any dimension. The downsides: significant weight (tile is heavy in a moving vehicle), more complex waterproofing, and grout that can crack from van flex over time. Use uncoupling membrane between the substrate and tile to handle movement.
4. Portable Folding Shower Pan
For builds without a dedicated bathroom space, folding silicone or rubber shower trays offer a removable solution. They fold flat when not in use, work with a portable shower curtain setup, and drain via a flexible hose to a grey water jug. Not ideal for daily use but perfect for weekend vans or stealth builds.
Drain Selection: The Most Critical Decision
The drain is where most van shower builds go wrong. You need a drain that:
- Sits low enough to create proper slope toward it (minimum 1/4″ per foot)
- Connects to tubing that runs to your grey water system
- Has a trap to prevent sewer gas if you’re using a permanent tank
- Can be accessed for cleaning without a full teardown
Standard 2″ PVC drains work for most builds. Low-profile brass or stainless drains look better and last longer. If you’re running to a grey water tank (see our guide on van shower drain plumbing and pump systems), plan your drain location around the path the hose needs to travel — every bend adds resistance and potential for clogs.
Waterproofing the Shower Pan Area
The pan itself is waterproof, but the walls above it are not. Water splashes up — you need a continuous waterproof envelope from the pan at least 6″ up the wall, and ideally higher if you have a fixed showerhead.
Common approaches:
- PVC shower surround panels — fast install, no grout to maintain, glued directly to walls
- FRP (fiberglass reinforced plastic) — common in RVs, durable, low cost
- Solid surface panels (Swanstone, Cultured Marble) — premium look, heavy
- Waterproofed plywood + paint — budget option, requires multiple coats of waterproof paint and careful sealing at all joints
All wall panels must be sealed to the pan lip with 100% silicone caulk — no acrylic caulk, no grout. Silicone stays flexible as the van moves and prevents water from wicking behind the panel edge.
Van Shower Pan Spec Comparison
| Pan Type | Weight | Cost Range | Durability | Custom Fit | Best For |
|---|---|---|---|---|---|
| Prefab RV Tray | 5–12 lbs | $40–$120 | Good | No | Fast builds |
| Custom Fiberglass | 8–15 lbs | $150–$400 | Excellent | Yes | Permanent van homes |
| Custom HDPE | 10–20 lbs | $200–$500 | Excellent | Yes | Heavy-use builds |
| Tile-Over Liner | 20–40 lbs | $100–$300 | Good (with flex) | Yes | Aesthetic builds |
| Folding Silicone | 1–3 lbs | $25–$70 | Fair | Partial | Part-time vanlife |
Grey Water: Where Does the Water Go?
Your shower drain connects to a grey water system. The two main options in van builds are a portable grey water tank or a drainboard that routes water outside the van onto the ground (legal in some jurisdictions, not all). For any regular-use shower, a dedicated tank is the better choice.
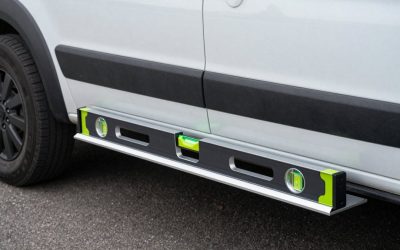
A 5–7 gallon portable tank handles a few days of showering for one person. The tank needs to be accessible to dump, vented so it doesn’t build pressure, and mounted low enough for gravity drainage from the shower pan. Read our full breakdown of van leveling systems — a level van is critical for shower drainage to work correctly. If your van is parked at an angle, water pools against the low wall instead of draining toward the outlet.
Installation Tips from Real Van Builders
Mark drain location before framing. The single biggest mistake is framing the bathroom, then trying to route drain tubing around structural elements. Decide drain position on day one, then frame around it.
Build a test shower before committing. Use a garden hose to run water over your installed pan before installing wall surrounds. Look for slow drainage, pooling, or any leak path around the drain flange. Fix these issues when they’re accessible, not after the walls are up.
Use a shower pan liner under prefab trays. Even a prefab pan can develop micro-cracks over years of road use. Laying a thin EPDM or PVC liner under the tray (overlapping up the walls a few inches) gives you a secondary waterproofing layer that protects your subfloor.
Ventilation matters as much as waterproofing. Without a vent fan above the shower area, humidity will condense on every cold surface in the van. A dedicated bathroom exhaust fan (separate from your main roof fan) or a cracked window during showers prevents mold and keeps your insulation dry. See our guide on van 12V breaker panel wiring for how to add a dedicated shower fan circuit.
FAQ: Van Shower Pan Questions
What size shower pan fits in a standard cargo van?
A high-roof cargo van (Transit, Sprinter, ProMaster) typically accommodates a 24″x32″ or 24″x36″ shower pan if you’re using a corner or side-wall bathroom layout. Standard-roof vans are more constrained — 24″x24″ is the practical maximum without sacrificing ceiling clearance for standing. Measure your available floor space with wheel wells factored in before ordering any prefab tray.
Can I use a standard house shower pan in a van?
Standard residential shower pans (36″x36″ minimum) are almost always too large for van bathrooms. More importantly, house pans are designed for fixed structures that don’t flex — a van body twists and flexes constantly on the road, which can crack rigid pans over time. Purpose-built RV or compact pans, or custom-fabricated options with some flex tolerance, are better choices.
How do I slope a van shower pan for drainage?
Prefab RV pans have a slope built in — the center (or corner) is the lowest point and the pan angles toward it. For custom pans or tile-over builds, the industry standard is 1/4″ drop per foot of horizontal run toward the drain. In a 24″ square shower, that means the far corner is 1/2″ higher than the drain point. This is achieved with a sloped mortar bed, foam slope kit, or by shimming under the pan during installation.
What’s the best waterproofing membrane for a van shower?
For tile-over builds, Schluter KERDI sheet membrane or RedGard liquid waterproofing are the two most trusted options. For direct-to-wall applications (no tile), 100% silicone caulk at all joints plus a continuous PVC or FRP surround panel provides excellent protection. Avoid cement board in a van — it’s heavy, and the constant humidity in a small enclosed space can cause problems even with a waterproof membrane over it. Foam-core tile backer (like Schluter KERDI-BOARD) is lighter and completely non-absorptive.
Do I need a P-trap under a van shower drain?
If your drain runs to an open grey water jug with a vented cap, you don’t need a P-trap — there’s no sewer gas to worry about. If you’re running to a closed tank with a vent, a P-trap is good practice and prevents any odor from backing up through the drain. In most van builds, a simple inline trap in the drain hose is sufficient — you don’t need a full plumbing P-trap fitting unless you have significant vertical drop available under the floor.
Frequently Asked Questions
What size shower pan fits in a camper van?
Most Sprinter and Transit wet baths use a 24×32 or 30×30 inch pan, which is tight but usable standing. A 36×36 pan is luxurious but eats a full cabinet bay. Measure floor width between the wall ribs, not the outer body, and allow an inch for the waterproof wall panel.
Can I use a household shower pan in a van?
Acrylic and fibreglass household pans work but they crack from chassis flex if bolted rigidly, and they are heavy. Bed the pan in a flexible adhesive rather than screwing it tight, or choose a purpose-made RV pan moulded from thinner ABS that tolerates twisting. Marine hatch pans are another option.
How do I stop water leaking behind the pan?
The joint between pan lip and wall is where nearly every wet bath fails. Run the wall panel down inside the pan lip so gravity works for you, seal with a marine-grade polyurethane such as Sikaflex 291 rather than bathroom silicone, and add a corner bead. Test with a bucket before finishing.
Gravity drain or a pump-out drain?
Gravity to an underslung grey tank is simplest and has nothing to fail, but it needs the pan raised several inches and the van roughly level. A small diaphragm or macerator pump lets you keep the pan low and drain into a tank anywhere, at the cost of power and a filter to clean.
Will the drain trap freeze or smell?
A conventional P-trap holds water that freezes solid below about 28F and cracks. Many van builders use a waterless HepvO style valve instead, which blocks tank odour without standing water and cannot freeze. If you keep a P-trap, drain it before hard freezes and pour in a little RV antifreeze.