TL;DR: PEX tubing is the go-to choice for van plumbing — flexible, freeze-resistant, and DIY-friendly. This guide covers everything from choosing the right fittings to routing lines through your build, plus the top products vanlifers trust on the road.
Van Plumbing PEX: The Complete Installation Guide for Vanlife
Running water in a van changes everything. No more hunting for campground spigots, no more juggling jugs — just turn the tap. And when it comes to van plumbing, PEX (cross-linked polyethylene) tubing is the material that makes it practical. It bends around tight corners, handles freezing better than rigid pipe, and connects without special tools. Whether you’re building a fresh water system or upgrading an existing setup, PEX is the foundation every serious van build deserves.
As an Amazon Associate we earn from qualifying purchases.




🛒 Best Price Today on Amazon
Prime members get fast, free shipping on everything above, plus member-only deals. New members get a 30-day free trial — cancel anytime.
Start 30-Day Prime Free Trial →See Today’s Amazon Deals- Why PEX Is the Right Choice for Van Plumbing
- Top Products for Van Plumbing PEX Systems
- PEX Types: A, B, or C?
- Van Plumbing PEX Installation: Step-by-Step
- Winterizing Your Van PEX Plumbing
- Common Van Plumbing PEX Mistakes to Avoid
- Van Plumbing PEX: FAQ
- Build Your Vanlife Water System Right
- Related Guides
- Frequently Asked Questions
- Related Articles
- Related Guides
Why PEX Is the Right Choice for Van Plumbing
Traditional copper and CPVC pipe work fine in houses, but a van is a different environment. Your build flexes and vibrates constantly. Temperatures swing from desert heat to mountain cold. Rigid pipe joints crack under those conditions. PEX handles all of it.
- Flexibility: PEX bends around obstacles without elbows, reducing potential leak points.
- Freeze tolerance: PEX expands when water freezes inside, then returns to shape — copper splits.
- Lightweight: Every pound matters in a van build. PEX is a fraction of copper’s weight.
- DIY-friendly: Push-to-connect (SharkBite-style) fittings mean no soldering, no special skills.
- Affordable: A complete van plumbing system costs under $200 in materials.
Top Products for Van Plumbing PEX Systems
See also: Best Ways to Keep a Van Tidy on the Road • Best Cyber Monday Cologne Deals
These are the products real vanlifers use in their builds — chosen for reliability, compatibility, and ease of installation:


As an Amazon Associate we earn from qualifying purchases. Product prices and availability are accurate as of the date/time indicated.

WAYSKA Diesel Heater 12V, 5L Tank, Diesel Heater 2KW, Muffler, Diesel Parking Heater with LCD Monitor & Remote Control for Trucks, Trailer, Boat and Motor-Home


As an Amazon Associate we earn from qualifying purchases. Product prices and availability are accurate as of the date/time indicated.


As an Amazon Associate we earn from qualifying purchases. Product prices and availability are accurate as of the date/time indicated.
PEX Types: A, B, or C?
Not all PEX is identical. For van plumbing, you’ll encounter three types:
| Type | Flexibility | Fittings | Best For Vans |
|---|---|---|---|
| PEX-A | Most flexible | Expansion rings | Best overall, coldest climates |
| PEX-B | Good | Crimp/clamp, push-connect | Budget builds, mild climates |
| PEX-C | Least flexible | Crimp/clamp | Not recommended for vans |
For most van builds, PEX-B with push-to-connect fittings hits the sweet spot of cost and convenience. PEX-A is worth the premium if you park in sub-freezing temps regularly.
Van Plumbing PEX Installation: Step-by-Step
Step 1: Plan Your Water System Layout
Sketch the full system before cutting a single piece of tubing. Identify your fresh water tank location, pump, filter, sink, and any additional fixtures (outdoor shower, toilet supply). The shortest, most direct routes save tubing and reduce pressure drop.
Standard van build flow: Fresh tank → 12V pump → inline filter → cold supply → water heater → hot supply → fixtures
Step 2: Size Your Tubing Correctly
Most van plumbing uses 1/2-inch PEX for main runs and 3/8-inch for branch lines to individual fixtures. Larger diameter means less pressure drop over longer runs — important if your tank is far from your sink. A 12V demand pump rated at 1-2 GPM works perfectly with 1/2-inch PEX in most van configurations.
Step 3: Route and Secure the Tubing
Route PEX away from heat sources (exhaust, diesel heater pipes) and sharp edges. Use plastic P-clips or tubing clamps every 18-24 inches to prevent vibration wear. Where tubing passes through metal, use grommets — van builds move constantly and metal edges cut through PEX over time.
Insulate any runs exposed to outside temperature — foam pipe insulation is cheap and adds significant freeze protection. Pair this with a proper vanlife water system setup for a fully functional build.
Step 4: Install Fittings and Connections
Push-to-connect fittings (SharkBite or compatible) are the fastest option — push the tubing in until it seats and you’re done. For a more permanent connection, crimp fittings with a $30 crimp tool provide a slightly more secure seal. Either method holds well in van applications.
Key fittings you’ll need: elbows, tees, couplings, and shutoff valves at the tank outlet and under each fixture. Shutoffs let you isolate sections for repairs without draining the whole system.
Step 5: Pressure Test Before Closing Walls
Fill your fresh water tank, run the pump, and check every fitting for leaks. Do this before you close up walls or install cabinets. A slow drip hidden inside a wall causes mold and rot within weeks. Leave the system pressurized for 30 minutes and check again.
Also consider how your plumbing integrates with your broader build — read our guide on van insulation for tips on protecting pipes during wall buildout.
Winterizing Your Van PEX Plumbing
If you’re parking in freezing temps, winterizing protects your investment. Two approaches work well:
- Blow-out method: Use a compressor to push all water out of the lines before freezing temps hit.
- RV antifreeze: Pink, non-toxic RV antifreeze pushed through the system protects to -50°F.
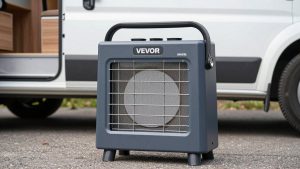
- Heated storage: Keep your van above freezing with a diesel heater — the whole system stays protected. See our full diesel heater guide for details.
PEX’s freeze tolerance buys you time, but it’s not a substitute for proper winterization on extended cold-weather trips.
Common Van Plumbing PEX Mistakes to Avoid
- Under-sizing the pump: A pump that can’t maintain pressure makes for a frustrating shower experience. Match pump GPM to your fixture count.
- Skipping the inline filter: Tank sediment destroys pump impellers. A $15 inline sediment filter before the pump saves a $60 replacement.
- No check valve: Without a check valve between pump and tank, pressure bleeds back and your pump short-cycles constantly.
- Routing near exhaust heat: PEX softens and fails at high temperatures. Keep at least 6 inches from any heat source.
- Forgetting grey water: Your grey tank needs as much planning as fresh. Check our complete van water system guide for grey water handling.
Van Plumbing PEX: FAQ
Can I use regular PEX from a hardware store for van plumbing?
Yes — standard plumbing PEX from any hardware store works perfectly in vans. There’s nothing “RV-specific” required. PEX-B in 1/2-inch diameter is the most common choice and available at any home improvement store for around $0.30-0.50 per foot.
What size PEX tubing is best for a van build?
Use 1/2-inch for main supply lines from tank to pump and pump to manifold. Drop to 3/8-inch for individual fixture branches. This sizing matches standard 12V van pumps and fittings while keeping pressure adequate at the tap.
How do I connect PEX to my 12V water pump?
Most 12V pumps (Shurflo, Remco, etc.) use standard garden hose thread or 1/2-inch barbed fittings. Get a barb-to-push-connect adapter to transition from pump to PEX. Use a hose clamp on the barbed side for a secure connection that won’t vibrate loose.
Will PEX freeze and crack in my van?
PEX expands under freeze pressure and usually survives without cracking — unlike copper. But the fittings are the weak point; brass push-connect fittings can crack in hard freezes. Proper winterization (blow-out or antifreeze) is still the right call for extended cold-weather camping.
Do I need a permit for van plumbing?
No. Van builds are personal vehicle modifications and don’t require plumbing permits. This is one of the major advantages of van life over RV registration in many states — you build to your own spec. Just make sure grey water is handled responsibly per local regulations.
Build Your Vanlife Water System Right
Van plumbing PEX is one of the most satisfying parts of a van build — the moment you turn on that tap for the first time is worth every hour of planning. Start with a solid layout, use push-to-connect fittings for a clean install, pressure test before closing walls, and your system will run reliably for years. Pair it with solid power (see our guide on LiFePO4 batteries for running your pump reliably) and you’ve got a true home on wheels.
Related Guides
- Quick Picks: Best Paracord for Van Life and Survival
- Van Slide Out Step Running Board Review
- RV Tow Bar Flat Towing Setup
Frequently Asked Questions
What size PEX should I use in a camper van?
Half-inch PEX for the main runs from pump to manifold, and 3/8 inch for individual fixture drops. Half-inch throughout is simpler and costs little more, and the extra volume acts as a small buffer that softens pump pulsing. Use three-quarter inch only if you have a high-flow system.
PEX-A with expansion or PEX-B with crimp rings?
PEX-A expansion fittings have the largest internal diameter and are the most freeze-tolerant because the tubing has shape memory. PEX-B with copper crimp or stainless cinch rings is cheaper and the tools are widely available. Both are fine in a van; just do not mix fitting systems.
How do I stop PEX rattling and chafing against the van body?
Support the tubing every 32 inches with cushioned clamps, use a grommet or split loom wherever it passes through a metal rib, and leave gentle expansion loops rather than tight runs. PEX moves about an inch per hundred feet with temperature, and vibration will saw an unsupported line through in a season.
Will PEX survive freezing?
PEX expands and usually survives one or two freeze cycles that would split copper, but the fittings do not, and repeated freezing will eventually fail the line. Winterise properly by draining the system, blowing lines out with low-pressure air, and adding RV antifreeze to the traps and pump.
How difficult is a full PEX install for a beginner?
It is one of the more approachable van jobs. Cutting is a single squeeze, fittings take seconds, and a cinch tool costs under fifty dollars. Budget a day for a simple sink and pump system, two days with a shower and water heater. Pressure test everything before closing the walls.