Last updated: September 18, 2026
If freezing weather is on the way, learning how to winterize a van water system can prevent cracked pipes, split fittings, damaged pumps, and an expensive spring repair. Water expands by about 9 percent when it freezes, so even a small amount trapped inside a faucet, filter housing, water heater, or low point can cause trouble.
A rushed job often fails because the owner drains the fresh tank but forgets the pump, shower hose, exterior sprayer, toilet valve, or water heater. Another common mistake is using automotive antifreeze, which is toxic and not intended for drinking-water plumbing. The process below is designed for a typical camper van with a fresh tank, 12-volt pump, pressurized lines, sink, shower, and possibly a water heater. Check your vehicle and appliance manuals first, because layouts and winterizing valves vary.
As an Amazon Associate we earn from qualifying purchases at no extra cost to you. Product prices and availability are accurate as of the date shown and are subject to change.


Quick answer: Our top pick in 2026 is the 2–4 gallons of RV/marine potable-water antifreeze — our #1 rated choice. See the full ranked comparison, alternatives and buying advice below.
What You Need
| Item | Why | Optional? |
|---|---|---|
| 2–4 gallons of RV/marine potable-water antifreeze | Protects water lines from freezing. Choose a product labeled for RV or marine drinking-water systems, commonly rated to around -50°F. | No, unless you use a complete compressed-air method. |
| Air compressor with regulator and blowout plug | Pushes most water out before antifreeze is added. Set pressure conservatively, usually 30–40 psi unless the manufacturer specifies otherwise. | Yes, but strongly recommended. |
| RV antifreeze pump kit, about $17–$22 | Connects to the pump inlet and draws antifreeze directly from its container. Electric kits often use a 12-volt self-priming pump. | Yes. A hand pump is another option. |
| Hand pump kit with a 3/4-inch NPT connector, about $20–$25 | Lets you feed antifreeze into the plumbing without powering an electric accessory. Confirm that the connector matches your van’s intake or bypass fitting. | Yes. |
| Bucket or drain pan | Catches water and diluted antifreeze at faucets and drain points. | No. |
| Screwdriver, adjustable wrench, towels, and labels | Helps remove drain caps, disconnect filters, identify valves, and clean spills. | No. |
| Water-heater bypass kit or built-in bypass valves | Prevents wasting several gallons of antifreeze inside the water heater tank. | Only if your van has a water heater. |
Step-by-Step
See also: Best Van Water Filter for Refill Stations in 2026: Tested and Ranked • How to Seal Camper Van Insulation Gaps (2026): Step-by-Step
1. Read the manuals and identify every water component (15–30 minutes)
Locate the fresh-water tank, pump, water heater, filter, low-point drains, tank drain, exterior shower, toilet, and any outdoor hose connection. Trace the plumbing if the layout is unfamiliar. Look for a water-heater bypass and a winterizing inlet near the pump. Photograph the valve positions before changing them so you can restore the system in spring.
2. Turn off utilities and empty the fresh tank (15–25 minutes)
Disconnect shore water, turn off the water pump, and switch off the water heater. If the water heater has an electric mode, disconnect shore power before opening or removing any parts. Allow a recently used gas or electric heater to cool completely.
Open the fresh-tank drain and let the tank empty outside in an approved location. Open one or more faucets to release pressure. Do not rely on the tank drain alone: water can remain in the pump inlet, tank outlet, and plumbing low spots.
3. Drain the water heater and remove the filter (15–30 minutes)
With the heater cool and the system depressurized, remove its drain plug or anode rod according to the manual. A typical residential-style RV water heater may hold 6–10 gallons, while compact van units hold less. Let it drain fully.
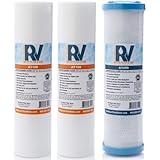
Put a container beneath the filter housing and remove the cartridge if one is installed. Filters can retain water and can be damaged or contaminated by antifreeze. Leave the housing open to drain, then reinstall it only if the manufacturer recommends doing so during storage.
4. Open low-point drains and blow out the lines (20–40 minutes)
Open the hot and cold low-point drains, then open every faucet, including the kitchen, bathroom, exterior shower, and any filtered-water tap. Flush the toilet and operate the shower wand so water leaves the valves and hoses.
Attach a regulated blowout plug to the city-water inlet. Use short bursts of air at about 30–40 psi, moving from one fixture to another. Start with cold water, then hot water, and repeat until only mist or a few drops emerge. Never connect an unregulated shop compressor directly; pressure above the plumbing’s rating can damage fittings, check valves, and appliances.
5. Bypass the water heater (5–10 minutes)
Set the water-heater bypass valves to bypass mode. The exact arrangement differs: some systems use one valve, while others use two or three. Confirm that the heater’s inlet and outlet are isolated before adding antifreeze. If you do not have a bypass, you may need extra antifreeze to fill the tank, but follow the heater maker’s instructions rather than guessing.
6. Prepare the antifreeze inlet (5–15 minutes)
Find the pump’s winterizing hose or disconnect the pump inlet from the fresh tank and connect a winterizing kit. Place the kit’s pickup hose into a container of RV/marine potable-water antifreeze. Keep the container upright and stable.
An electric RV antifreeze pump kit can cost roughly $17–$22 and typically includes two hoses. A hand pump kit is usually around $20–$25 and may use a 3/4-inch NPT connector. Neither replaces the van’s regular water pump unless the product and plumbing are specifically designed for that use.
7. Pump antifreeze through every fixture (20–45 minutes)
Turn on the van’s water pump, or operate the hand pump, and open the faucet closest to the pump. Run it until the liquid changes from clear water to the product’s undiluted color. Close that fixture and repeat at every hot and cold outlet.
Do not skip the toilet valve, shower hose, exterior shower, refrigerator water line, ice-maker line, or any auxiliary tap. For each outlet, let antifreeze flow for several seconds after it appears. This ensures the valve body and nearby tubing contain antifreeze rather than diluted water.
Keep an eye on the supply container. A small van may need about 2 gallons, while a larger or more complex system can require 3–4 gallons. Never let the pump run dry for an extended period.
8. Protect drains and finish the inspection (10–20 minutes)
Pour a small amount—usually 1–2 cups—of RV antifreeze into each sink or shower drain so the trap is protected. Do not pour automotive antifreeze, windshield washer fluid, or household plumbing antifreeze into the system.
Close faucets, turn off the pump, and leave the low-point drains in the position recommended by your manual. Check beneath cabinets and around the pump for leaks. Label the water-heater bypass and winterizing valves. Store loose drain plugs and the water-heater plug in a visible bag so they are not forgotten in spring.
Mistakes to Avoid
- Using automotive antifreeze: It is not safe for potable-water plumbing and can leave hazardous residue.
- Forgetting the water heater: Drain and bypass it before pumping antifreeze through the lines.
- Relying only on the fresh-tank drain: Water may remain in low points, filters, valves, and pump chambers.
- Applying excessive air pressure: Stay near 30–40 psi unless your manufacturer specifies a different limit.
- Leaving a filter installed: Remove cartridges and replace them in spring if they were exposed to dirty or diluted water.
- Skipping rarely used outlets: Exterior showers, toilet sprayers, ice makers, and rear utility taps still contain water.
- Leaving a heater energized: Never run a water heater empty or while it is being drained.
How Often
Winterize once before the first sustained freeze, not necessarily after the first cold night. In many regions, begin when overnight temperatures are expected to remain below about 28–32°F for several hours. If you use the van during winter, repeat the process whenever it will sit without heat in freezing conditions.
Inspect the system after severe cold snaps, long storage periods, or any plumbing repair. Antifreeze does not remove the need for draining: the more water you remove first, the better protected the system will be.
When to Call a Pro or Replace
Ask an RV or marine technician for help if you cannot identify the bypass valves, find a frozen or split line, smell gas near a water heater, or see water entering electrical compartments. Professional service is also sensible when the van has a hydronic heating system, complex filtration, an ice maker, or a combined water-and-heating appliance.
Replace a cracked filter housing, leaking pressure regulator, damaged pump head, split hose, or brittle fitting rather than trying to seal it with tape. After winter, pressurize the system slowly and inspect every connection. A pump that cycles without a faucet open, fails to build pressure, or leaks from its housing may need a rebuild or replacement.
FAQ
Can I winterize a van water system with compressed air only?
Yes, if the plumbing is simple and you can remove nearly all water. Use a regulated supply and a proper blowout plug, then open every outlet in sequence. Many owners still use a small amount of potable RV antifreeze in traps and vulnerable appliances for extra protection.
How much RV antifreeze does a camper van need?
Most basic vans use approximately 2 gallons after thorough draining and line blowing. Systems with long runs, multiple showers, exterior fixtures, or a refrigerator may need 3–4 gallons. Buy an extra gallon if you are unfamiliar with the layout; unused, uncontaminated product can often be saved according to its label.
Do I put antifreeze in the fresh-water tank?
Usually, no. Keep potable RV antifreeze out of the fresh tank unless the vehicle manufacturer specifically directs that method. Use a winterizing inlet or connect the product at the pump inlet so antifreeze travels through the lines without coating the tank.
How do I de-winterize the van in spring?
Restore the normal valve positions, reinstall the water-heater plug and filter, and flush the system with fresh water. Open each faucet until the antifreeze color and odor disappear, sanitize the tank according to the manual, and inspect for leaks before drinking the water.
Ready to decide? Our #1 pick for 2026 is the 2–4 gallons of RV/marine potable-water antifreeze.
Live price & availability on Amazon.