Last updated: September 18, 2026
Installing van roof vent flashing is a small job with high consequences. A flashing collar or vent boot creates the watertight transition between a roof opening and the vent, pipe, or fan housing. If it is cut too large, fastened poorly, or sealed with the wrong material, rain can travel under the flange and into insulation, plywood, wiring, and cabinets. Leaks may not appear until weeks later, when staining, mold, or soft roof decking has already developed.
This guide explains how to install van roof vent flashing on a metal or fiberglass van roof. The exact flashing shape depends on your vent model: low-profile fan vents typically use a rectangular flange, while pipe-style roof penetrations use a flexible silicone boot. In 2026, always follow the vent manufacturer’s cutout template and sealant requirements before relying on general measurements.
As an Amazon Associate we earn from qualifying purchases at no extra cost to you. Product prices and availability are accurate as of the date shown and are subject to change.

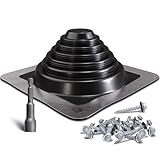
Quick answer: Our top pick in 2026 is the Roof vent flashing or compatible silicone boot — our #1 rated choice. See the full ranked comparison, alternatives and buying advice below.
What You Need
| Item | Why | Optional? |
|---|---|---|
| Roof vent flashing or compatible silicone boot | Forms the weatherproof transition around the opening or pipe | No |
| Butyl sealing tape, about 1 inch wide | Creates a flexible primary seal beneath a vent flange | No for most flanged vents |
| Exterior-rated polyurethane or MS-polymer sealant | Seals screw heads, seams, and exposed flashing edges | No |
| Stainless-steel screws, usually 3/4 to 1 inch long | Secures the flashing without unnecessarily penetrating the roof | No |
| Drill, step bit, metal file, and jigsaw or nibbler | Creates and finishes the roof opening | No |
| Painter’s tape, marker, measuring tape, and cardboard template | Helps mark the cut accurately and protects the finish | No |
| Safety glasses, gloves, and hearing protection | Protects against sharp sheet metal and cutting debris | No |
| Aothotop High Temp Silicone Metal Roof Pipe Flashing Boot, 2 Pack — $28.99 | Useful for compatible round pipe penetrations; confirm diameter and roof-angle compatibility first | Yes |
| VIVIDA #3 Metal Roof Pipe Flashing, Silicone Roof Vent Boot, Black, 1-Pack — $19.99 | Another option for a compatible round pipe or vent penetration | Yes |
Do not use a pipe flashing boot as a substitute for a rectangular powered fan vent unless the boot is specifically designed for that vent. For a powered roof fan, also have wire strippers, appropriately sized cable, a fuse, and a disconnect method for the vehicle battery.
Step-by-Step
See also: Best Van Water Filter for Refill Stations in 2026: Tested and Ranked • How to Winterize a Van Water System (2026): Step-by-Step
1. Confirm the vent and flashing fit (15–20 minutes)
Read the installation instructions and measure the vent’s required cutout. Do not measure only the outside of the flange. The opening must be large enough for the vent body but small enough for the flange to cover the cut edges on every side.
For a pipe boot, measure the outside diameter of the pipe and compare it with the boot’s listed range. A flexible boot should grip the pipe firmly without stretching so far that its sealing ribs distort. Check the roof slope as well: some metal-roof flashing boots are designed to be trimmed and positioned on sloped surfaces, while a van roof may have compound curves.
2. Choose and prepare the roof location (20–30 minutes)
Select a relatively flat section with at least 1 inch of clearance beyond the flange or flashing on all sides. Inside the van, inspect for roof bows, factory wiring, airbags, lights, and trim. A vent that lands directly over a roof rib may not sit flat, while a cut near an airbag or harness can create a serious safety problem.
Park on level ground, turn off all electrical loads, and disconnect the negative battery cable when cutting near wiring or installing a powered vent. Clean the roof with mild detergent, then wipe the bonding area with isopropyl alcohol if the vent manufacturer permits it. Avoid oily cleaners, wax, and silicone residue.
3. Mark the opening and protect the finish (10–15 minutes)
Make a cardboard template from the manufacturer’s cutout dimensions. Position it on the roof, check the interior alignment again, and tape it in place. Mark the cut line clearly. Apply two layers of painter’s tape around the line to reduce scratching and help keep metal filings from spreading.
For a rectangular vent, drill 1/4-inch starter holes just inside each corner. For a round pipe, drill a pilot hole and use the appropriate hole saw or step bit. Keep the opening no larger than specified; an oversized hole reduces the flange’s sealing surface.
4. Cut, deburr, and treat the exposed edge (15–25 minutes)
Cut slowly with a jigsaw fitted with a metal blade or with a nibbler. Support the panel so vibration does not bend the roof. Wear eye protection and gloves; cut van roof metal can be razor sharp.
Test-fit the vent or pipe boot without sealant. File the opening until the component sits flat and centered. Remove every burr, then vacuum up metal shavings. Apply a compatible rust-inhibiting primer or touch-up coating to exposed steel edges and allow it to dry according to the product instructions. Aluminum and fiberglass still need clean, smooth edges, even though they do not rust like bare steel.
5. Apply the primary seal (10–15 minutes)
For a flanged vent, place continuous 1-inch-wide butyl tape around the underside of the flange. Overlap the ends by about 1/2 inch, and keep the tape inside the screw line so it will compress rather than squeeze completely outside the flange. Do not leave gaps at corners.
For a silicone pipe boot, slide the boot over the pipe and position its base so the molded flange follows the roof. Use the sealant type recommended for the boot and roof material. Avoid assuming that any high-temperature silicone is suitable for painted metal, fiberglass, or a bonded roof membrane.
6. Fasten the flashing or vent (15–25 minutes)
Set the component in place without dragging it across the butyl tape. Install stainless-steel screws through the predrilled holes, working in a crisscross pattern. Use light, even pressure. Over-tightening can warp the flange, squeeze out the seal, and create low spots where water collects.
If the vent has no holes, space fasteners according to its instructions; a common range is about 4 to 6 inches apart around a perimeter, but the vent manufacturer’s pattern takes priority. Use screws long enough to hold securely but not so long that they contact hidden wiring, interior trim, or a roof bow unnecessarily.
7. Seal exposed edges and screw heads (10–15 minutes)
Tool a continuous 1/4-inch bead of exterior-rated sealant around the outside edge of the flange, including corners and transitions. Cover each screw head with a small dab rather than burying the entire vent in sealant. For a pipe boot, seal the boot’s molded flange and any trimmed upper collar as directed by its instructions.
Use a plastic tool or a gloved finger lightly dampened as permitted by the sealant manufacturer. Keep the bead smooth and continuous. Do not use household bathroom caulk, acrylic painter’s caulk, or a sealant incompatible with the roof coating.
8. Cure and test the installation (24–48 hours)
Keep the van dry for the full cure time listed on the sealant label; many products need at least 24 hours, and cool or humid conditions can require longer. Do not drive through heavy rain immediately after installation if the sealant has not cured.
After curing, inspect the flange for lifted corners, gaps, or displaced butyl. Test with a gentle hose flow for 10 to 15 minutes, starting below the vent and gradually working above it. Do not use a pressure washer. Have someone inside check the perimeter with a dry paper towel. A dry test does not replace inspection after the first storm.
Mistakes to Avoid
- Cutting before checking the interior: A roof bow, wire, or airbag can be hidden directly below the planned opening.
- Using the wrong flashing type: A pipe boot is for a round penetration, not automatically for a roof fan.
- Skipping edge treatment: Bare steel around a cut can begin corroding beneath the seal.
- Relying on sealant alone: A mechanical flange and correctly compressed butyl tape are more reliable than a thick exterior bead by itself.
- Over-tightening screws: Distortion is a frequent cause of leaks.
- Sealing a dirty roof: Dust, wax, and silicone contamination prevent proper adhesion.
- Blocking drainage: Do not place sealant where the vent’s designed drain path must remain open.
- Ignoring temperature limits: Apply sealant within its specified working range, often roughly 40–100°F, unless the label states otherwise.
How Often
Inspect van roof vent flashing at least twice a year and after severe wind, hail, a branch strike, or roof work. Look for cracked sealant, lifting corners, loose screws, hardened butyl, rust, and water stains inside the van. Clean dirt from the flashing with mild soap and water.
Sealant may need touch-up every 2 to 5 years, depending on sun exposure, movement, and product quality. Do not simply add a new layer over failing sealant. Remove loose material, clean the surface, and use a compatible replacement.
When to Call a Pro or Replace
Call a qualified van upfitter, RV technician, or automotive body professional if the roof is badly curved, structurally damaged, heavily rusted, or made from a material you cannot safely cut and seal. Get professional help if the opening is near airbags, high-voltage equipment, factory solar wiring, or an uncertain roof support.
Replace the flashing when it is split, permanently deformed, brittle, corroded through, or no longer covers the cut by at least the manufacturer’s required margin. Persistent interior moisture, bubbling paint, soft roof decking, or mold indicates that the leak may extend beyond the visible flashing and deserves a broader inspection.
FAQ
Can I install van roof vent flashing without removing the interior?
Sometimes, but you should still inspect the underside before cutting. Removing a small section of headliner or trim is safer than guessing about wiring, roof ribs, and clearance. The interior also provides a way to confirm that the vent is positioned correctly.
Should I use silicone or butyl tape?
Most flanged vents use butyl tape as the primary seal beneath the flange, with an exterior-rated sealant around exposed edges and screw heads. A silicone pipe boot may specify a compatible silicone or another sealant at its flange. Follow the component and roof-material instructions rather than choosing by product name alone.
How much does a van roof vent flashing installation cost?
A basic DIY installation may cost about $40 to $150 for flashing, tape, sealant, screws, and consumables, excluding tools. Pipe-style boots commonly fall in the roughly $20 to $35 range; the listed Aothotop two-pack is $28.99 and the VIVIDA one-pack is $19.99. Professional labor commonly adds about $200 to $600, depending on access, wiring, and roof repairs.
What should I do if the vent leaks after installation?
Dry the interior and identify the entry point before resealing. Inspect corners, screw heads, the upper pipe collar, and nearby roof seams. Remove failed sealant rather than smearing new material over it. If water has reached insulation or wiring, dry those areas thoroughly and have hidden damage checked before using the vent again.
Ready to decide? Our #1 pick for 2026 is the Roof vent flashing or compatible silicone boot.
Live price & availability on Amazon.