- Top Pick: Starvent RV Roof Vent Fan 6-Speed-Reversible
- Best Value: Sporthfish RV Vent Cover 14" Roof Vent Lid for Universal RV, Trailer, Camper, Motorhome Roof Replacement Ceiling Vent Covers, Plastic Square Skylight Cover Liftable, 1 Pack White
- Premium Choice: Camco Standard Roof Vent Cover, Opens for Easy Cleaning, Aerodynamic Design, Easily Mounts to RV with Included Hardware-Black (21015)
Last updated: September 18, 2026
The Short Answer
For most camper vans, the right roof vent size is a 14 x 14 inch rough opening (35.6 x 35.6 cm). This is the dominant RV-style roof vent size in North America, and it gives you the widest choice of powered fans, manual vents, replacement lids, and exterior vent covers. A typical 14-inch fan unit needs an opening that measures 14 x 14 inches after the roof is cut, while its mounting flange usually covers roughly 16 1/2 to 17 1/2 inches square on the roof.
A 14 x 14 inch vent is usually large enough for a small or midsize camper van when paired with an open window or another air intake. For a longer van, a van used in humid climates, or a layout with an enclosed bathroom, plan on two 14 x 14 inch vents: one toward the front and one toward the rear. This creates more useful airflow than installing one oversized vent in the middle.
As an Amazon Associate we earn from qualifying purchases at no extra cost to you. Product prices and availability are accurate as of the date shown and are subject to change.
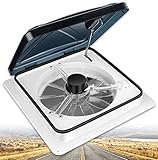


Before ordering, measure the available flat roof area, check for roof ribs and wiring, and confirm that the vent’s interior trim ring will work with your finished ceiling thickness. In 2026, 14-inch roof vents remain the easiest size to replace and accessorize.
Standard Sizes
See also: Best Van Water Filter for Refill Stations in 2026: Tested and Ranked • How to Winterize a Van Water System (2026): Step-by-Step
| Nominal Vent Opening | Actual Opening in Inches | Actual Opening in Centimeters | Typical Use | Notes |
|---|---|---|---|---|
| Small square vent | 9 1/2 x 9 1/2 in. | 24.1 x 24.1 cm | Compact trailers, small toilet rooms, passive ventilation | Useful where roof space is tight, but fan and cover choices are limited. |
| Small/medium square vent | 11 x 11 in. | 27.9 x 27.9 cm | Older RVs and specialty installations | Measure carefully; this is not interchangeable with a 14-inch opening. |
| Standard RV vent | 14 x 14 in. | 35.6 x 35.6 cm | Most camper vans, trailers, and motorhomes | The most common choice for powered roof fans, replacement lids, and vent covers. |
| European-style roof hatch | 15 3/4 x 15 3/4 in. | 40 x 40 cm | Imported hatches and some conversion builds | A 400 x 400 mm cutout is larger than a 14 x 14 inch RV opening. |
| Large roof hatch | 19 11/16 x 19 11/16 in. | 50 x 50 cm | Light, emergency-exit, or premium ventilation applications | Needs more clear roof area and may conflict with solar panels or roof racks. |
The numbers above refer to the roof cutout, not the overall outside dimensions of the vent. This distinction matters. A 14 x 14 inch roof vent often has a flange around 16 1/2 to 17 1/2 inches wide, and an exterior vent cover can extend farther still. Leave at least 2 inches of clear, flat roof around the flange where possible so there is room for butyl tape, sealant, screws, and future maintenance.
For a standard 14-inch opening, replacement parts are generally easier to find. For example, a 14-inch replacement lid such as the Sporthfish RV Vent Cover is intended for the common 14 x 14 inch roof-vent category, not for every square skylight or hatch. Likewise, a powered 14-inch unit such as the PRUNkuar 14-inch RV Roof Vent with 12V Fan is designed around that standard cutout size.
How to Measure Your Space
- Measure the existing hole, not the old lid. From inside the van, remove the trim ring if necessary and measure the width and length of the roof opening. Measure at several points. A nominal 14-inch opening should be close to 14 x 14 inches, but do not assume it is square.
- Measure the flat roof area outside. Check the roof surface around the proposed opening. You need enough flat, unobstructed area for the vent flange. Avoid deeply corrugated sections, curved edges, roof rack feet, solar mounts, and raised factory seams.
- Check roof ribs and crossmembers. Use interior panel seams, a magnet where appropriate, or careful inspection to identify structural ribs. Do not cut a major roof crossmember without a build-specific plan. On many vans, the best vent location falls between factory roof ribs.
- Confirm clearance above the roof. Account for awnings, solar panels, cargo boxes, antennas, and rack bars. A low-profile vent still needs room for its lid to open. If you plan to add a cover, allow for its larger footprint and height.
- Measure ceiling thickness. Measure from the metal roof skin to the finished interior ceiling surface. Camper van roofs commonly end up 1 1/2 to 3 inches thick after insulation and paneling. Buy a trim ring or garnish long enough for that depth; many can be trimmed to fit.
- Plan the wiring route before cutting. A 12V fan needs a protected power run, fuse, switch or control, and a path through insulation. Many roof fans draw roughly 1 to 5 amps depending on speed, which equals about 12 to 60 watts on a 12V system.
- Mark the cutout from inside and verify from outside. Tape the template in place, drill small reference holes at the corners, then confirm the location on the roof before making the full cut. This extra check can prevent an expensive conflict with a rib or roof-mounted accessory.
By Room or Use Case
Small Camper Van or Weekend Conversion
For a compact van with a simple bed platform and minimal cooking, one 14 x 14 inch powered roof vent is usually the practical choice. Install it near the center or rear half of the living area, then crack a front window for intake air. A reversible fan is especially useful because it can exhaust warm, humid air while cooking or pull in cooler evening air when parked.
Expect many basic 14-inch manual or fan-equipped vents to weigh roughly 5 to 12 pounds before sealant and wiring. Budget units can fall around $60, such as the listed $59.98 PRUNkuar 14-inch fan vent, while more fully featured reversible fan models may be around $100 to $150; the listed Starvent 6-speed reversible model is $109.70.
Long-Wheelbase Van or Full-Time Build
Use two 14 x 14 inch vents for a longer van or a build that is occupied frequently. Place one near the front living or kitchen area and one near the rear bed area. Run one fan as intake and the other as exhaust when conditions allow. Even if only one vent is powered, a second manually opening 14-inch vent improves natural airflow.
Two standard openings are usually more flexible than one large hatch. You can ventilate the bed without pulling cooking odors through the entire cabin, and replacement parts remain straightforward if a lid, motor, screen, or control panel eventually needs service.
Kitchen-Heavy Layout
If you cook indoors often, prioritize a powered 14 x 14 inch exhaust fan over the galley. Locate it close enough to capture steam and odors, but not directly above a tall cabinet where the interior trim ring cannot be installed. A roof vent is not a substitute for a true range hood in every situation, but it is the main moisture-control tool in many camper vans.
Choose a fan with multiple speeds and reversible operation if possible. Lower speeds are useful for steady background ventilation, while higher settings help after boiling water or frying food. Open a window on the opposite side of the van to give the fan a reliable air path.
Bathroom or Wet-Bath Area
A small wet bath can use a 9 1/2 x 9 1/2 inch vent when roof space is limited, but a 14 x 14 inch vent is generally better if the layout permits it. The larger opening provides more airflow potential and makes replacement easier. Position the vent where the lid can open fully without hitting a solar panel or roof rack.
For a bathroom fan, moisture management matters more than maximum airflow claims. Use the fan during showers and leave it running afterward until visible condensation has cleared. A screened opening and a rain-resistant cover can make it easier to ventilate during light rain.
Ventilation With a Protective Roof Cover
If you want to leave the vent open during rain or while parked, choose a cover sized for a standard 14-inch vent. The Camco Standard Roof Vent Cover, listed at $52.99, is an example of the common external-cover format. These covers mount above the vent and usually add several inches of height, so check garage clearance and roof-rack spacing.
A vent cover does not change the roof cutout size: a 14-inch vent still needs a 14 x 14 inch opening. It does, however, affect the overall footprint, cleaning access, and clearance around the lid.
Common Sizing Mistakes
- Ordering by flange size instead of cutout size. A vent advertised as “14 inch” usually means a 14 x 14 inch opening, not a 14-inch outside flange.
- Assuming every square vent is interchangeable. A 400 x 400 mm hatch is approximately 15 3/4 inches square, which is substantially larger than a 14-inch RV opening.
- Ignoring finished ceiling thickness. A fan may fit the roof opening perfectly but come with a garnish too short for an insulated, paneled van ceiling.
- Putting the vent too close to solar panels. Panels, brackets, and rack rails can prevent a lid from opening or make cleaning difficult.
- Installing only exhaust with no intake path. A roof fan works best when a window, floor vent, or second roof vent supplies replacement air.
- Forgetting total roof height. A fan lid plus an exterior cover can add meaningful height to the van, particularly on a high-roof model.
FAQ
Is a 14 x 14 inch roof vent big enough for a camper van?
Yes. One powered 14 x 14 inch vent is enough for many small and midsize camper vans when a window is opened for intake. For long-wheelbase vans, full-time use, frequent cooking, pets, or humid conditions, two 14-inch vents provide more balanced airflow.
Can I replace an old 14-inch roof vent with any new 14-inch fan?
Usually, but verify the actual roof opening, roof thickness, flange footprint, screw pattern, and interior trim depth before buying. The 14 x 14 inch cutout is common, but lid hinges, garnish pieces, and exterior covers are not universally interchangeable across brands.
What size roof vent cover do I need?
For a standard RV-style roof vent, buy a cover specifically labeled for a 14 x 14 inch vent opening. Check the cover’s outside dimensions and mounting method, especially if your van has solar panels, crossbars, or a low garage-height limit.
Should my camper van roof fan pull air in or push air out?
Use exhaust mode for cooking odors, shower moisture, and hot air rising to the roof. Use intake mode when cooler outdoor air is available and you want airflow across the bed or seating area. Reversible fans give you both options, but either mode requires another opening for air to move effectively.
Ready to decide? Our #1 pick for 2026 is the Small square vent.
Live price & availability on Amazon.