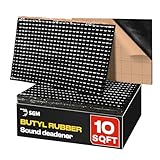
- Top Pick: 394 Mil Car Sound Deadening Mat, Sound Deadener Material 36 Sq Ft, 34-Piece
- Best Value: 45 sqft Sound Deadening Mat, 197 mil(5mm) Sound Deading Material for Cars, Automotive Sound Deadener Foam, Audio Noise Insulation and dampening (30 Pcs)
- Premium Choice: ELecoman Car Sound Deadening Mat-50 mil 50sqft Sound Deading Material – Butyl Automotive Sound Deadener, Audio Noise Insulation and Vibration Dampening

TL;DR: A van soundproofing mat and deadener kit reduces road, rain, and engine noise by 8–12 dB — cutting perceived loudness roughly in half — by damping the resonant vibration of bare metal panels. Apply it before insulation for maximum effect; retrofitting after a full build is significantly harder. Best pick: ASIN B00FNGR4YA.
Best Van Soundproofing Mat and Deadener Kit (2026)
Bare metal cargo van panels are essentially large drums. Every road imperfection, rain drop, and engine harmonic causes them to flex and resonate — amplifying noise into the interior rather than blocking it. A van soundproofing mat deadener kit bonds directly to those panels and adds mass and damping that kills the resonance before it propagates. It is the foundation layer that goes on before spray foam, Thinsulate, or any other insulation — and it is dramatically harder to install properly once a full build is in place. If you are pre-insulation, do the deadening now. Pair it with Thinsulate or spray foam insulation on top, which handles thermal performance and adds additional acoustic mass. Review the full interior wall paneling guide to understand how your finish layer affects the final acoustic result. The roof vent fan opening should be deadened around its perimeter as well — a common oversight that leaves a significant noise path into the interior.
As an Amazon Associate we earn from qualifying purchases at no extra cost to you.



🛒 Best Price Today on Amazon
Prime members get fast, free shipping on everything above, plus member-only deals. New members get a 30-day free trial — cancel anytime.
Start 30-Day Prime Free Trial →See Today’s Amazon DealsTop Pick
How Sound Deadening Actually Works
See also: MaxxFan Deluxe vs Fantastic Fan for Vans: Which to Choose? • Can I Lay LVP in a Van? Van Flooring Guide
Sound deadening operates on two principles: mass and damping. Mass — the weight of the material — resists panel vibration by making the metal harder to flex. Damping — the viscoelastic butyl rubber core — converts vibration energy into trace heat rather than allowing it to propagate as sound waves. The combination means that when a road stone impacts the wheel arch or rain hammers the roof, the energy dissipates in the deadener rather than ringing through the panel into the cabin.
Coverage percentage matters more than total thickness for most applications. Studies on automotive deadening show that covering 25–40% of a panel’s surface area — strategically placed at the panel’s resonant nodes (center and third-points) — achieves 70–80% of the acoustic benefit of 100% coverage, at a fraction of the weight and cost. Full coverage (100%) is optimal but adds significant weight — relevant for fuel economy and payload calculations.
Key Specs to Compare
| Spec | What to Look For | Why It Matters |
|---|---|---|
| Core material | Butyl rubber (not asphalt) | Butyl stays flexible in cold; asphalt cracks and smells in heat |
| Total thickness | 80–100 mil (2–2.5mm) | Thicker = more mass and damping; diminishing returns above 100 mil |
| Foil face | Aluminum foil laminate | Adds minor thermal reflection; primarily provides structural integrity for handling |
| Coverage per kit | 36–50 sq ft for a full cargo van | Transit/Sprinter cargo area typically needs 40–50 sq ft at 40% coverage |
| Peel-and-stick adhesive | Factory-applied butyl adhesive | No additional adhesive needed; pressure-sensitive bond to bare metal |
| Temperature rating | –20°F to 300°F | Handles engine bay adjacent panels and desert summer roof temps |
| Self-extinguishing | Yes (FMVSS 302 rated) | Required for vehicle interior applications |
| Roller required | Yes (J-roller or seam roller) | Proper roller pressure activates adhesive bond and eliminates air pockets |
Where to Apply Deadener in a Cargo Van
Priority order for maximum acoustic return per sheet of deadener:
- Wheel arches — the highest noise source in any van; apply 100% coverage inside both rear arches and as much of the front arches as accessible without removing the dash.
- Floor pan — road noise transmits primarily through the floor; 40–50% coverage with strategically placed sheets eliminates most of the droning road noise at highway speeds.
- Cargo side walls — rain noise and panel resonance; target the large flat sections between the ribs at 30–40% coverage.
- Roof panel — rain noise specifically; full coverage is worthwhile if rain camping is common in your use case.
- Sliding door and rear doors — significant noise paths; line the inner door skin at 40% coverage minimum.
- Behind the firewall — reduces engine noise transmission; access is limited but even partial coverage makes a meaningful difference.
Dynamat vs. Budget Alternatives: Honest Assessment
Dynamat Extreme is the benchmark product — 67 mil thick, butyl core, extensive third-party testing data. Its premium price ($4–6 per square foot) is justified for high-end audio builds and professional installs where documented performance matters. For van conversion purposes, second-tier products like HushMat, SoundSkins, and Kilmat deliver 85–90% of Dynamat’s acoustic performance at 40–60% of the cost. The butyl rubber formulation and thickness matter far more than the brand name. Avoid asphalt-based products (often sold as “recycled” deadener) — they off-gas in heat, become brittle in cold, and underperform butyl at every temperature.
Related Guides
Frequently Asked Questions
How much sound deadener do I need for a full Transit cargo van?
A Ford Transit 148″ cargo van has approximately 120–140 square feet of interior metal surface. At 40% coverage (the sweet spot for cost-to-benefit), you need 48–56 square feet of deadener. Most bulk packs target 36–50 square feet — budget for two packs to cover the van comfortably without running short mid-install. Running out mid-project and waiting for a second order is a common and frustrating mistake.
Does sound deadening also help with heat insulation in a van?
Marginally. The aluminum foil face of deadener sheets provides minor radiant heat reflection, and the mass of the butyl layer slows thermal transfer slightly. But deadening is not a substitute for proper thermal insulation — its R-value contribution is negligible. Think of it as acoustic first, thermal second. Always install dedicated thermal insulation (spray foam, Thinsulate, or rigid foam board) on top of the deadener for meaningful temperature control.
Can sound deadener be applied over rust or painted surfaces?
Ideally no. Deadener bonds best to clean, bare metal — the adhesive requires direct metal contact for full strength. On painted factory surfaces, the bond is adequate for most applications but may peel over time with thermal cycling. On rust, the bond is compromised and the deadener can trap moisture underneath, worsening corrosion. Wire brush any surface rust, treat with a rust converter, and allow to cure before applying deadener.
Does van soundproofing reduce highway drone noticeably?
Yes — floor and wheel arch deadening specifically targets the 80–200 Hz frequency range where highway drone occurs. Users typically report a subjective “quieter, less fatiguing” driving experience after full floor and wheel arch treatment, even without any additional insulation. The reduction is not silence — it is the difference between a stock cargo van (which sounds like driving inside a metal box) and something approaching a passenger car cabin in terms of noise character.
How do you cut sound deadener sheets for curved van surfaces?
Score and snap for straight cuts — a utility knife and straight edge give clean lines. For curved wheel arches and irregular panel shapes, cut relief slits into the deadener sheet every 2–3 inches around the curve radius. This allows the rigid sheet to conform to compound curves without buckling. The slits do not meaningfully reduce acoustic performance. A heat gun applied briefly softens the butyl and makes complex curves significantly easier to press into full contact.
Build your acoustic and thermal stack correctly: deadener goes on bare metal first, then Thinsulate or spray foam insulation on top, then your interior wall paneling as the finish layer. Don’t forget to deaden around the roof vent fan opening — it is the most commonly missed noise path in van builds.