- Top Pick: bingaai Cedar Tongue and Groove Wall Panels – ½" Thick (12mm) Western Red Cedar Wood Planks for Walls, Sauna, Accent Wall & DIY Projects | 3 ft Long | Covers 9.7 sq ft
- Best Value: Tongue and Groove Planks Sample Pack | 3/8" x 3-3/4" x 10" | 5677 (Samples)
- Premium Choice: Art3d 108 x 5.7 Inch Slat Solid Wood Wall Paneling for Interior Decor, Oak

TL;DR: Van wood paneling with tongue and groove boards transforms a bare metal cargo van into a warm, livable space. Pine is the most popular choice — affordable, light, and easy to work with. Cedar smells great and resists moisture. This guide covers wood selection, installation sequence, finishing, and common mistakes to avoid.
Van Wood Paneling Tongue and Groove: Complete Installation Guide
Tongue and groove paneling is the most popular interior wall treatment in van conversions, and for good reason. It installs over your insulation layer without requiring drywall or complex framing, creates a finished look that no other material matches, and adds a meaningful layer of thermal and acoustic mass to the build. Done right, it makes a cargo van feel like a cabin on wheels.
As an Amazon Associate we earn from qualifying purchases.
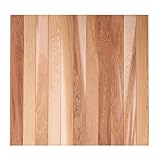


This guide covers everything — from wood selection to final finish — so you get it right the first time.
🛒 Best Price Today on Amazon
Prime members get fast, free shipping on everything above, plus member-only deals. New members get a 30-day free trial — cancel anytime.
Start 30-Day Prime Free Trial →See Today’s Amazon Deals- Top Wood Paneling Products for Van Builds
- Wood Species Comparison for Van Paneling
- Before You Start: The Right Build Sequence
- Furring Strips: The Foundation for T&G Paneling
- Spec Comparison: Wood Paneling Options for Vans
- Installation: How to Install Tongue and Groove Paneling in a Van
- Finishing: Stain, Oil, or Paint?
- FAQ: Van Wood Paneling Tongue and Groove
- Bottom Line
- Related Guides
- Frequently Asked Questions
- Related Articles
Top Wood Paneling Products for Van Builds


As an Amazon Associate we earn from qualifying purchases. Product prices and availability are accurate as of the date/time indicated.

WAYSKA Diesel Heater 12V, 5L Tank, Diesel Heater 2KW, Muffler, Diesel Parking Heater with LCD Monitor & Remote Control for Trucks, Trailer, Boat and Motor-Home


As an Amazon Associate we earn from qualifying purchases. Product prices and availability are accurate as of the date/time indicated.


As an Amazon Associate we earn from qualifying purchases. Product prices and availability are accurate as of the date/time indicated.
Wood Species Comparison for Van Paneling
See also: MaxxFan Deluxe vs Fantastic Fan for Vans: Which to Choose? • Can I Lay LVP in a Van? Van Flooring Guide
The species you choose affects cost, weight, appearance, workability, and moisture resistance. Here’s the practical breakdown for van builds.
Pine (Knotty or Clear)
The default choice for 80% of van builds. Widely available at home improvement stores pre-milled in tongue and groove profiles, affordable (roughly $1.50–3.00 per linear foot), lightweight, and easy to cut with basic tools. Knotty pine has a rustic character; clear pine is smoother and more uniform.
Softwood means it dents more easily than hardwood, but in a van interior that’s rarely a problem. Pine takes stain, oil, and paint well. It does expand and contract with humidity — acclimate boards in the van for 24–48 hours before installation, especially in high-humidity climates.
Cedar
The premium choice for moisture-prone areas like the floor, lower walls, or ceiling. Naturally resistant to rot, mildew, and insects. The scent is pleasant and lasts for years. Lighter than pine, very easy to work with. More expensive — expect 2–3x pine pricing. Western red cedar is the most common type found at lumber yards in tongue and groove profiles.
Excellent choice for vans used in coastal or Pacific Northwest climates where condensation and humidity are constant challenges.
Poplar
Harder than pine, smoother grain, takes paint exceptionally well. Less character for natural finishes (pale, greenish hue), but perfect if you’re painting the interior white or a solid color. Moderately priced, widely available at hardwood dealers though less commonly pre-milled in T&G profiles at big box stores.
Shiplap vs Tongue and Groove
Shiplap boards overlap at a rabbet joint and leave a visible gap — a slightly different look than T&G. Both install similarly. T&G locks boards together for a tighter panel (better for walls and ceiling where flexing matters). Shiplap is slightly easier to remove individual boards if you need access to wiring behind the wall later.
Before You Start: The Right Build Sequence
Paneling goes in after insulation, before furniture. The correct sequence for a van build is:
- Rust treatment and surface prep
- Electrical rough-in (wire runs behind walls)
- Insulation (spray foam, rigid board, or combination)
- Vapor barrier if using fiberglass batts
- Furring strips or wall framing
- Wood paneling
- Floor
- Furniture and fixtures
Never install paneling before your wiring rough-in. You will regret it. If you’re running 12V circuits for lighting, outlets, and fans, know exactly where those runs go before the walls go up. A proper 12V outlet plan mapped before paneling saves major headaches later.
Furring Strips: The Foundation for T&G Paneling
Tongue and groove boards need something to fasten to. In a van, that means furring strips — horizontal or vertical battens attached to the van’s metal ribs or directly to the metal skin with appropriate fasteners.
Common approaches:
- 3M VHB tape + 1×2 pine strips: No drilling into the van body. Strong enough for light paneling. Popular in cargo van builds where minimizing metal penetrations is a priority.
- Self-tapping screws into van ribs: More secure. Requires pilot holes through the metal ribs. Use #8 or #10 self-tappers with a drill/driver and appropriate bit.
- Threaded inserts welded or bolted to ribs: Most permanent, cleaner look, used in high-finish builds.
Space furring strips every 16–24 inches. Closer spacing (16″) is better for ceiling applications where board weight and vibration are factors. Walls can get away with 24″ spacing on 1/4″ to 3/8″ boards.
Spec Comparison: Wood Paneling Options for Vans
| Species | Relative Cost | Weight | Moisture Resistance | Workability | Natural Finish | Best Use |
|---|---|---|---|---|---|---|
| Knotty Pine | $ | Light | Low | Easy | Warm, rustic | Walls, ceiling |
| Clear Pine | $$ | Light | Low | Easy | Clean, uniform | Walls, ceiling |
| Western Red Cedar | $$–$$$ | Very Light | High | Easy | Rich reddish tone | All areas esp. floor |
| Poplar | $$ | Medium | Low–Medium | Easy | Pale (better painted) | Painted walls |
| Shiplap Pine | $–$$ | Light | Low | Easy | Modern farmhouse | Accent walls |
Installation: How to Install Tongue and Groove Paneling in a Van
Start from the bottom of the wall and work up. The groove faces down on the first board — this prevents water from sitting in an upward-facing groove at the floor level. Slide each successive board’s tongue into the previous board’s groove. Fasten through the tongue at an angle (blind nail) to hide fasteners.
For ceilings: start at the centerline and work toward both sides simultaneously if possible, so any gaps at the edges are equal and symmetrical. A helper or panel prop makes ceiling work significantly easier — holding boards up while fastening is frustrating solo.
Around wheel wells and curved surfaces: cut boards to fit the contour. A jigsaw with a fine-tooth blade handles curves cleanly. A paper template traced from the wheel well shape saves material — test the template first before cutting actual wood.
Leave a 1/8″ gap at floor and ceiling for expansion. Wood moves with temperature and humidity swings — a van parked in Phoenix in summer and Colorado in winter will see significant dimensional change. No gap means buckled panels.
Finishing: Stain, Oil, or Paint?
The finish protects the wood and defines the look of your interior. Options:
- Raw/unfinished: Fastest, cheapest, absorbs odors over time. Not recommended unless you’re planning to refinish later.
- Tung oil or linseed oil: Penetrating finish that enhances grain without a surface film. Wipe-on application, easy in a van. Provides moderate moisture protection. Reapply every 1–2 years.
- Hardwax oil (Rubio Monocoat, Osmo): Premium penetrating finish, excellent durability, low-VOC options available. One coat typically sufficient. More expensive but long-lasting.
- Polyurethane: Hard surface coating, excellent moisture protection. More plastic-looking finish. Harder to touch up if scratched.
- Paint or whitewash: Dramatically brightens a dark van interior. Light colors make a small space feel larger. Whitewash over pine gives a beachy, Scandinavian aesthetic.
Finish boards before installation when possible — it’s far easier to coat flat boards on sawhorses than to work around corners and furring strips. Just touch up the edges and fastener holes after installation.
FAQ: Van Wood Paneling Tongue and Groove
How thick should T&G paneling be for a van?
For walls: 1/4″ to 3/8″ thick boards are standard. They’re light, flexible enough to follow slight curves, and provide sufficient rigidity between furring strips at 16–24″ spacing. For ceilings: 3/8″ is more stable and less prone to sagging over time. Avoid 1/2″ or thicker boards unless you’re doing a structural wall panel — they add unnecessary weight.
Will wood paneling cause moisture problems in a van?
Condensation is the main risk. Moisture migrates from warm interior air toward the cold van metal skin and condenses at that interface. Proper insulation (especially closed-cell spray foam, which acts as a vapor barrier) prevents this from reaching the wood. Cedar and finished pine handle incidental moisture well. Never install paneling over inadequate insulation and expect it to last.
How do I handle the curved ceiling of a van?
Thin boards (1/4″) flex over mild curves without kerf cutting. For tighter curves (Transit ceiling, Sprinter high-roof transition), kerf-cut the back of boards — a series of shallow parallel cuts that allow the board to bend without breaking. Space kerfs every 1–2 inches for tight curves. Test the bend radius before applying finish to avoid cracking finished boards.
Can I remove T&G paneling without destroying it?
Yes, if installed with blind nails through the tongue (not face nails). Use a flexible pry bar at the furring strip locations and work slowly. T&G panels come apart in the reverse installation order — remove from top (or last installed) toward bottom. Shiplap is even easier to remove since boards don’t interlock as tightly.
What’s the best way to cut T&G paneling to fit around obstacles?
A jigsaw for curves and notches, a miter saw for clean crosscuts, and a table saw or circular saw for ripping boards lengthwise. For very tight fits around ribs or wheel wells, a Japanese pull saw gives controlled cuts in tight spaces. Always measure twice — boards are cheap but time-consuming to replace on a build timeline. Make cardboard templates for complex shapes before cutting wood.
Bottom Line
Tongue and groove wood paneling is one of the best investments you can make in a van build. It transforms raw metal into a warm, finished interior that’s durable, repairable, and genuinely beautiful. Pine is the practical choice for most builders. Cedar if you’re in wet climates. Do your wiring and insulation first, use furring strips properly, finish before installation, and leave room for expansion. Done right, your paneling will outlast every other element of the build.
After walls are done, tackle the floor: see our guide on van bed platform and plywood build to continue the interior buildout sequence.
Related Guides
Frequently Asked Questions
How much weight does tongue and groove paneling add to a van?
Quarter-inch cedar or pine tongue and groove runs roughly 0.5 to 0.8 pounds per square foot, so paneling 150 square feet of wall and ceiling adds 75 to 120 pounds plus furring strips and fasteners. That is real payload in a build where insulation, water, and batteries are already competing for it.
Will wood paneling crack as the van flexes?
Tongue and groove handles flex better than sheet plywood because each board can move slightly against its neighbor. Leave a small expansion gap at the ends of runs, do not glue boards edge to edge, and fasten through the tongue with brad nails into furring strips so each board can breathe.
Do I need to seal the wood?
Yes. Bare wood absorbs cabin humidity, swells, and can grow mold behind the panel where you will never see it. Use a low-VOC water-based polyurethane or hardwax oil on all faces including the back before installation, since sealing only the visible side lets moisture in from behind.
How do I attach panels without drilling the van body?
Screw furring strips to the existing factory threaded holes and rivnuts in the ribs, then nail the paneling to the furring. This creates an air gap for wiring and avoids new holes in the shell. Where no factory holes exist, rivnuts into the ribs are far better than self-tappers into flat panels.
How difficult is this for a first-time builder?
It is forgiving work but slow. Expect two to four days for a full high-roof van, most of it spent scribing curved ceiling ends and cutting around fan and window openings. A brad nailer, a miter saw, and a contour gauge turn a frustrating job into a satisfying one.