Last updated: October 7, 2026
A practical ProMaster City camper conversion uses a longitudinal single or narrow double bed, lightweight modular furniture, and removable camping equipment rather than trying to create a standing-height RV.
The Ram ProMaster City is a compact cargo van, not a miniature high-roof van. Its low interior height and short cargo floor make it best for one comfortable sleeper, two people using a convertible bed, or a simple weekend camper that can return to cargo duty.

Floor mat for Ram ProMaster City 2015-2022
Included for 'How to Convert a Ram ProMaster City Into a Camper' as a relevant option in this category; details come from the product listing.
View on Amazon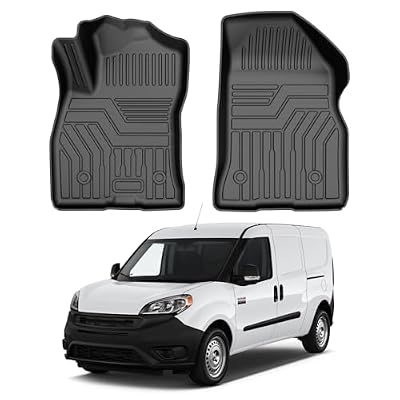
T TGBROS Floor Mats for Ram ProMaster City 2015-2022
Included for 'How to Convert a Ram ProMaster City Into a Camper' as a relevant option in this category; details come from the product listing.
View on Amazon
Naibeve Floor Mats for 2015-2022 Ram ProMaster City
Included for 'How to Convert a Ram ProMaster City Into a Camper' as a relevant option in this category; details come from the product listing.
View on AmazonStart with the usable dimensions
Exact measurements vary by model year, cargo partition, insulation, and whether you are measuring a cargo or passenger version. Before cutting materials, measure your own van with the doors closed and record the narrowest points.
| ProMaster City planning measurement | Approximate factory figure | What it means for the conversion |
|---|---|---|
| Cargo floor length behind the front seats | About 87 inches | Enough for a 72-inch bed plus storage at the rear |
| Maximum interior width | About 73 inches | Useful for cabinets, but not the true sleeping width everywhere |
| Width between wheel arches | About 48 inches | Limits a fixed transverse bed and most full-width floor plans |
| Interior height | About 52 inches | Expect to sit or kneel; a raised roof is not part of a simple build |
| Maximum cargo volume | About 131 cubic feet | Plenty for compact gear, but less once the bed and insulation are installed |
| Typical payload capacity | Roughly 1,800–1,900 pounds | Includes passengers, water, furniture, battery, tools, and luggage |
These figures are planning references, not permission to exceed the vehicle’s door-jamb payload label. A conversion can become overweight surprisingly quickly when plywood, a large battery, water, and two occupants are added together.
Choose a layout based on how you will use the van
See also: MaxxFan Deluxe vs Fantastic Fan for Vans: Which to Choose? • Can I Lay LVP in a Van? Van Flooring Guide
| Your situation | Recommended layout | Why it works | Approximate build range |
|---|---|---|---|
| Low budget, occasional solo trips | Folding platform, foam mattress, plastic bins | Fast, light, and removable | $500–$1,500 |
| Frequent solo weekends | 72-inch longitudinal bed with drawer storage | Reliable sleeping setup without rebuilding the van | $1,500–$3,500 |
| Two people, compact gear | Widthwise convertible bed or split sleeping platform | Preserves a walkway or daytime seating area | $2,000–$4,500 |
| Mixed work and camping use | Removable platform and cargo tie-down system | Returns to a useful cargo van in under an hour | $800–$2,500 |
The easiest bed solution
For one person, build a 72-inch-long bed along one side of the van. A 24- to 30-inch-wide mattress leaves space for a narrow aisle and a cabinet or gear boxes. A 75-inch mattress may fit, but measure around the front seat backs, rear doors, and trim before choosing it.
For two people, a standard 54-inch-wide full mattress is difficult to use as a permanent transverse bed because the wheel arches reduce the available width. A better approach is a 48-inch-wide sleeping platform between the arches, or a longitudinal platform that expands into the aisle at night. Two separate 24-inch foam cushions can be easier to store than one large mattress.
Keep the bed platform approximately 12 to 16 inches above the floor if you want usable storage underneath. Higher platforms provide more storage but reduce headroom and make getting into bed less convenient. With only about 52 inches of interior height, even a modest platform can make the van feel cramped.
Plan storage before building furniture
Use the rear doors for access to bulky items and the sliding-door side for daily-use equipment. A compact ProMaster City RV conversion benefits from several small storage zones rather than one large cabinet.
- Under-bed storage: Use lidded bins or drawers for clothing, cooking equipment, and recovery gear.
- Rear-door storage: Reserve shallow pockets for leveling blocks, a folding table, hose, and outdoor shoes.
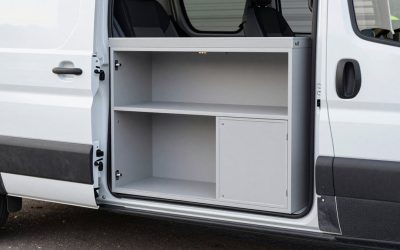
- Sliding-door cabinet: Build a 10- to 14-inch-deep cabinet for food, water, and a small stove.
- Overhead space: Use soft organizers only; rigid cabinets can reduce visibility and add weight.
- Wet gear: Keep shoes, wet towels, and hoses in a washable tub rather than inside upholstered storage.
Do not block the factory tie-down points. They are useful for securing furniture and cargo, and they allow a future owner to remove the conversion without drilling dozens of new holes.
Materials that suit a small van
Use 12-millimeter (about 1/2-inch) plywood for most cabinet sides and 18-millimeter (about 3/4-inch) plywood for highly loaded bed rails. Baltic birch is strong and clean-looking, while lighter plywood reduces weight. Avoid building everything from 3/4-inch sheet goods unless you have a specific structural reason.
- Seal plywood edges with varnish, paint, or polyurethane to reduce moisture damage.
- Use aluminum angle or hardwood cleats where a panel needs support without a heavy frame.
- Choose machine screws, rivet nuts, or existing tie-down locations for attachment points.
- Use closed-cell foam under panels only where it will not trap condensation against metal.
- Cover high-contact edges with trim to prevent splinters and damaged bedding.
Full insulation is optional in a summer-focused build, but window coverings, a roof vent, and airflow usually improve comfort more than thick insulation in a low-roof van. Never cover structural or service components without knowing what is behind them.
Build the conversion in this order
1. Measure and make a full-size plan
Remove loose cargo and cardboard-template the wheel arches, sliding door opening, seat travel, and rear-door clearance. Mark a safe sleeping rectangle on the floor. Check that you can open both side doors and still reach your emergency equipment.
2. Decide whether the build must be removable
A removable build can sit on a low plywood subfloor or independent platform secured to factory tie-downs. A permanent conversion can be quieter and more integrated, but it is harder to repair and may affect the van’s resale or commercial use.
3. Install the floor and ventilation plan
Clean the metal floor, address rust, and use thin floor insulation only where it will not interfere with door thresholds. Plan ventilation before installing the bed. A low-power roof fan is effective, but any roof or body penetration should be sealed carefully and checked regularly for leaks.
4. Build the bed first
The bed determines nearly every other dimension. Assemble the frame outside the van where possible, then test it with the mattress, bedding, and a person inside. Add rounded corners and a positive latch for any folding section so it cannot move while driving.
5. Add storage around the bed
Fit the largest containers you expect to use before finalizing drawer dimensions. A cabinet that wastes two inches on each side may not accept common storage bins. Keep heavy equipment low and near the center of the van.
6. Install electrical and water systems conservatively
A basic setup may include a portable power station or a fused 12-volt auxiliary system, LED lights, USB charging, and a 10- to 20-liter water container. If installing a separate battery, use correctly sized fuses close to the battery, protected cable routes, and components designed for vehicle use. Do not connect an auxiliary battery directly to the starter battery without an appropriate charging device.
For a simple energy calculation, two 5-watt lights used for four hours consume 40 watt-hours per night. A 500-watt-hour portable power station would theoretically provide 12.5 such nights, but inverter losses, temperature, battery-management reserves, and other devices reduce the practical result. A small refrigerator can consume more energy than the lights, so size the system around actual loads rather than the battery’s headline capacity.
7. Secure, inspect, and test-load everything
Drive over rough roads at low speed and listen for movement. Check that drawers stay closed, the bed does not shift, water containers cannot tip, and no edge can injure an occupant in a collision. Weigh the finished build and calculate payload with passengers, food, water, and luggage included.
Ownership realities and common mistakes
The first parts to wear are usually mattress covers, drawer slides, door seals, fasteners, and floor finishes near the sliding door. Dust and grit quickly damage inexpensive slides, so vacuum them periodically and avoid storing sandy gear inside drawers. Wash removable fabric covers and dry wet bedding promptly; compact vans accumulate condensation quickly when people sleep inside.
Common mistakes include making the bed too high, ignoring seat adjustment, building cabinets wider than necessary, and placing a heavy battery at the very rear. Another frequent error is permanently installing a sink or toilet that is rarely used while sacrificing valuable storage. A lidded water container, folding wash basin, and compact portable toilet often suit this van better.
Expect a basic promaster city camper build to cost roughly $500–$1,500 using removable furniture and existing gear, or $2,000–$5,000 for a more finished layout with electrical, ventilation, cabinetry, and a quality mattress. Professional bodywork, custom upholstery, and major electrical systems can push the total much higher. Start with the bed, ventilation, and storage; add luxury equipment only after several trips reveal what you actually need.
Is the ProMaster City suitable for your conversion?
Choose it if you value car-like driving, a compact footprint, good maneuverability, and a relatively simple weekend setup. It is especially attractive for solo travelers, couples who accept a convertible bed, and owners who need the van for work during the week.
Choose a larger high-roof van instead if you need indoor standing room, a permanent full bed, an indoor shower, extensive cold-weather systems, or comfortable interior living during bad weather. The best ProMaster City camper is deliberately compact: a secure bed, sensible storage, ventilation, and enough power for the equipment you actually use.