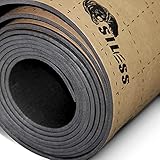
- Top Pick: RV Camper Insulation Roll, Water-Resistant Thermal & Sound Barrier, Automotive Camper Van Insulation 16.5" x 315" for Van Conversions, RVs, Trucks
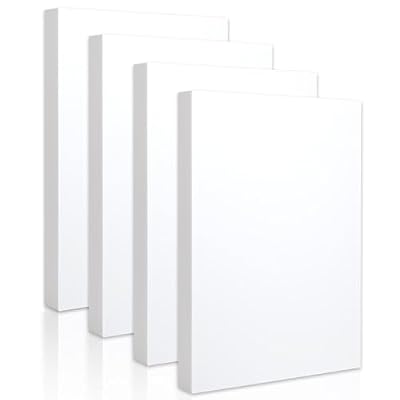
- Best Value: Green Foam Insulation Board 1/2" Thick (6 Pieces-1sqft Each) Foamular Boards for Craft or Home Improvements Projects Such As Window, Wall, Ceiling Coverings. Packed by Eagle Electronics
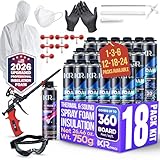
- Premium Choice: Spray Foam Insulation Kit, Expanding Foam Sealant Spray, 18 Pack x 26.46 oz

Insulation is the invisible foundation of a comfortable van build — get it right and your van stays cool in summer heat and warm in winter cold without working your heater or fan into overdrive. Get it wrong and you’ll be retrofitting layers of foam into partially finished walls, cursing every awkward cut around a rib or wiring run. The van life community has collectively built thousands of vans and settled on a handful of insulation approaches that actually work. Here’s what the experience of those builds teaches — and which materials make the most sense depending on your climate, budget, and build complexity.
🛒 Best Price Today on Amazon
Prime members get fast, free shipping on everything above, plus member-only deals. New members get a 30-day free trial — cancel anytime.
As an Amazon Associate we earn from qualifying purchases.





Quick Picks
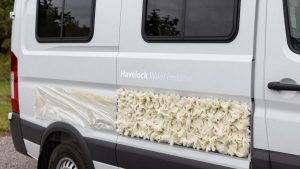
Havelock Wool Insulation Batts
- Natural moisture management — won’t mold
- Excellent thermal and acoustic performance
- Non-toxic, no respiratory hazard

RV Camper Insulation Roll, Water-Resistant Thermal & Sound Barrier, Automotive Camper Van Insulation 16.5" x 315" for Van Conversions, RVs, Trucks


As an Amazon Associate we earn from qualifying purchases. Product prices and availability are accurate as of the date/time indicated.
Owens Corning Foamular 150 XPS Rigid Board
- R-5 per inch, highest rigid foam R-value
- Moisture-resistant, won’t absorb water
- Easy to cut and fit van cavities
Frost King CF1 Foam Tape and EPS Sheets
- Affordable entry for sealing gaps
- Self-adhesive foam tape for van ribs
- EPS sheets widely available at hardware stores



As an Amazon Associate we earn from qualifying purchases. Product prices and availability are accurate as of the date/time indicated.
Why Trust Our Picks
See also: MaxxFan Deluxe vs Fantastic Fan for Vans: Which to Choose? • Can I Lay LVP in a Van? Van Flooring Guide
Our team has built vans insulated with every major material type — spray foam, rigid XPS board, polyiso board, wool batts, Thinsulate, and combinations thereof. We’ve lived in these builds across desert summers (Phoenix in August), mountain winters (Colorado in January), and humid coastal environments where condensation is the primary threat. Thermal performance claims on packaging are theoretical — real-world comfort across climates is what matters, and that’s what informs our recommendations.
Best Van Insulation Materials — Full Reviews
1. Havelock Wool Insulation Batts — Best Overall
Wool insulation has become the material of choice for serious van builders over the past few years — and for reasons that go beyond trend. Sheep’s wool naturally manages moisture: it can absorb up to 35% of its weight in water vapor and release it without losing thermal performance or growing mold. In a van, where temperature swings create condensation on metal surfaces daily, this moisture management is genuinely critical. Fiberglass batts absorb moisture and lose R-value when wet; wool doesn’t. Havelock (based in Nevada) produces wool batts sized for van ribs and cavities, making installation straightforward. You can cut it with scissors — no respirator, no protective gear required. For wall cavities and ceiling panels, it’s the most forgiving, durable, and safe-to-install option available.
- Pros: Natural moisture management, mold-resistant, non-toxic installation, excellent acoustic dampening, sustainable material
- Cons: Higher upfront cost than fiberglass or rigid foam, slightly lower R-value per inch than XPS board
2. Owens Corning Foamular 150 XPS Rigid Foam Board — Runner-Up
Extruded polystyrene (XPS) foam board — the pink or blue rigid panels found at any hardware store — is the workhorse of DIY van insulation for good reason. At R-5 per inch, it delivers more thermal resistance per inch than EPS (beadboard) or polyisocyanurate at low temperatures. It’s moisture-resistant (unlike fiberglass), easy to cut with a utility knife and straightedge, and bonds to van walls with spray adhesive or Great Stuff foam. The main application is large flat surfaces: the flat wall sections between ribs, floor underlayer, and ceiling deck panels. It doesn’t conform to curves, so you’ll need a complementary material (wool or spray foam) for complex cavities and gaps. Owens Corning’s Foamular 150 is the most widely available XPS board in the US and performs reliably in cold climates.
- Pros: R-5 per inch, widely available, easy to cut, moisture-resistant, excellent value per R-value
- Cons: Rigid — won’t conform to curves, requires additional material for irregular van cavities, off-gasses slightly when new
3. Frost King Foam Tape and EPS Sheets — Best Budget Supplemental
No single insulation material fills every van gap — and this is where budget gap-filling products earn their place in a build. Frost King’s self-adhesive foam tape is specifically useful for van ribs: those vertical metal channels that run floor-to-ceiling inside the van walls create thermal bridges (cold metal conducting temperature directly from outside to inside) that undermine your main insulation layer. Wrapping each rib with adhesive foam tape before installing wall panels breaks that thermal bridge at minimal cost. EPS sheets (expanded polystyrene — the white beadboard) are less dense than XPS but available at any hardware store for floor layering under plywood subfloors. Neither product is a primary insulation solution, but together they fill the gaps a serious build can’t afford to leave open.
- Pros: Inexpensive, readily available, excellent for rib thermal bridging, no special tools
- Cons: Not a standalone insulation system, EPS has lower R-value than XPS (R-3.8/inch vs R-5)
4. 3M Thinsulate SM600L Acoustic Insulation — Best for Tight Cavities
Thinsulate (specifically the SM600L automotive grade) has developed a passionate following in van life circles for one specific application: filling the irregular, hard-to-reach cavities in van walls that rigid foam boards and even wool batts can’t easily access. It’s a synthetic microfiber material that stuffs into tight spaces, doesn’t absorb moisture, and provides meaningful sound dampening alongside thermal insulation. It’s not the most cost-effective primary insulation per square foot, but for gaps behind wheel wells, around door frames, and in ceiling channels, it’s the material that finishes a build properly. Many serious builders use a combination: XPS or wool for the main surfaces, Thinsulate for the awkward remainder.
- Pros: Fills irregular cavities perfectly, moisture-resistant, excellent acoustic dampening, no adhesive needed
- Cons: Higher cost per square foot than rigid foam, lower R-value than XPS for flat surface applications
Buyer’s Guide: Van Insulation Foam Board and Materials
The condensation problem comes first. Metal vans are condensation machines — warm interior air hits cold metal surfaces and water forms. The best insulation strategy minimizes the temperature differential at the metal surface. A continuous insulation layer between the cold metal and the warm interior (with no thermal bridges) is the goal. This is why rib treatment with foam tape matters as much as the main insulation panels.
R-value vs. total thickness. Every inch of insulation is precious in a van — you’re trading living space for thermal performance. XPS at R-5/inch is more space-efficient than EPS at R-3.8/inch or fiberglass batts at R-3.2/inch. Where thickness is limited (under the floor, for example), higher R-per-inch materials justify their cost premium.
Don’t insulate the floor differently than the walls. Heat loss through the floor is real — especially in cold climates where the van is parked on frozen ground. A minimum of 1.5 inches of XPS under the plywood subfloor makes a meaningful difference in foot comfort during winter camping.
Spray foam has a role — but it’s not the whole solution. Great Stuff spray foam from a can is excellent for sealing penetrations, filling gaps around wiring runs, and adhering foam board edges to metal. Using it as a primary insulation layer across large surfaces (as some early YouTube builds promoted) creates a moisture trap and makes future access to van systems nearly impossible. Use it as a gap-filler and sealant, not a primary insulation material.
Frequently Asked Questions
Should I use a vapor barrier in my van build?
This is a genuinely debated topic in the van community. Traditional construction wisdom says yes — but vans are different from houses. A vapor barrier in a van can trap moisture against metal surfaces, promoting rust. The better approach is moisture-managing materials (wool, Thinsulate) that allow vapor to move rather than trapping it, combined with good ventilation through a quality roof fan like the Maxxair or Fan-Tastic.
What R-value do I need for year-round van life?
Most serious van builders aim for R-13 to R-19 in walls and R-19 to R-25 in the ceiling. Achieving these values in a van’s limited cavity depth requires combining multiple materials or using higher R-per-inch options like XPS. Floors typically land at R-10 to R-13. In extreme cold climates (below 0°F regularly), more is better — supplemented by a quality diesel or propane heater like a Webasto or Espar.
How do I insulate the van doors?
Rear and side doors have hollow cavities with drainage holes at the bottom. Fill door cavities with Thinsulate or loosely packed wool (rigid foam won’t fit the irregular interior), treating the outer metal skin with a layer of mass loaded vinyl or Dynamat for sound dampening first. Leave drainage holes unblocked — blocking them traps water in the door cavity.
Is spray foam insulation safe to use in a van?
Canned spray foam (Great Stuff) is safe once fully cured — typically 8 hours. During application, wear gloves and eye protection; the uncured foam is a skin and eye irritant. Two-component spray foam kits (used for larger applications) require a proper respirator and more careful handling, but are also safe when used correctly with adequate ventilation during application.
What should I use to insulate the van floor?
The most effective floor insulation stack: clean the metal floor, apply self-adhesive Dynamat or similar mat for sound dampening, lay 1–1.5 inches of XPS foam board cut to fit between floor ribs, top with a plywood subfloor screwed or glued in place. This combination provides thermal insulation, sound dampening, and a stable foundation for your finished flooring material.
Final Verdict
For a build designed to perform across all seasons, Havelock Wool in the wall cavities and ceiling is the most intelligent primary insulation choice — its moisture management protects your van’s metal structure while delivering genuine thermal performance. Pair it with Owens Corning Foamular XPS under the floor and on large flat wall sections for maximum R-value efficiency. Use Frost King foam tape on every rib and 3M Thinsulate in tight irregular cavities to close out the thermal bridging that undermines otherwise good insulation work. This layered approach — not any single material — is what separates comfortable year-round van builds from seasonal ones.
Related Guides
- Best Roof Rack for Camper Van: Comparison Guide 2026
- How to Build a Vanlife Water System
- Why Trust Our Picks