- Top Pick: HULKNPE Z Brackets Solar Panel Mounting Kit (16 Pack) – Heavy Duty Corrosion-Resistant Aluminum for RV, Boat, Roof & Off-Grid Installations
- Best Value: Anbte Solar Panel Mounting Brackets for Roof, Aluminum Solar Rails, Black
- Premium Choice: BougeRV Solar Panel Crab Mounting Kit for Cars with Cross Bars No Drilling
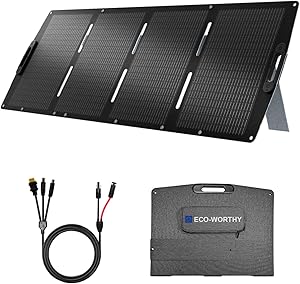
RV Roof Solar Panel Mounting: Complete Installation Guide for Van & RV Builds
TL;DR Quick Answer
RV roof solar panel mounting comes down to three decisions: Z-brackets (fixed, cheap, low-profile) vs tilt mounts (15–25% more harvest) vs adhesive (no-drill, lower load capacity). For most van and RV builds, stainless Z-brackets with Dicor lap sealant is the sweet spot — permanent, leak-proof, and wind-resistant to 80+ mph. Budget $40–$120 for mounting hardware. Correct penetration sealing matters more than the mount type itself: a $200 tilt mount with poor sealing will destroy your roof in two seasons.
You’ve bought the panels. Now the hard part: getting them on the roof without creating a leak, a wind sail, or a panel that vibrates loose at highway speed. RV roof solar panel mounting is where builds succeed or fail — not in the panel wattage or charge controller choice, but in the mechanical and waterproofing execution.
As an Amazon Associate we earn from qualifying purchases at no extra cost to you.
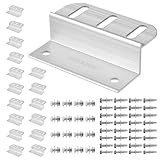


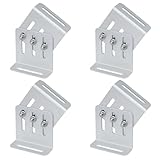


This guide covers every mount type, roof material compatibility, penetration sealing, cable entry, wire routing, and the specific hardware worth buying for a build that lasts a decade.
🛒 Best Price Today on Amazon
Prime members get fast, free shipping on everything above, plus member-only deals. New members get a 30-day free trial — cancel anytime.
Start 30-Day Prime Free Trial →See Today’s Amazon Deals- Solar Panel Mount Types: What Actually Works on an RV Roof
- Mount Type Comparison: Z-Bracket vs Tilt vs Adhesive
- RV Roof Materials: What You’re Actually Drilling Into
- Step-by-Step: How to Mount Solar Panels on an RV Roof
- Solar Wire Gauge for Roof Runs
- Common Roof Mounting Mistakes (and How to Avoid Them)
- FAQ: RV Roof Solar Panel Mounting
- Frequently Asked Questions
- Related Articles
- Related Guides
Solar Panel Mount Types: What Actually Works on an RV Roof
BEST ALL-AROUND MOUNT KIT
Stainless Z-Bracket Solar Panel Mounting Kit (4-pc)


As an Amazon Associate we earn from qualifying purchases. Product prices and availability are accurate as of the date/time indicated.
BEST TILT MOUNT
Adjustable Solar Panel Tilt Mount Bracket Set

WAYSKA Diesel Heater 12V, 5L Tank, Diesel Heater 2KW, Muffler, Diesel Parking Heater with LCD Monitor & Remote Control for Trucks, Trailer, Boat and Motor-Home


As an Amazon Associate we earn from qualifying purchases. Product prices and availability are accurate as of the date/time indicated.
BEST NO-DRILL OPTION
VHB Adhesive Solar Mounting Pads + Corner Brackets

Ivation Portable Camping Shower | Compact Handheld & Hands-Free Rechargeable Outdoor Shower Head & Cleaning System w/ 3.7V Pump, 6-Ft Hose, Bidet Head, Removable Filter, Multiuse Hook & USB Cable


As an Amazon Associate we earn from qualifying purchases. Product prices and availability are accurate as of the date/time indicated.
Mount Type Comparison: Z-Bracket vs Tilt vs Adhesive
See also: MaxxFan Deluxe vs Fantastic Fan for Vans: Which to Choose? • Can I Lay LVP in a Van? Van Flooring Guide
| Mount Type | Cost | Roof Penetration | Wind Load | Solar Harvest Gain | Best For |
|---|---|---|---|---|---|
| Z-Bracket (fixed flat) | $30–$60 | Yes (4–8 bolts) | Excellent | Baseline | Most van/RV builds |
| Tilt Mount (adjustable) | $60–$150 | Yes (4–8 bolts) | Good (flat position) | +15–25% in winter/high latitude | Stationary camping, N. climates |
| Adhesive/No-drill | $40–$80 | No | Fair (wind strips<60mph) | Baseline | Fiberglass roofs, lease vehicles |
| Rail System | $120–$300 | Yes (fewer penetrations) | Excellent | Baseline–+20% | Multiple panels, premium builds |
For most van and Class B RV builds with 1–4 panels, stainless Z-brackets strike the best balance. Tilt mounts make sense if you camp stationary for extended periods above 40° latitude — the 15–25% winter harvest gain is real and measurable. Adhesive-only mounts are a last resort: they work fine below 60 mph on clean fiberglass, but a highway gust at 75 mph has separated panels from roofs.
RV Roof Materials: What You’re Actually Drilling Into
Before buying hardware, identify your roof material. Each behaves differently and requires specific sealing approaches:
- EPDM rubber roof (most Class A/C RVs): drill with a sharp bit, use Dicor self-leveling lap sealant, apply generously. EPDM seals exceptionally well with Dicor. Do not use silicone — it doesn’t bond to EPDM.
- TPO membrane (newer RVs, cargo vans): similar to EPDM but slightly stiffer. Dicor works; TPO-specific sealant is better for full waterproofing integrity.
- Fiberglass roof (Class B, some sprinter conversions): drill carefully, use 3M 5200 or butyl tape plus a stainless backing plate inside the van to distribute load. Fiberglass can crack if bolts are overtightened.
- Steel roof (Transit, Sprinter, ProMaster van conversions): drill and use self-tapping stainless screws with butyl tape under the mount base. Apply Dicor or silicone over exposed metal to prevent rust.
Step-by-Step: How to Mount Solar Panels on an RV Roof
Step 1: Plan Panel Layout
Measure your usable roof space, accounting for roof vents, AC units, antenna mounts, and vent fan cutouts. Leave 4–6 inches clearance around panels for airflow — panels mounted flush with zero gap run 15–25°C hotter, cutting output by 10–15%. Map panel positions with tape before drilling anything.
Step 2: Mark and Pre-Drill Mount Points
Use a center punch to mark drill points. Drill pilot holes slightly undersized for your hardware. On steel and aluminum roofs, immediately apply a rust inhibitor or primer to exposed metal inside the hole. On rubber membrane roofs, the hole will be covered by sealant — work quickly before it dries.
Step 3: Install Mounts with Butyl Tape Base Seal
Apply butyl tape to the underside of each Z-bracket before bolting down. Butyl tape compresses into every micro-gap as you tighten, creating a waterproof gasket. Do not skip this step — it’s the first line of defense. Tighten bolts to snug but not overtorqued; on fiberglass especially, overtightening cracks the roof.
Step 4: Apply Dicor Lap Sealant Over All Penetrations
After mounting, apply a generous bead of Dicor self-leveling lap sealant completely around each mount base, covering the bolt heads. On EPDM and TPO roofs, Dicor flows into seams and creates a flexible, UV-resistant seal that moves with roof expansion. Reapply every 2–3 years as preventative maintenance.
Step 5: Route Cables Through a Dedicated Entry Gland
Never run solar cables through the same hole as the mount bolts. Use a dedicated cable entry gland — a waterproof fitting designed for 4–6mm solar wire that creates a UV-resistant, watertight pass-through. Mount the gland near your charge controller location to minimize wire run length inside the van. Seal around the gland with Dicor identical to mount penetrations.
From there, route cables to your MPPT solar charge controller and on to your house battery bank. Use the correct wire gauge — undersized wire causes voltage drop that directly reduces charging efficiency.
Solar Wire Gauge for Roof Runs
| Panel Wattage | Amps at 12V | Run <10 ft | Run 10–20 ft | Run 20–30 ft |
|---|---|---|---|---|
| 100W | ~8.3A | 12 AWG | 10 AWG | 8 AWG |
| 200W | ~16.7A | 10 AWG | 8 AWG | 6 AWG |
| 400W | ~33.3A | 8 AWG | 6 AWG | 4 AWG |
| 600W | ~50A | 6 AWG | 4 AWG | 2 AWG |
These are conservative minimums. Going one size heavier than the table shows adds minimal cost and meaningfully reduces resistive losses over years of use. Use UV-rated, tinned-copper solar wire for any roof or exterior runs.
Common Roof Mounting Mistakes (and How to Avoid Them)
- Drilling into roof ribs or structural members: always check inside the van for ribs, crossmembers, or existing wiring before drilling. A misplaced hole through a structural rib weakens the roof.
- Using silicone on EPDM roofs: silicone does not bond to EPDM rubber. It looks sealed for a season then peels. Use Dicor or EPDM-specific adhesive sealant only.
- Skipping the butyl tape base layer: Dicor alone on top is not sufficient. The butyl tape provides the primary compression seal; Dicor provides UV protection and weatherproofing over time.
- Running positive and negative wires through the same hole: creates a potential short if the hole edge chafes through insulation. Use separate entry points or a proper dual-cable gland with individual seals per conductor.
- Not accounting for panel thermal expansion: aluminum-framed panels expand and contract with temperature cycles. Leave slight play in cable slack loops near the panel junction box so expansion doesn’t stress connections.
If you’re building out a complete van solar system, also review your portable solar panel options for supplemental ground-level charging when parked in partial shade.
FAQ: RV Roof Solar Panel Mounting
Do I need to seal solar panel mounting bolts on an RV roof?
Yes, every penetration absolutely must be sealed. A single unsealed bolt hole over an RV season can allow enough water ingress to rot the roof substrate and damage insulation or wiring inside. Use butyl tape under the mount base plus Dicor lap sealant over all bolt heads and the perimeter of each mount. Inspect and reapply Dicor every 2–3 years.
How far apart should Z-brackets be on a solar panel?
Place Z-brackets no more than 24 inches from each panel corner and no more than 36 inches apart along the long axis of the panel. For a standard 39×65-inch 200W panel, four brackets — one near each corner — is sufficient. For panels over 250W (typically 40×67 inches or larger), consider six brackets or a rail system to distribute load and reduce panel frame flex.
Can I mount solar panels on a TPO or rubber RV roof without drilling?
Adhesive mounts using 3M VHB tape or specialized solar mounting adhesive can work on clean, smooth rubber roofs for panels up to 100W. Above 100W, wind load at highway speed becomes a serious concern. For permanent builds or panels over 100W, drilled-and-sealed Z-brackets are strongly recommended. Adhesive-only mounts are best for temporary setups or lightweight flexible panels on fiberglass surfaces.
What is the best sealant for solar panel mounts on an RV?
Dicor 501LSW self-leveling lap sealant is the industry standard for EPDM and TPO roofs. It stays flexible as the roof expands and contracts with temperature, bonds permanently to rubber membranes, and resists UV degradation for years. For metal roofs (steel, aluminum), Sikaflex 221 or 3M 5200 marine adhesive sealant provides superior adhesion and flexibility. Never use standard silicone on EPDM — it doesn’t bond and will peel within one season.
How many solar panels can I fit on a standard cargo van roof?
A standard high-roof 148″ wheelbase Transit or Sprinter van has roughly 50–60 square feet of usable roof space after accounting for roof vent fans, skylights, and clearance margins. You can typically fit 3–4 standard 200W panels (each about 18 sq ft) for a 600–800W system. A 144″ wheelbase low-roof van fits 2–3 panels comfortably. Measure your specific van before purchasing panels — roof dimensions vary significantly between model years and wheelbases.
Frequently Asked Questions
Should I drill into my van roof or use adhesive mounts?
Drilled mounts with stainless bolts, backing plates and sealant are the strongest and are what most professional installers use. VHB tape and adhesive brackets work and avoid holes, but require perfect surface prep, and heat cycling plus 70 mph wind loading means a failure is catastrophic. Many builders use both.
How do I stop roof penetrations leaking?
Drill undersize, deburr, prime the bare steel, then bed the bracket in a polyurethane like Sikaflex 252 rather than silicone, which does not bond to automotive paint long term. Cap the bolt head with self-leveling lap sealant and inspect every spring, since UV degrades sealant before the fastener fails.
Do panels need an air gap under them?
Yes. Panels lose roughly 0.4 percent output per degree Celsius above 25C, so a flush-mounted panel baking on a hot roof can lose 10-15 percent. Leave at least 1.5-2 inches of air gap for convection, which also lets you clean underneath and reduces heat soaking into the cabin.
Will the panels survive highway speeds and hail?
Tempered glass panels are typically rated for 2,400 Pa wind and 1-inch hail at 50 mph. The weak point is the mount, not the panel, so use at least four attachment points per panel, add a front wind deflector if your panel sits ahead of a roof rack, and torque check annually.
Rigid or flexible panels for a van roof?
Rigid glass panels last 20-25 years and are cheaper per watt. Flexible panels are light and low profile but typically fail within three to five years when glued flat, because trapped heat delaminates the cells. If you need flexible for a curved fibreglass roof, mount them with an air gap.