Last updated: September 18, 2026
Insulation gaps in a camper van may look minor, but a few open seams can create cold spots, condensation, road noise, and uncomfortable drafts. Moisture can also collect behind wall panels, where it may encourage rust, mildew, or deteriorated adhesive. Sealing too aggressively can cause different problems: trapped water, blocked drainage paths, compressed insulation, or foam expanding around wiring and distorting a panel.
The best approach is deliberate rather than simply filling every opening. First find the source of the gap, then use a material suited to its location and movement. The method below works for common van-conversion walls, ceiling panels, rear doors, wheel wells, floor edges, and roof-vent surrounds. It is also a practical way to improve an older build in 2026 without removing every interior panel.
As an Amazon Associate we earn from qualifying purchases at no extra cost to you. Product prices and availability are accurate as of the date shown and are subject to change.


Quick answer: Our top pick in 2026 is the Flashlight, inspection mirror, and moisture meter — our #1 rated choice. See the full ranked comparison, alternatives and buying advice below.
What You Need
| Item | Why | Optional? |
|---|---|---|
| Flashlight, inspection mirror, and moisture meter | Helps locate hidden openings, damp insulation, and rusty metal. | Moisture meter is optional |
| Tape measure, marker, cardboard, and scissors | Creates accurate templates and prevents oversized patches. | No |
| Utility knife with spare blades | Cuts insulation, tape, and old sealant cleanly. | No |
| Water-resistant thermal and sound-barrier insulation roll, 16.5 inches by 315 inches | Useful for replacing narrow, damaged strips in doors, walls, and ceiling cavities. A roll is approximately 27 feet long; typical retail pricing is about $35–$50, with the listed RV Camper Insulation Roll priced at $39.99. | Optional if existing insulation is dry and intact |
| Foil HVAC tape or purpose-made insulation seam tape | Bridges seams and protects exposed insulation edges. Choose tape rated for the temperatures in your van. | No for foil-faced insulation |
| Butyl tape or flexible automotive sealant | Seals exterior penetrations and joints that experience vibration. | Depends on the gap |
| Closed-cell backer rod | Fills deep gaps before sealant, reducing the amount of sealant required. | Optional for shallow gaps |
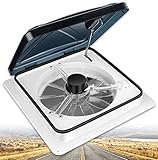
| Replacement vinyl seal | Restores a compressed roof-vent, hatch, or trim seal. A Ventline BVD0455-01 51-inch vinyl seal costs about $10–$15. | Only when the existing seal is damaged |
| Isopropyl alcohol, lint-free cloths, gloves, and painter’s tape | Removes residue and keeps sealant off finished surfaces. | No |
Step-by-Step
See also: Best Van Water Filter for Refill Stations in 2026: Tested and Ranked • How to Winterize a Van Water System (2026): Step-by-Step
1. Find and classify every gap (30–60 minutes)
Work on a dry day with the van parked level. Remove only the panels needed for access, and photograph wiring, hoses, clips, and fastener locations before taking anything apart. Look for daylight, loose insulation, crushed material, rusty seams, damp spots, and darkened wood or fabric.
Classify each opening before choosing a product:
- Small stationary seam: usually less than 1/8 inch wide and suitable for tape or a thin bead of sealant.
- Deep joint: wider than 1/8 inch or more than 1/4 inch deep; use backer rod first.
- Moving joint: a door, hatch, roof vent, or trim edge; use a flexible gasket, butyl tape, or automotive sealant.
- Drainage or ventilation opening: do not seal it until you know its purpose. Doors and body cavities may need to drain water.
2. Check for moisture and damage (20–40 minutes)
Do not cover wet insulation. Press a clean paper towel against suspicious areas, and use a moisture meter if available. Surface rust should be cleaned, dried, and treated according to the coating manufacturer’s directions. Heavy flaking rust, swollen wood, a persistent musty odor, or insulation that stays damp indicates a larger leak.
Inspect around roof vents, windows, plumbing penetrations, exterior lights, roof racks, and door seals first. Water often travels along metal before appearing far from the actual entry point.
3. Remove old material and prepare the surface (30–90 minutes)
Cut away loose insulation and scrape off failing tape or sealant. Avoid pulling hard on bonded insulation, because you can lift paint or expose bare metal. Vacuum dust and wipe the bonding area with isopropyl alcohol on a lint-free cloth. Let the surface dry completely.
Do not use alcohol near an open flame, heater, or energized electrical equipment. Disconnect the battery’s negative terminal before working near exposed wiring or powered accessories, and keep solvents away from plastics that may be damaged by them.
4. Cut a correctly sized insulation patch (20–45 minutes)
Make a cardboard template first. The replacement piece should fill the cavity without being tightly compressed. Leave clearance around wiring, hinges, latches, and fastener holes. Compression can reduce the material’s insulating performance and prevent a wall panel from sitting flat.
For a 16.5-inch-wide roll, measure each section separately rather than assuming the cavity is uniform. Cut with a sharp blade and make clean edges. For a narrow void, a strip 1–2 inches wider than the visible opening may provide enough overlap for taping, but never cover a required drain or service access.
5. Install the insulation and seal its seams (30–60 minutes)
Place the patch so it contacts the surrounding insulation without creating a bulge. Follow the product instructions for adhesive; some rolls are self-adhesive, while others need compatible spray or contact adhesive. Use short, even pieces of foil tape over seams, pressing from the center outward to remove wrinkles.
Seal the perimeter, but avoid making a completely airtight “bag” around a cavity that was designed to drain or dry. In metal-bodied vans, the goal is to stop interior air from reaching cold surfaces while preserving the body’s drainage paths.
6. Fill deep gaps with backer rod (15–30 minutes)
Push closed-cell backer rod into a deep joint with a blunt plastic tool. It should fit snugly and sit slightly recessed, not protrude beyond the surface. As a general guide, choose backer rod about 25% larger than the joint width so it stays in place. Never pack it around a wire so tightly that the wire is pinched or cannot be serviced.
7. Seal exterior joints and penetrations (30–60 minutes)
Apply a continuous bead of flexible automotive sealant to clean, dry surfaces. For a removable roof vent or trim piece, butyl tape is often easier to service later than a permanent adhesive. Install the seal without stretching it; stretched vinyl can shrink and leave a gap at the ends.
For a replacement 51-inch vinyl seal, measure the old seal and the channel before ordering. Press the new seal evenly into place, join the ends neatly, and close the vent or hatch to check compression. Follow the sealant’s cure time, commonly 24–48 hours, before exposing the joint to heavy rain.
8. Test before reinstalling panels (20–40 minutes)
Use a garden hose on a gentle flow, starting below the repair and moving upward. Do not use a pressure washer. Have someone watch the interior with a flashlight and paper towel. Then check for drafts on a cool day, listen for rattles during a short drive, and confirm that doors and panels close without interference.
Leave the area accessible until the repair has passed its water test and the sealant has cured. Reinstall panels only after confirming that no fastener, wire, or drain path was covered.
Mistakes to Avoid
- Do not seal over wet insulation, active rust, or a known leak.
- Do not use household caulk, expanding foam, or rigid adhesive around moving panels unless the product is specifically suitable.
- Do not fill factory drain holes, door-bottom slots, pressure vents, or access points.
- Do not stretch vinyl gaskets during installation.
- Do not use foil tape as the only solution for a gap that flexes or is exposed to standing water.
- Do not trap wires, fuses, plumbing connections, or removable fasteners behind a permanent repair.
- Do not rely on insulation to make a poorly sealed roof vent or window watertight.
How Often
Inspect seals twice a year, ideally before winter and after the hottest part of summer. Also inspect after a major roof repair, an accident, bodywork, or any event that flexes the van. Check the roof, windows, rear doors, sliding-door track area, wheel wells, and plumbing penetrations every three to six months. Replace cracked, hardened, loose, or permanently compressed gaskets rather than covering them with another layer of tape.
When to Call a Pro or Replace
Call an RV, van-conversion, body-repair, or automotive-glass professional when water is entering around a bonded windshield, structural roof seam, fixed window, or damaged body panel. Professional help is also wise when rust has perforated the metal, insulation remains wet after drying, wiring is corroded, or a roof accessory must be removed.
Replace insulation if it is moldy, oil-soaked, crumbling, permanently compressed, or repeatedly damp. Replace a gasket when it no longer rebounds, has splits, or leaves uneven compression marks. A small replacement part costing roughly $10–$50 is usually preferable to repeatedly adding sealant to a failing seal.
FAQ
What is the best product for sealing camper van insulation gaps?
Use insulation seam tape for clean, stationary insulation joints; closed-cell backer rod plus flexible sealant for deep gaps; and butyl tape or a replacement gasket for exterior components that may need future removal. Product compatibility matters more than using the thickest sealant.
Can I use expanding spray foam in a camper van?
Use it only where the manufacturer specifically permits the application and where expansion cannot distort panels, block drains, surround hot equipment, or trap wiring. It is usually a poor choice for thin wall seams and moving doors. Cut-to-fit insulation and flexible seam sealing are easier to control.
Should camper van insulation be completely airtight?
The interior air barrier should be continuous where practical, but the van’s body cavities still need their designed drainage and ventilation. Airtightness must not come at the cost of blocked drain holes or trapped moisture. Seal the interior-facing gaps while preserving paths that let water escape.
How do I know whether a gap is causing condensation?
Look for dampness or frost on cold metal beside an insulation seam, especially after sleeping in the van. A simple test is to dry the area, seal one clearly identified gap, and monitor it through several cold nights. If moisture continues, check ventilation, cooking, showers, wet gear, and roof or window leaks rather than adding more insulation.
Ready to decide? Our #1 pick for 2026 is the Flashlight, inspection mirror, and moisture meter.
Live price & availability on Amazon.