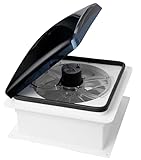
- Top Pick: OUTPRIZE Manual RV Roof Vent Fan, 12V DC 14" Super Quiet
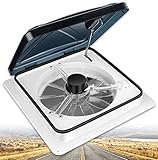
- Best Value: Starvent RV Roof Vent Fan 6-Speed-Reversible
- Premium Choice: RVMATE 14×14 RV Roof Vent Fan, Remote, 12V, White
Last updated: September 18, 2026
Choosing a van roof vent fan is less about finding the fan with the most buttons and more about matching airflow, power use, roof dimensions, and installation requirements to the way you travel. The wrong model can create leaks, drain a house battery overnight, or leave you with a fan that is too loud to sleep beside.
The most common buying mistakes are measuring only the visible ceiling opening, assuming every 14-inch fan fits every van, and comparing advertised speed settings instead of actual power draw and airflow. Buyers also overlook the roof’s corrugation, the thickness of their ceiling build-out, and whether they need reversible airflow. Use this guide to compare the details that matter when you’re deciding how to choose a van roof vent fan in 2026.
As an Amazon Associate we earn from qualifying purchases at no extra cost to you. Product prices and availability are accurate as of the date shown and are subject to change.


- Decide These 3 Things First
- Size: Measure the Cutout, Roof, and Interior Clearance
- Material: Prioritize UV Resistance and Heat Management
- Construction: Look at the Seal, Lid, Motor, and Service Parts
- Comfort and Performance: Compare Airflow, Noise, and Controls
- Price Tiers: Match Features to Your Use
- Warranty: Read What Is Actually Covered
- Delivery and Assembly: Budget for the Installation Details
- Spec Checklist
- Red Flags
- FAQ
Decide These 3 Things First
- Confirm the opening and roof shape. Most RV-style fans are designed for a nominal 14-by-14-inch opening, but the required cutout is often approximately 14 1/4 by 14 1/4 inches. Measure the actual hole, not just the interior trim. Also check whether roof ribs, wiring, solar panels, or a roof rack will interfere with the flange or lid.
- Set your electrical limit. A typical 12-volt fan may draw about 1 to 5 amps depending on speed, with higher consumption when reversing or running at maximum power. Decide whether you will run it from a dedicated battery circuit, a fuse panel, or a portable power station. Budget for correctly sized wire and a fuse.
- Choose airflow direction and control style. Reversible fans can exhaust hot, damp air or bring in cooler air. A remote, thermostat, rain sensor, or automatic lid adds convenience, but each feature increases cost and creates another component that may eventually need service.
Size: Measure the Cutout, Roof, and Interior Clearance
See also: Best Van Water Filter for Refill Stations in 2026: Tested and Ranked • How to Winterize a Van Water System (2026): Step-by-Step
The popular 14-inch category is a useful starting point, but “14 inch” usually describes the intended opening rather than the fan’s full outside dimensions. Exterior flanges can extend to roughly 16 to 17 inches square, and an open lid may reach 8 to 12 inches above the roof. Measure the available roof area before ordering.
Check the distance between roof ribs and the location of crossbars, vents, air conditioners, and solar hardware. A fan needs a flat, sealable surface around the opening. On a curved or ribbed van roof, you may need an adapter, a raised mounting frame, or careful shimming. Do not assume sealant will compensate for a flange that bridges a large gap.
Interior clearance matters too. A fan with a deep trim ring may collide with cabinets, a bed platform, or a ceiling panel. Measure the distance from the roof skin to the finished ceiling and confirm that the supplied trim can be cut or adjusted. If your van has a smaller existing vent, enlarging the opening may require reinforcing the surrounding roof.
Material: Prioritize UV Resistance and Heat Management
Fan lids are commonly made from plastic, while mounting flanges and internal frames may use plastic or metal. UV-stabilized plastic keeps weight and cost down, but inexpensive plastic can become brittle after prolonged sun exposure. Look for a lid described as UV-resistant and inspect whether replacement lids are available.
White or light-colored lids generally absorb less solar heat than dark lids. That does not make the fan a cooling system, but it can reduce heat buildup above the interior ceiling. Metal components can improve rigidity, though they may add weight and require better corrosion protection. For a coastal, snowy, or frequently wet environment, prioritize stainless or corrosion-resistant fasteners and a gasket designed for exterior use.
Also consider the screen. A removable insect screen is easier to clean than a fixed one, and a fine mesh helps block mosquitoes while still allowing airflow. Very fine mesh can add resistance and collect dust faster, so cleanability is as important as mesh density.
Construction: Look at the Seal, Lid, Motor, and Service Parts
A dependable fan is a small roof assembly, not just a motor with blades. The lid should close evenly against a continuous gasket, and the flange should have enough width to provide a reliable seal. A flange around 1 to 2 inches wide is common, but the useful measurement is the flat area that actually contacts your roof or adapter.
Crank-open lids are simple and inexpensive, while powered lids are more convenient. A manual lid can still pair with a powered fan, but you must remember to close it before driving or during heavy rain. If you want unattended ventilation, look for an automatic lid and a rain sensor, while recognizing that those systems add motors, switches, and wiring.
Check whether the motor and fan blade assembly can be accessed from inside the van. A removable screen and accessible screws make it easier to remove dust, pet hair, and debris. Ask whether the manufacturer sells replacement lids, motors, screens, remotes, and trim rings. A low purchase price is less attractive if a broken lid requires replacing the entire unit.
Comfort and Performance: Compare Airflow, Noise, and Controls
Airflow is useful only when the van has somewhere for replacement air to enter. Crack a window or open a second vent on the opposite side to create cross-ventilation. In exhaust mode, a roof fan can help remove cooking odors, humidity, and warm air; it cannot reliably cool the van below outdoor temperature without cooler air entering.
Variable-speed control is more useful than a single high setting. A fan with three to six speeds lets you use a low setting at night and a higher setting after cooking or showering. Reversible operation is valuable in shoulder seasons when you want to draw in fresh air rather than exhaust it.
Manufacturers may publish noise levels in decibels, but ratings are not always measured under the same conditions. Treat a quoted figure as a comparison point, not a guaranteed bedroom experience. Blade balance, roof vibration, mounting quality, and the van’s insulation can affect perceived noise. A 12-volt fan commonly uses about 12 to 60 watts across its operating range, but verify the product’s current draw before sizing your electrical system.
Useful controls include a wall switch, remote, thermostat, and rain sensor. A remote is convenient from bed, but keep a manual control option if possible. Thermostats can cycle the fan automatically, while rain sensors may close the lid when moisture is detected. These features are worthwhile for full-time use but may not justify their cost in a simple weekend setup.
Price Tiers: Match Features to Your Use
For a basic 12-volt roof fan, budget approximately $50 to $90. This tier may include several speeds or reversing, but often has a manual lid, simpler controls, and fewer replacement parts. The RVMATE 14-by-14-inch remote model is an example of a lower-priced option, listed at $55.19, though you should verify the included controls and installation hardware before buying.
Midrange fans generally cost about $90 to $150. This is where you are likely to find quieter operation claims, more speed settings, reversible airflow, stronger trim, and better control options. The OUTPRIZE manual 12-volt model is listed at $109.99, while the Starvent six-speed reversible model is listed at $109.70. The Kohree 14-inch model is listed at $137.77. These prices illustrate the category, not a guarantee of performance.
Premium systems can cost $150 to $350 or more once you include an automatic lid, rain sensor, thermostat, upgraded controls, a mounting adapter, wiring, sealant, and professional installation. Pay for features you will use. If you rarely camp in rain or leave the van unattended, a robust manual-lid fan may offer better value than a feature-heavy system.
Warranty: Read What Is Actually Covered
Look for at least a one-year limited warranty, and check whether it covers the motor, electronics, remote, lid, and labor separately. Some warranties cover parts but exclude water damage, incorrect wiring, installation errors, freezing, or damage caused by driving with the lid open.
Keep the receipt, product label, wiring instructions, and photographs of the installation. Before purchase, confirm how warranty claims work if you buy through a marketplace. A recognizable brand is helpful, but parts availability and responsive support are more useful than branding alone. Replacement lids and motors can extend the life of a fan far beyond its original warranty.
Delivery and Assembly: Budget for the Installation Details
A typical installation requires a jigsaw or nibbler, drill, measuring tools, wire connectors, a fuse, roof-compatible sealant, fasteners, and interior trim. The fan itself may weigh roughly 4 to 10 pounds; an adapter or reinforcing frame can add several more. Check the package weight and dimensions if you are ordering for a tight build or rooftop delivery.
Allow several hours for a first installation, including removing the old vent, cleaning the roof, routing wire, sealing the flange, and testing the lid. Professional installation often adds approximately $200 to $600, depending on roof access, wiring, interior finish, and whether an adapter is required. Do not install in rain or on a contaminated roof surface. Sealant needs the manufacturer’s recommended temperature and curing conditions.
Spec Checklist
| Spec | Budget | Mid | Premium |
|---|---|---|---|
| Typical price | $50–$90 | $90–$150 | $150–$350+ |
| Opening | Usually 14 1/4 by 14 1/4 inches | Usually 14 1/4 by 14 1/4 inches | Confirm exact cutout and adapter needs |
| Power | 12V; about 1–5 amps | 12V; about 1–5 amps | 12V; verify motor, lid, and sensor draw |
| Speed control | One to three settings | Three to six settings | Variable speed, thermostat, or automatic control |
| Air direction | Exhaust only or manual reversal | Powered reversible airflow | Powered reversible airflow with automation |
| Lid | Manual crank or simple lift | Manual or powered | Powered, rain-sensing, or remote-controlled |
| Weight | About 4–7 pounds | About 5–9 pounds | About 7–12 pounds with accessories |
Red Flags
- No clearly stated cutout size, voltage, current draw, or wiring instructions.
- “Whisper quiet” language without a decibel rating or any test conditions.
- A 14-inch label that does not provide the exterior flange dimensions.
- A lid with no visible gasket, drainage path, or replacement part information.
- Remote-only operation with no practical manual override.
- Reviews reporting leaks, melted wiring, seized motors, or batteries draining unusually fast.
- Instructions that omit fuse size, wire gauge, polarity, or roof-sealing guidance.
- A suspiciously low price that excludes the trim ring, remote, screen, or mounting hardware.
FAQ
Is a 14-inch van roof vent fan universal?
No. Many fans use a similar nominal opening, but exterior dimensions, flange shape, trim depth, lid clearance, and wiring vary. Measure the cutout and the flat roof area before ordering.
How powerful should a van roof vent fan be?
For most vans, a 12-volt fan with several speeds and a maximum draw of roughly 1 to 5 amps is a practical range. The best choice depends on interior volume, insulation, window ventilation, and whether you need to remove cooking moisture or simply maintain airflow while sleeping.
Should the fan exhaust or intake air?
Reversible operation is the most flexible choice. Exhaust mode removes hot, humid, or smoky air, while intake mode can bring in fresh air when conditions outside are more comfortable. Open a window or second vent to make either mode work better.
Can I install a roof fan myself?
Yes, if you are comfortable cutting the roof, routing 12-volt wiring, fitting a fuse, and creating a durable weather seal. Plan on several hours for a first installation. If the roof is ribbed, curved, heavily finished, or already crowded with wiring and solar equipment, professional installation may be worth the added $200 to $600.
Ready to decide? Our #1 pick for 2026 is the Typical price.
Live price & availability on Amazon.