Last updated: July 3, 2026

The Van Conversion Bible: The Ultimate Guide to Converting a Campervan
Sprinter Van Conversion: Building Your Dream Home on Wheels
Converting a Mercedes Sprinter into a livable, functional van is one of the most rewarding DIY projects you can take on. The Sprinter’s generous interior dimensions, high roof clearance, and long wheelbase give you a blank canvas that can accommodate a full bed, kitchen, bathroom, and workstation all in one vehicle. Whether you are planning a full-time build or a weekend adventure rig, this guide covers the essential gear and tips to make your Sprinter van conversion a success.
1. Sprinter Van Conversion Kit with Flooring and Wall Panels
Starting with a quality conversion kit takes the guesswork out of your build. Kits designed specifically for Sprinters include pre-cut flooring panels, wall liner pieces, and window covers sized to the exact interior dimensions of 144 or 170 wheelbase models. This saves dozens of hours of measuring and cutting while giving your van a finished, professional appearance from day one.
Prime
The Van Conversion Bible: The Ultimate Guide to Converting a Campervan

As an Amazon Associate we earn from qualifying purchases. Product prices and availability are accurate as of the date/time indicated.
2. Van Life Roof Vent Fan for Sprinter
Ventilation is critical in a Sprinter conversion, especially since the steel van body can become extremely hot in summer. A quality roof vent fan like the Maxxair or Fan-Tastic series mounts in a standard 14×14 inch roof cutout and provides powerful airflow for cooking odors, moisture, and heat removal. Most models include rain sensors and variable speed settings for year-round use.
Prime
Sprinter Van Conversion Guide: A Complete Practical Guide to Planning, Building and Living the Van Life (Essential Guides to Crafts and Hobbies: ... and Essential Skills for Everyday Makers)
As an Amazon Associate we earn from qualifying purchases. Product prices and availability are accurate as of the date/time indicated.
3. Sprinter Sliding Door Window Covers with Insulation
Window covers serve double duty in a Sprinter build: they block light for sleeping and add a layer of insulation against heat and cold. Custom-fit covers made from Reflectix or foam-backed vinyl install with suction cups or magnetic edges and can be deployed or removed in seconds. Having covers for every window keeps your sleeping space dark and private no matter where you park.![Sprinter van camper conversion DIY guide [Booklet]](https://m.media-amazon.com/images/I/61alW+soeyL._SL1360_.jpg)
Prime
Sprinter van camper conversion DIY guide [Booklet]
As an Amazon Associate we earn from qualifying purchases. Product prices and availability are accurate as of the date/time indicated.
Sprinter Conversion Buying Guide
See also: July 2026 Road-Trip Essentials: Stay Cool and Powered Off-Grid • How to Choose a Rooftop Tent: Complete Buying Guide (2026)
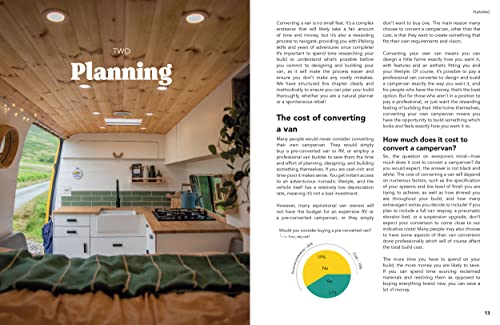
- Plan your layout first: Sketch your floor plan on paper before buying any materials. Decide on bed orientation (lengthwise vs transverse), kitchen placement, and garage storage needs.
- Insulate thoroughly: Use a combination of spray foam in cavities, Thinsulate or polyiso boards on flat panels, and Noico or Kilmat sound deadener on the floor and lower walls.
- Electrical first: Run all wiring before installing wall panels and cabinetry. Adding circuits later is extremely difficult once walls are finished.
- Weight distribution: Keep heavy items (batteries, water tank, tools) low and centered between the axles for stable handling.
- Moisture management: Use a vapor barrier behind insulation and vent your van daily to prevent mold and condensation buildup.
- Professional vs DIY: Budget $3,000-$8,000 for a high-quality DIY build or $20,000-$80,000+ for a professional conversion.
Final Thoughts
A well-executed Sprinter van conversion creates one of the most capable and comfortable mobile homes available. The key to success is careful planning, quality materials, and patience. Take your time with insulation and electrical work since these foundational systems are difficult to redo once the build is complete. The investment of time and money pays off every day you wake up in a beautiful location with a fully functional home right outside your door.