Last updated: October 7, 2026
- Ram ProMaster Van Conversion Guide: Build in the Right Order
- 1. Choose the van and verify its usable dimensions
- 2. Make a layout that survives a tape-measure check
- 3. Address leaks, rust, and insulation before closing the walls
- 4. Install electrical and utilities while everything is accessible
- 5. Finish the interior, then build cabinetry to the van
- Common ProMaster fitment constraints
- Final checks before the first trip
Ram ProMaster Van Conversion Guide: Build in the Right Order
A successful Ram ProMaster van conversion starts with measuring the exact model and planning around its front-wheel-drive layout, wheel wells, and roof height—then proceeds through moisture control, wiring, wall and ceiling finishes, cabinetry, and final fit checks. The ProMaster’s wide interior and relatively low step-in height make it a flexible camper platform, but dimensions vary by model year, wheelbase, and roof, so don’t order materials from a generic floor plan alone.
1. Choose the van and verify its usable dimensions
See also: MaxxFan Deluxe vs Fantastic Fan for Vans: Which to Choose? • Can I Lay LVP in a Van? Van Flooring Guide
ProMasters have been sold in multiple wheelbases and body lengths, with low, high, and—in some model years—super-high roof options. Published cargo dimensions are useful for narrowing a choice, not for cutting plywood: trim, ribs, doors, flooring, and wheel-well covers reduce usable space. Measure your actual van after purchase, including the narrowest points and the height where you intend to install a bed or cabinets.

MAXXAIR Maxxfan Deluxe Vent, Fan and Vent Cover All in One - Powerful 10-Speed Reversible Fan with Thermostat, Built-in Rain Cover, Remote Control, Intake & Exhaust Fan, Smoke (00-07500K)
Included for 'Ram ProMaster Van Conversion Guide' because the listing specifies Fan and Vent Cover All in One and Powerful 10-Speed Reversible Fan with Thermostat, details this guide uses to compare options.
View on Amazon
Maxx Air 0007500K MaxxFan Smoke Grey Deluxe Remote Fan Lid
Included for 'Ram ProMaster Van Conversion Guide' as a relevant option in this category; details come from the product listing.
View on Amazon
Maxxair MAXXFAN DELUXE 10-Speed Fan Motor with 12 Inch Fan, Anti-Rattle Lid
Included for 'Ram ProMaster Van Conversion Guide' because the listing specifies Anti-Rattle Lid, details this guide uses to compare options.
View on Amazon
3M Thinsulate SM600L Automotive Camper Van Insulation 60 Inch x 360 Inch (5 Feet x 30 Feet)
Included for 'Ram ProMaster Van Conversion Guide' as a relevant option in this category; details come from the product listing.
View on Amazon3M Thinsulate SM600L Automotive Camper Van Insulation 60 Inch x 120 Inch (5 Feet x 10 Feet)
Included for 'Ram ProMaster Van Conversion Guide' as a relevant option in this category; details come from the product listing.
View on Amazon| Common ProMaster configuration | Approx. cargo length at floor | Approx. interior standing height | What it tends to suit |
|---|---|---|---|
| 136-inch wheelbase, high roof | About 105 in | About 76 in | Compact, two-person layouts with a shorter bed or convertible seating |
| 159-inch wheelbase, high roof | About 122 in | About 76 in | Common balance of living space and maneuverability |
| 159-inch wheelbase, extended body, high roof | About 145 in | About 76 in | Fixed bed, more storage, or a larger galley |
| 159-inch wheelbase, super-high roof, where available | About 145 in | About 86 in | More standing and overhead clearance, with a taller exterior profile |
These are approximate nominal figures; verify the model-year specifications and measure the van itself. Width also changes with height: the widest body area is not the same as the space between wheel wells. A transverse bed may fit some occupants comfortably, but the van’s interior width tapers and wall finishes take up room. Mock up the mattress with cardboard or tape before committing.
Front-wheel drive means there is no rear driveshaft tunnel to plan around, and the relatively low floor can help with entry and interior height. In return, keep heavy equipment low and sensibly distributed, and avoid placing added weight far behind the rear axle. Check the door, seat, airbag, and vehicle upfitter information before drilling or routing wires.
2. Make a layout that survives a tape-measure check
Sketch the bed, galley, water, batteries, and circulation space at full scale on the floor. Include finished wall thickness, cabinet faces, door swings, and access to service panels. A layout that works on paper can fail when a sliding-door opening, seat belt, wheel arch, or cab seat gets in the way.
- Short trips and simple builds: A portable power station, removable bed platform, and basic storage reduce cost and keep the van adaptable.
- Frequent travel or remote work: Plan fixed wiring, ventilation, a serviceable electrical cabinet, and a bed that doesn’t block daily access.
- More room needed: A longer body can support a fixed bed and galley, but check parking length, turning needs, and payload before choosing it.
- First build with limited tools: Use fewer custom curves and build modular boxes that can be removed for repair.
Before building, check the door opening dimensions for every large item you plan to bring inside. A mattress, refrigerator, or finished cabinet may not pass through a narrowed opening after trim or a partition is installed.
3. Address leaks, rust, and insulation before closing the walls
Inspect the roof seams, windows, floor, and existing body penetrations for water entry and corrosion. Repair leaks before insulating; trapping moisture behind a finished wall can lead to rust, odors, and damaged materials. Clean and protect bare metal with a compatible automotive coating, following its preparation and cure instructions.
There isn’t one insulation material that is best for every ProMaster. Closed-cell foam board is light and provides useful thermal resistance, but it must be cut around ribs and fitted without blocking drainage paths. Flexible closed-cell products can conform to irregular areas, while mineral wool requires careful retention and moisture-aware detailing. Don’t fill cavities blindly or cover factory drains, wiring, or access points. Avoid products that absorb water or adhesives and coatings not intended for vehicle use.
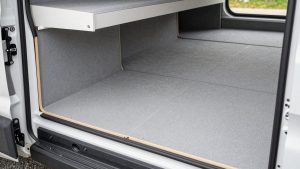
Add a continuous, durable floor appropriate to your load and moisture exposure. Account for the floor’s thickness when calculating standing height, cabinet height, and door clearances. A small floor sample and a wall mock-up can prevent costly interference later.
4. Install electrical and utilities while everything is accessible
Plan the system around actual loads rather than choosing a battery by habit. List each device’s watts and expected hours of use, then estimate daily energy: watts × hours ÷ 1,000 = kilowatt-hours. For example, a 40-watt device used for five hours consumes about 200 watt-hours per day, before conversion losses. Add every load and allow a reserve for cloudy days, cold weather, and battery aging.
Battery capacity, solar input, alternator charging, and inverter size are separate decisions. A larger inverter does not provide more stored energy. Use properly sized wire, overcurrent protection near power sources, secure battery mounting, and components rated for the system voltage and environment. High-current wiring and vehicle charging connections deserve particular care; have a qualified professional review work you’re unsure about.
Install wiring, ventilation ducts, water lines, and service access before covering the walls. Photograph routes and label both ends of each cable. Keep wiring away from sharp edges, hot surfaces, moving hardware, and future screw locations. For plumbing, make shutoffs and winterization points reachable rather than hiding them behind fixed cabinetry.
5. Finish the interior, then build cabinetry to the van
Fit wall and ceiling panels only after checking that wiring and insulation are complete and that fasteners won’t contact hidden systems. Use attachment points suitable for the van’s structure; don’t assume every thin rib or trim panel can carry a cabinet’s weight. Leave room for body flex, and secure furniture against movement in a collision.
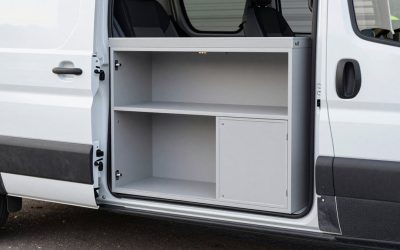
Cabinet boxes are easiest to build as separate, square modules and then fit to the van’s curved walls. Use templates for the final side panels instead of expecting a straight cabinet back to match the body. Keep heavy items—water, batteries, tools—low and close to the vehicle’s center, while making fuses, pumps, and connectors accessible.
Before permanent fastening, test the sliding door, rear doors, seats, bed conversion, and every drawer through their full travel. Check that cabinets don’t obstruct emergency exits or seat belts. A few millimeters can matter where a door seal, latch, or drawer front meets a curved wall.
Common ProMaster fitment constraints
- Bed width: Interior width varies with height and wall curvature; test the finished-wall measurement, not the exterior body width.
- Wheel wells: They limit low cabinet and bed-platform layouts. Build around measured wheel-well dimensions and leave room for service access.
- Roof height: Insulation, ceiling panels, and floor build-up reduce standing clearance. Measure at several points, especially beneath roof ribs.
- Payload: Add the weight of occupants, water, batteries, furniture, appliances, and cargo. Use the specific vehicle’s door-jamb ratings and weigh the completed van; don’t rely on a generic payload figure.
- Curved surfaces and doors: The walls taper, and the sliding-door opening can constrain galley depth. Make cardboard templates before cutting expensive panels.
- Exterior additions: Roof fans, racks, and solar panels affect total height and may need model-specific brackets. Confirm fitment and sealing details for the exact roof and year.
Final checks before the first trip
A careful Ram ProMaster build is less about maximizing built-ins than keeping the van safe, serviceable, and suited to how you travel. Recheck fasteners, wiring protection, door operation, ventilation, and load distribution after the first short drive. Look for rattles, loose fittings, water leaks, and warm electrical connections before a longer trip. For a Dodge ProMaster conversion—the name used on some earlier model years—verify parts and body dimensions by year, since trim and fitment can change.