- Top Pick: Furrion 10-Blade, 14" RV Rooftop Vent Exhaust Fan with Lid, Four Fan Speeds, Push-Button Controls, Removable Insect Screen, Flush-Mount Design for 2" to 7" Thick Roofs, White – FVF14D90R6A-PS-AM
- Best Value: Living in a Bubble Magnetic Insulated Blackout MaxxAir Fan Cover for Sprinter, RVs and other Campervans, Universal Size, Snug Fitting RV Roof Vent Covers for Privacy, Fantastic Fan Vent Insulator
- Premium Choice: Kakalote 12V RV Roof Vent Ventilation Ceiling Exhaust Fan Motorhome Caravans Exhaust Cooling Fan 60CFM
Last updated: September 9, 2026
Cutting a hole in your van’s roof for the first time is nerve-wracking, but a roof vent fan is one of the highest-impact upgrades you can make for comfort. It pulls hot, humid air out year-round, kills condensation before it turns into mold, and runs on a fraction of the power your fridge uses. Whether you’re upgrading an old manual vent or installing one from scratch, the process is very doable in a weekend with basic tools.
Below we’ll walk through picking the right fan, prepping the roof, wiring it in, and sealing everything so it stays leak-free for years. We’ve also included a few accessories worth grabbing at the same time, since ordering everything together saves you a second trip to the hardware store.
As an Amazon Associate we earn from qualifying purchases at no extra cost to you.




⚡ Save on Your Next PC — Amazon Prime
Prime members get fast free shipping on the systems above, plus early access to Prime Day & Black Friday PC deals. New members get a 30-day free trial.
Watch: How to Install a Roof Vent Fan in Your Campervan — Video Review
Choosing the Right Fan for Your Build
See also: Best Van Awning for Campers: Rack-Mount, Portable and Freestanding Options Sorted • In-Depth Review: Goal Zero Yeti 1500X Portable Power Station
Most campervan roof fans fall into two categories: 14-inch powered exhaust fans that mount into a standard Fantastic Fan or MaxxAir-style opening, and smaller 6-inch replacement fans used inside an existing vent housing. Get this decision right before you buy anything else.
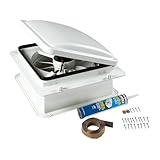
- If you’re starting from a bare roof or replacing a manual crank vent, a full unit like the Furrion 14″ 10-Blade Exhaust Fan is the simplest path. It’s a flush-mount design built for 2″ to 7″ roof thickness, has four fan speeds, and includes a removable insect screen.
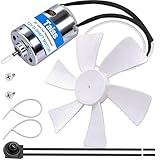
- If your existing vent housing and lid are still in good shape and only the motor or blade has failed, a motor-and-blade swap like the Taiss 6″ 12V D-Shaft Fan Motor is far cheaper than replacing the whole unit.
- Budget builds or secondary vents (over a kitchen or wet bath) often use a compact 12V fan like the Kakalote 60CFM unit, which is quieter and pulls less current for smaller spaces.
- If you need the housing, lid, and fan as one bundle at a lower price point than name-brand units, something like the 14″ Universal RV Roof Vent with 12V Fan gives you all three parts matched to fit.
Tools and Materials You’ll Need
Gather everything before you cut. Roof work goes faster when you’re not climbing down for a forgotten tool.
- Jigsaw or oscillating multi-tool for cutting the roof opening
- Drill with bits sized for your screws, plus a step bit if running new wire through the roof
- Butyl tape and self-leveling sealant (Dicor or equivalent) rated for RV roofing
- 12V wire (14-16 gauge is typical), inline fuse, and a switch if the fan doesn’t include one
- Caulk gun, gloves, and a tape measure
Cutting and Prepping the Roof Opening
Most 14″ fans require a 14″ x 14″ rough opening, but always confirm against the fan’s install template before cutting, since it varies slightly by brand.
- Mark the opening between roof ribs, ideally centered over a bathroom, kitchen, or sleeping area for the best airflow benefit.
- Drill a pilot hole at one corner, then cut along your marked lines with a jigsaw set to a fine-tooth blade.
- Sand the cut edges and check your roof thickness against the fan’s rated range (2″ to 7″ for most flush-mount units) so the mounting flange sits flush.
- Dry-fit the fan housing before applying any sealant to confirm the fit and check for interference with interior cabinetry below.
Wiring and Mounting the Fan
Powered fans run on 12V DC and typically draw between 0.5 and 2 amps depending on speed setting, so a dedicated fused circuit off your fuse block is standard practice.
- Run wire from your fuse block to the roof opening before mounting, leaving a few extra inches of slack.
- Apply a bead of butyl tape around the underside of the mounting flange, then set the fan into the opening and screw it down evenly to avoid warping the flange.
- Connect wiring per the included diagram, matching polarity carefully. Most units like the RVLOVENT 10-Speed Reversible Fan and the Kakalote model wire the same way: positive, negative, and an optional thermostat lead.
- Test the fan on all speeds and in both intake/exhaust directions (if reversible) before finishing the seal.
Sealing the Roof Properly
This step determines whether your install lasts ten years or leaks in ten months. Don’t rush it.
- Apply a generous, continuous bead of self-leveling sealant around the entire perimeter of the flange, working it into every screw head.
- Avoid non-leveling silicone caulk on horizontal roof seams; it cracks with UV exposure and temperature swings over a season or two.
- Let the sealant cure fully (check the product’s cure time, often 24 hours) before driving over rough roads.
- Recheck the seal every 6 months and reapply sealant at the first sign of cracking.
Tips
- Add a magnetic insulated cover, such as the Living in a Bubble Blackout Fan Cover, for winter nights when you want to stop heat loss through the vent without removing the fan.
- Wire in a thermostat-capable model if you plan to boondock in hot climates, so the fan cycles on automatically once the interior hits a set temperature.
- Keep the included insect screen clean; a clogged screen is the most common reason people think their fan “stopped working.”
- Label your fuse block circuit clearly so future troubleshooting doesn’t turn into a guessing game.
Frequently Asked Questions
Do I need a powered fan, or is a manual vent enough?
A manual crank vent lets air in but does little to actively pull humid or hot air out. A powered exhaust fan, even a compact 60CFM unit, moves far more air and noticeably reduces condensation on windows and cabinetry, especially in cooler climates where moisture buildup is a bigger issue than heat.
What size hole do most 14″ fans require?
The vast majority of 14″ RV roof fans use a standard 14″ x 14″ rough opening, which matches older Fantastic Fan and MaxxAir cutouts. This is why replacing an existing vent with a new fan is usually easier than a first-time install; you’re reusing the same hole.
Can I install a roof fan without any prior wiring experience?
Yes, the wiring itself is simple 12V DC work: positive, negative, and sometimes a third accessory wire. The main things to get right are using a properly sized fuse, matching polarity, and keeping wire runs protected from chafing against metal roof ribs.
How long does a typical roof fan motor last?
Most quality 12V fan motors last 5 to 8 years of regular use before the bearings wear out. Since replacement motors like the Taiss 6″ D-Shaft unit are inexpensive, many owners choose to replace just the motor rather than the entire housing when a fan finally dies.
Conclusion
A roof vent fan is one of the few upgrades that pays off every single day you’re on the road, from clearing morning condensation to keeping your rig livable in summer heat. Take your time on the cutout and sealing steps, since those are the parts that determine long-term reliability, and the fan itself will likely outlast several other systems in your build.