Last updated: September 9, 2026
Running water in a van isn’t a luxury add-on anymore, it’s the difference between a comfortable build and one you’re constantly fighting. Whether you’re plumbing a full sink-and-shower setup or just want reliable pressure for a jug-fed system, the pump is the heart of it. Get the wrong pump, wire it wrong, or skip the pressure switch, and you’ll end up with a system that sputters, drains your battery, or floods a cabinet.
This guide walks through choosing the right pump for a DIY van build, installing it correctly, and avoiding the most common wiring and plumbing mistakes. We’ll also clear up a surprisingly common mix-up: automotive engine water pumps and RV fresh water pumps share a name but do completely different jobs.
As an Amazon Associate we earn from qualifying purchases at no extra cost to you.




⚡ Save on Your Next PC — Amazon Prime
Prime members get fast free shipping on the systems above, plus early access to Prime Day & Black Friday PC deals. New members get a 30-day free trial.
Watch: How to Install a Van Life Water Pump — Video Review
Choosing the Right Pump for Your Build
See also: Best Van Awning for Campers: Rack-Mount, Portable and Freestanding Options Sorted • In-Depth Review: Goal Zero Yeti 1500X Portable Power Station
Most van conversions use one of two setups: a fixed 12V diaphragm pump plumbed into a tank, or a portable electric pump that sits on top of a jug for simpler builds.
- Fixed diaphragm pumps like the ECO-WORTHY RV Fresh Water Pump (12V DC, 3.5GPM, 45PSI) are self-priming and include a built-in pressure switch, which cycles the pump on and off automatically as you open and close a faucet. This is the standard choice for a sink, shower, or multi-fixture system.
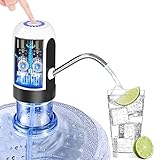
- Portable jug pumps like the USB-charging Water Bottle Pump work well for minimalist builds using 2-5 gallon jugs. No plumbing or wiring into your electrical system required, just drop it in and go.
- For a fixed system, aim for 40-55 PSI and 3-4 GPM. Anything lower feels weak at the tap; anything higher stresses fittings and drains batteries faster than needed.
Don’t Confuse This With an Engine Water Pump
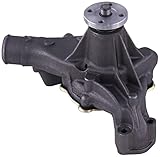
Search “water pump” on any auto parts site and you’ll get flooded with engine cooling parts, not drinking water pumps. Products like the Water Pump for 1996-2014 Chevy GMC Cadillac Isuzu Workhorse 4.3/5.0/5.7L, the ACDelco Gold 252-711 (88926225), the Gates 43114 Premium Water Pump, and the A-Premium Water Pump for Chrysler Town & Country/Voyager/Dodge Caravan are all engine coolant pumps that circulate antifreeze through your van’s engine block. They have nothing to do with your fresh water tank, and installing one requires draining coolant, removing belts, and torquing to engine spec, an entirely different job with different tools. If you’re building a water system for living space, you want a 12V DC diaphragm or portable pump, not one of these.
Tools and Materials You’ll Need
- Pump, mounting screws, and rubber isolation feet (usually included)
- 1/2 inch or 3/8 inch barbed fittings matching your tubing size
- Inline water filter (recommended, install before the pump inlet)
- 14-16 AWG marine-grade wire, inline fuse holder, and a 5-7A fuse
- Wire strippers, crimp connectors, screwdriver, and Teflon tape
Step-by-Step Installation
Mount the pump low, below the tank’s water line if possible, so gravity assists priming. Secure it to a flat surface with the rubber feet to cut down on vibration noise, a common complaint with diaphragm pumps.
- Run tubing from the tank outlet through a filter, into the pump’s inlet port (usually marked “IN”).
- Connect the pump’s outlet to your plumbing manifold or directly to the faucet line.
- Wire the positive lead through an inline fuse to your 12V distribution panel, and ground the negative lead to your chassis or battery negative bus.
- Tighten all barbed fittings with hose clamps. Push-fit alone loosens under vibration on rough roads.
Priming and Testing the System
Fill the tank before powering the pump for the first time; running it dry can burn out the diaphragm in seconds. Open a faucet, switch on the pump, and let it run until water flows steady and air stops sputtering out, usually 15-30 seconds. Check every fitting for drips under pressure, then close the faucet and confirm the pump shuts off on its own within a second or two.
Tips
- Install a check valve on the tank outlet to stop water from draining back when the pump is off.
- Wrap the pump in foam or mount it on a rubber pad, diaphragm pumps are notoriously loud in a small van interior.
- Keep the inline fuse close to the power source, not the pump, so the whole run of wire is protected.
- Winterize by draining the pump and lines fully if you’ll see temps below freezing; trapped water cracks the housing.
Frequently Asked Questions
Why does my pump cycle on and off even with the faucet closed?
This almost always means a leak somewhere in the line or a faulty check valve letting pressure bleed off. Inspect every fitting under pressure and replace any that show weeping or corrosion.
Can I use an engine water pump for my van’s drinking water system?
No. Engine water pumps like the ACDelco Gold 252-711 or Gates 43114 are built to move coolant at engine temperatures and pressures, not potable water, and they aren’t self-priming or designed for low-voltage DC wiring used in RV systems.
How much amperage draw should I expect?
A typical 3.5 GPM, 45 PSI diaphragm pump like the ECO-WORTHY draws around 5-8 amps at full load, so size your fuse and wire gauge accordingly and account for it in your battery budget.
Do I need a filter before the pump?
Yes. Sediment and debris are the leading cause of premature diaphragm wear. A simple inline filter ahead of the pump inlet adds negligible cost and significantly extends pump life.
Conclusion
A properly installed water pump is one of the more satisfying upgrades in a van build, quiet when idle, steady under pressure, and easy to troubleshoot once you understand the basics. Match the pump to your build size, wire it with proper fusing, and don’t skip the filter, and you’ll get years of reliable service out of a $40-90 part.