Last updated: October 7, 2026
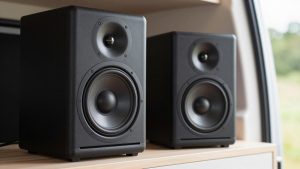
The best in wall speakers for a van or compact room are usually 6.5-inch, 8-ohm models with a mounting depth under 3 inches, paintable magnetic or snap-on grilles, and a sealed back box or carefully treated cavity; larger 8-inch speakers can sound fuller, but they demand more wall depth and structural clearance.
Quick picks by situation
| Situation | Best fit | Why | Watch out for |
|---|---|---|---|
| Shallow van wall or thin partition | 6.5-inch shallow in-wall speaker, approximately 2.5–3 inches deep | Easier to fit between framing, wiring, and insulation | Measure behind the panel; nominal speaker depth is not the entire required cavity depth |
| Small bedroom, office, or lounge up to about 150 square feet | Pair of 6.5-inch, 8-ohm speakers | Good balance of bass, dispersion, amplifier load, and installation size | Do not place both speakers in one corner or directly beside the listener |
| Large living room or open-plan area | Pair of 8-inch speakers, or multiple 6.5-inch pairs | More cone area and greater output before distortion | Large cutouts can weaken thin cabinetry or wall panels |
| Rental-style or reversible installation | Surface-mount speakers or compact bookshelf speakers | Avoids cutting a permanent opening | They are not technically in-wall speakers, but may be the better ownership decision |
| Mostly spoken audio and television | 6.5-inch two-way model with a pivoting tweeter | Clear dialogue and easier aiming from an off-center seat | A pivoting tweeter helps high frequencies, not bass response |
What to compare before buying
See also: Can You Listen to Apple Music Offline? • Top Radeon Graphics Deals
Speaker size and output
Most in-wall speakers use a 5.25-inch, 6.5-inch, or 8-inch woofer. A 6.5-inch model is the safest starting point for mobile living spaces: it provides enough cone area for music and films without requiring the oversized cutout of an 8-inch design. A 5.25-inch speaker can work well in a narrow bunk area or small office, particularly when paired with a subwoofer, but it will generally produce less low-frequency energy.
An 8-inch woofer does not automatically sound better. It can move more air and play louder with less strain, but the enclosure, wall cavity, amplifier, and placement matter just as much. In a van, a large cavity may also transmit vibration into cabinets and body panels. If you choose an 8-inch pair, use isolation material around the back and frame rather than allowing the speaker basket to contact thin metal.
Installation depth and cutout dimensions
Installation depth is the distance from the front of the wall surface to the rearmost part of the speaker. The cavity must be deeper than that measurement, with additional clearance for the grille, wiring bend, insulation, and movement of the woofer.
For example, a speaker listed at 2.5 inches deep may need roughly 3 inches of unobstructed space once the cable connector and rear clearance are considered. In a van, inspect for wiring looms, roof ribs, plumbing, window mechanisms, and exterior bodywork before marking the cutout. A stud finder alone is not sufficient because vehicle construction often uses irregular metal framing and bonded panels.
Use the manufacturer’s cutout template rather than measuring the visible grille. A typical 6.5-inch in-wall speaker may require a cutout around 7.5 to 8 inches across, while an 8-inch model may need approximately 9.5 to 10 inches. Those dimensions vary considerably between brands.
Impedance and amplifier compatibility
Most in-wall speakers are rated at 8 ohms and work with conventional stereo amplifiers, AV receivers, and many compact streaming amplifiers. Some models offer selectable 4-ohm or 8-ohm operation, while others use an impedance selector for multi-room installations.
Two 8-ohm speakers connected in parallel present a 4-ohm load to the amplifier. That can be acceptable, but only if the amplifier is rated for 4-ohm operation and has adequate ventilation. In a van, low-voltage compact amplifiers are attractive because they can run from a 12-volt electrical system, but check their output specification at the actual supply voltage rather than relying on a headline wattage.
For a normal stereo pair, an amplifier producing approximately 30 to 100 watts per channel into 8 ohms is a sensible range. More power is not harmful when used carefully; clipping from an undersized amplifier is often more damaging than clean power with a higher rating.
Dispersion, tweeter adjustment, and listening position
In-wall speakers are flush with the surface, so their sound spreads differently from a speaker that can be angled toward the listener. A wide-dispersion design is useful in a lounge where people move around. A pivoting tweeter is valuable when the speaker must be mounted above a sofa, beside a bed, or off the room’s centerline.
Pivot the tweeter toward the main listening position, but do not aim both tweeters directly at one person’s head if the room is shared. For stereo music, place the left and right speakers at equal heights and as far apart as the room permits. A practical starting point is to form an approximate triangle between the two speakers and the primary listening position.
Paintable grilles and trim
Paintable grilles help an installation disappear into a wall, but painting them incorrectly can restrict the grille openings. Remove the grille when possible, spray several thin coats from a distance, and avoid thick roller-applied paint over the perforations. If the grille uses magnets, keep paint away from the magnetic seating surfaces.
Some grilles are magnetic and nearly flush; others use plastic tabs or spring clips. Magnetic grilles are convenient for removal and cleaning, while tabbed grilles may hold securely during vehicle vibration. Check that the frame has enough adjustment range for your panel thickness. A speaker designed for standard drywall may not clamp correctly to thin plywood, composite board, or a van’s layered wall construction.
Representative models and specifications
The following products illustrate the main trade-offs among established in-wall designs. Specifications can vary by production revision, so confirm the current manufacturer sheet before cutting the wall.
| Model | Nominal size | Impedance | Approx. depth | Notable features | Best suited to |
|---|---|---|---|---|---|
| Polk Audio RC65i | 6.5-inch woofer | 8 ohms | About 2.5 inches | Moisture-resistant design, aimable tweeter, paintable grille | Shallow installations and compact rooms |
| Polk Audio RC80i | 8-inch woofer | 8 ohms | About 3.25 inches | Moisture-resistant construction, aimable tweeter, paintable grille | Larger rooms needing more low-end output |
| JBL Studio 2 6IW | 6.5-inch woofer | 8 ohms | About 3.25 inches | Two-way design, pivoting tweeter, paintable grille | Music and television in medium-sized rooms |
| Klipsch R-5502-W II | 5.25-inch woofer | 8 ohms | About 3.6 inches | Horn-loaded tweeter, aimable high-frequency section, paintable grille | Dialogue-focused systems and narrow wall sections |
| Yamaha NS-IW280CWH | 6.5-inch woofer | 8 ohms | About 3 inches | Two-way design, adjustable tweeter, paintable grille | General-purpose stereo installations |
How to plan an in-wall installation
- Map the wall. Remove trim or an inspection panel and identify framing, electrical cables, water lines, insulation, and exterior metal. Never rely only on the desired speaker position.
- Confirm cavity depth. Compare the available depth with the speaker body, connector, and required rear clearance. If the speaker is deeper than the wall, choose a shallower model instead of compressing the woofer or cutting structural material.
- Use a temporary test position. Hold a cardboard circle matching the cutout against the proposed location. Sit in the main listening position and check sight lines, cabinet doors, bed movement, and access to the grille.
- Cut a small inspection opening first. This reduces the risk of hitting hidden obstructions and lets you verify the real cavity before making the full cutout.
- Add acoustic isolation. Use speaker gasket tape around the frame. In a metal-bodied van, place suitable damping or a purpose-made back enclosure behind the speaker where safe and ventilated. Do not block the woofer or trap heat around the amplifier.
- Leave serviceable wiring. Run extra cable length, label both ends, and protect the cable from sharp metal edges with grommets or conduit. Vibration can loosen poorly supported connections.
- Install and test before final painting. Check polarity, listen for rattles, and verify that the grille fits without touching the cone or surround.
Ownership realities in a van
The first problems are usually not blown drivers. They are rattling trim, loose grille clips, moisture exposure, compressed gaskets, and cables rubbing against metal. Retighten the mounting screws after the first several trips, but stop when the frame is secure; overtightening can warp the frame or damage a thin wall panel.
Keep dust and cooking grease off the grille. Vacuum with a soft brush rather than pushing debris through the perforations. If condensation is common, choose a moisture-resistant model, improve ventilation, and avoid assuming that “moisture-resistant” means suitable for direct rain or continuous outdoor exposure.
Expect a pair of reputable 6.5-inch in-wall speakers to occupy a broad general-market price range of roughly $100 to $500, with premium architectural models costing more. Budget for cable, gasket tape, a back enclosure or damping material, a compatible amplifier, and replacement trim hardware. The least expensive speaker is not the least expensive installation if it requires enlarging the opening or rebuilding the wall.
Bottom line
For most van conversions and small rooms, choose a pair of 6.5-inch, 8-ohm speakers with approximately 2.5 to 3 inches of depth, aimable tweeters, and paintable grilles. Choose 8-inch models only when the wall has enough clearance and the room genuinely needs greater output. Before buying the best in wall speakers for your project, prioritize the actual cavity, amplifier load, listening geometry, and service access over woofer size or cosmetic grille design.