Last updated: October 7, 2026
- Ram ProMaster Windows Guide: Types, Sizes & Best Options (2026)
- Window types compared
- Cutout dimensions and placement: measure the van, not the listing
- Which ProMaster camper window suits your build?
- Ventilation and condensation: what a window can and cannot do
- Installation and ownership details that matter
Ram ProMaster Windows Guide: Types, Sizes & Best Options (2026)
The best Ram ProMaster windows depend on where you’ll cut, how you use the van, and whether you value low cost, ventilation, or a close-to-factory fit: choose a fixed bunk window for a simple bed-area view, a slider for controllable airflow, or an awning window when you want ventilation in light rain.
Before buying, match the window to your van’s exact generation, body side, and wheelbase. Wheelbase alone does not determine window fit: 1500, 2500, and 3500 models can share wheelbases, while body length, roof height, door layout, and model year affect available flat mounting areas. Treat any advertised cutout measurement as product-specific—not as a universal ProMaster opening size.

JMTAAT Rear Pair Window Glass Compatible with 2014-2024 Ram ProMaster
Included for 'Ram ProMaster Windows Guide: Types, Sizes & Best Options' as a relevant option in this category; details come from the product listing.
View on Amazon
Rain Guards for Ram ProMaster 2014-2025, Out-Channel Window Visor Shields Vent Deflector Shade Wind Dark Smoke 2015 2016 2017 2018 2019 2020 2021 2022 2023 2024, Tape-On Outside-Mount, 4PCS
Included for 'Ram ProMaster Windows Guide: Types, Sizes & Best Options' because the listing specifies Tape-On Outside-Mount and 4PCS, details this guide uses to compare options.
View on Amazon
VANNCAMP Front Door Window Covers(Pair) for Ram Promaster, 2014-current, Magnetic Insulated Blackout Window Sunshade, Foldable Design, AllSeasonGuard
Included for 'Ram ProMaster Windows Guide: Types, Sizes & Best Options' because the listing specifies 2014-current and Magnetic Insulated Blackout Window Sunshade, details this guide uses to compare options.
View on Amazon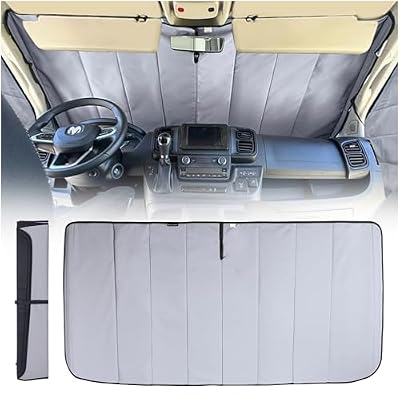
Living in a Bubble Insulated Blackout Window Covers for RAM Promaster 2014-Current (Windshield 2014-Current)
Included for 'Ram ProMaster Windows Guide: Types, Sizes & Best Options' as a relevant option in this category; details come from the product listing.
View on AmazonWindow types compared
See also: MaxxFan Deluxe vs Fantastic Fan for Vans: Which to Choose? • Can I Lay LVP in a Van? Van Flooring Guide
| Window type | Typical opening behavior | Common trade-off | Best fit |
|---|---|---|---|
| Fixed bunk | Non-opening glass; some versions include a separate vent panel | Usually simplest and least expensive, but limited airflow | Bedside views, budget builds, or windows paired with a roof fan |
| Slider | One or more panes slide open | Useful airflow, but tracks and screens need cleaning | Everyday ventilation and easy reach from inside |
| Awning | Hinged pane opens outward, usually from the bottom | More hardware and typically higher cost; opening can be restricted by nearby obstacles | Rain-sheltered airflow and controlled ventilation |
CRL is a well-known source of van glazing, including fixed and opening-window styles. Arctic Tern is associated with awning-style camper windows, while Van Windows Direct offers van-specific window options and installation guidance. Exact dimensions, frame depth, glass, tint, screen, and opening mechanism vary by product and model year, so compare the current manufacturer’s template and instructions—not just the window’s advertised outside size.
Cutout dimensions and placement: measure the van, not the listing
There is no single reliable cutout size for “a ProMaster window.” A product may have a larger outer frame than its required opening, and a window that fits one body panel may cross a rib or land too close to a door on another. Use the supplied paper or digital template and verify it against the actual van before cutting.
- 1500: Confirm whether your van is the short or long body and identify the intended panel. Do not assume a short-wheelbase window template will work on a longer body—or vice versa.
- 2500: Check body length and roof height as well as wheelbase. A longer wheelbase creates more possible placement zones, not necessarily a different window cutout.
- 3500: The same rule applies: verify the exact body configuration and the panel’s curvature and reinforcement. Heavy-duty trim or body details can affect placement.
For each candidate location, measure the clear flat area, mark the inner and outer panel boundaries, and inspect behind the metal for wiring, trim, structural ribs, and interior cabinetry. Hold the template in place from both sides if possible. Check door travel, bed height, and where the window will sit relative to a person’s eye line. A window centered over a mattress can be more useful than one centered on the exterior panel.
As a practical fit check, compare the template’s cutout width and height with your measured clear area, leaving the manufacturer’s specified clearance. Never shrink or enlarge the opening based on the frame’s outside dimensions. If a supplier lists only overall dimensions, ask for the exact cutout template and the compatible ProMaster years and body configurations before ordering.
Which ProMaster camper window suits your build?
| Your situation | Good starting choice | Why |
|---|---|---|
| Tight budget; you already use a roof fan | Fixed bunk window | Typically fewer moving parts and a lower price; the fan handles most air exchange |
| Frequent cooking or sleeping with the van occupied | Slider or awning window, ideally paired with an exhaust fan | An operable window gives you an intake-air option; cross-flow depends on a second opening |
| Often parked in drizzle | Awning window | The outward-opening pane can help shield the opening, though it is not a guarantee against wind-driven rain |
| First-time installer or uncertain placement | Supplier-supported, van-specific window with a verified template | Clear fit guidance matters more than a small price saving when a cut is permanent |
| Small sleeping area with limited wall space | Compact bunk-style window | Can provide daylight and a view without consuming as much wall area as a large opening |
For broad market planning, simple fixed windows are often in the low hundreds of dollars, while opening windows commonly range from several hundred dollars to around a thousand or more, depending on size, frame, glazing, and included hardware. Installation materials, shipping, and professional labor can add substantially. Get a current quote for the exact product; prices and configurations change.
Ventilation and condensation: what a window can and cannot do
A sliding or awning window provides a way to admit air, but one opening alone may not create strong airflow. For cooking or overnight use, plan an exhaust fan or a second opening on another side of the van. Keep ventilation adequate for the activity and conditions, and follow appliance safety instructions; an open window is not a substitute for safe combustion-air and exhaust arrangements.
Condensation forms when moist interior air meets a colder surface. Double-pane or insulated glazing can reduce the cold-surface effect compared with single glazing, but it cannot eliminate moisture from breathing, wet gear, or cooking. A useful setup combines controlled ventilation, a roof fan when appropriate, dry storage for wet items, and regular wiping of glass and frames. Insulated window covers can help when parked, but remove or adjust them as needed for ventilation and visibility.
Installation and ownership details that matter
Cutting a body panel is a high-consequence step. If you are new to metalwork, unsure about hidden wiring, or uncomfortable sealing an exterior opening, have an experienced van upfitter install it. For a DIY installation, use the product’s instructions, protect the paint, deburr the cut edge, apply the specified corrosion protection, and use only the recommended sealant and fasteners. Dry-fit the window before sealing; do not rely on sealant to correct a poor cut or uneven seating.
Over time, the first annoyances are often dirty slider tracks, worn seals, loose hardware, or water entering through an installation seam. Keep tracks and weep paths clear, inspect seals and fasteners periodically, and clean glass with products approved for the window’s coatings and frame. Avoid scraping tint or seal surfaces with abrasive tools. If water appears, identify whether it comes from a blocked drain, failed seal, or body seam before adding more sealant.
Bottom line: For the lowest-cost daylight, start with a fixed bunk window. For regular airflow, compare a slider with an awning model based on how much ventilation you need and whether rain protection matters. For any Ram ProMaster windows purchase, confirm the exact cutout template, model-year compatibility, and panel placement before ordering—especially across 1500, 2500, and 3500 configurations.