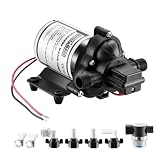
- Top Pick: WASSERMANN RV Pump, 12V Self-priming RV Water Pressure Pump 4.0GPM 45PSI with Pressure Switch, for RV Marine Camping Yacht Garden, 12Volt DC Fresh Water Pumps RV Water Pump 2088-554-144 Replacement
- Best Value: WASSERMANN RV Water Pump 12V DC 2088-554-144 Replacement, 3.5 GPM 45PSI, Quiet Water Pump for RV, Camper, Self-priming RV Water Pressure Pump, Food Truck Travel Trailer RV Water Pumps with Acessories
- Premium Choice: DC HOUSE 33 Series 12V RV Water Pump 3.5GPM 45PSI, 3-Chamber Diaphragm Pump with Built-in Pressure Switch, Quiet Self-Priming Demand Pump for Camper, Boat, Cabin, Off-Grid System
Last updated: October 4, 2026
Choosing a camper water pump is less about buying the pump with the highest gallons-per-minute rating and more about matching the pump to your plumbing, power system, and camping habits. A pump that is too powerful can create noisy, harsh water flow. One that is too small may struggle when two fixtures run at once. The wrong voltage, inlet size, or pressure setting can also turn a simple replacement into a plumbing project.
The best way to shop is to compare the pump’s voltage, flow rate, shutoff pressure, physical size, electrical draw, and installation requirements—not just the price on the box. This guide explains how to choose a camper water pump for a travel trailer, motorhome, boat, food truck, cabin, or off-grid water system in 2026.
As an Amazon Associate we earn from qualifying purchases at no extra cost to you.


- Decide These 3 Things First
- Size and Mounting Footprint
- Materials and Fresh-Water Compatibility
- Construction: Diaphragm, Chambers, and Pressure Switch
- Comfort and Performance: Flow, Noise, and Power
- Price Tiers: What You Actually Get
- Warranty and Replacement Support
- Delivery and Assembly Requirements
- Spec Checklist
- Red Flags
- FAQ
Decide These 3 Things First
- Match your electrical system. Most campers use a 12-volt DC fresh-water pump. Some larger rigs use 24 volts, while certain residential-style systems use 120-volt AC pumps. Replacing a 12V pump with the wrong voltage can damage the pump or create a safety hazard.
- Choose your required flow and pressure. A typical camper pump produces about 3.0 to 5.0 gallons per minute (GPM) and shuts off around 40 to 55 pounds per square inch (PSI). For one sink and a shower, 3.0 to 3.5 GPM is often adequate. If you regularly run multiple fixtures, a 4.0 GPM model gives you more capacity.
- Confirm the fit before ordering. Measure the existing pump’s length, width, height, mounting-hole spacing, hose connections, and wire position. A pump can have the right performance specifications and still fail to fit in a cramped service bay.
Size and Mounting Footprint
See also: How Many Watts of Solar Do You Need for Van Life? • Truma vs Webasto Water Heaters for Vans: Combi, Aquago and Alternatives
Start with the space around your existing pump. Common 12V diaphragm pumps are roughly 7 to 10 inches long, 4 to 6 inches wide, and 3 to 5 inches tall, although dimensions vary significantly by design. Leave at least 1 inch of clearance around the pump where possible, and provide enough room to reach the inlet strainer, wiring, and mounting screws.
Mounting-hole patterns matter just as much as overall dimensions. Some replacement pumps can use the original holes; others require new holes or a small adapter plate. Flexible mounting feet help isolate vibration, but they may not align with the old pump’s base.
Also inspect the plumbing connections. Camper pumps commonly use 1/2-inch or 3/4-inch ports, threaded adapters, or barbed fittings for flexible hose. If the replacement includes adapters, confirm that they match your hose inside diameter. Avoid forcing a mismatched fitting, since leaks at the pump inlet can cause loss of prime and poor performance.
Materials and Fresh-Water Compatibility
For a potable-water system, choose a pump specifically identified for fresh-water use. Look for a body made from corrosion-resistant plastic or coated metal, and check whether the manufacturer lists the pump for RV, marine, or food-service applications.
Diaphragm and valve materials are important because they contact the water. Common options include EPDM, Santoprene, and similar synthetic elastomers. The exact material is less important than clear potable-water compatibility and replacement-part availability.
Do not assume that a pump marketed for garden spraying or fuel transfer is suitable for drinking water. A fresh-water pump should also tolerate the sanitizing routine recommended for your camper’s plumbing. Never use a pump with a material rating that conflicts with your water-treatment products.
Construction: Diaphragm, Chambers, and Pressure Switch
Most camper demand pumps use a diaphragm design. When you open a faucet, pressure drops and the built-in switch starts the motor. When the faucet closes and pressure reaches the shutoff setting, the pump stops. This eliminates the need for a separate manual switch during normal use.
Three-chamber pumps are common in the 3.0 to 4.0 GPM range. More chambers can help produce steadier flow, but chamber count alone does not determine quality. A well-designed two-chamber pump may be a better fit than a poorly matched three-chamber model.
Check the pressure-switch setting. Many RV pumps are rated at 45 PSI, which works with a broad range of camper plumbing. Some systems use 55 PSI or more, but higher pressure is not automatically better. Confirm that your faucets, water heater, accumulator tank, and filters can handle the pressure.
An inlet strainer is another useful feature. It catches tank debris before it reaches the pump and makes routine cleaning easier. If a strainer is not included, budget for one and install it on the pump’s inlet side.
Comfort and Performance: Flow, Noise, and Power
Flow rate tells you how much water the pump can move under specified conditions, but the advertised maximum is not the same as guaranteed flow at every faucet. Plumbing length, filters, elevation, hose diameter, battery voltage, and water restrictions all affect actual delivery.
For basic use, a 3.0 to 3.5 GPM pump is generally a sensible target. A 4.0 GPM pump is worth considering when the camper has a larger shower, multiple outlets, or a longer plumbing run. A pump rated above 5.0 GPM may be unnecessary for a compact trailer and can increase cycling, noise, and water consumption.
Noise depends on the motor, mounting surface, plumbing, and vibration isolation. A pump rated as “quiet” may still hum or pulse if it is screwed directly to a thin cabinet wall. Use the supplied rubber feet, avoid rigidly pressing the pump against nearby panels, and consider short sections of flexible hose on the inlet and outlet.
A 12V pump rated around 3.5 to 4.0 GPM may draw roughly 5 to 10 amps while operating, depending on the model and load. Check the manufacturer’s stated amperage and size the fuse and wiring accordingly. A typical installation may use a 10-amp or 15-amp fuse, but the correct value must follow the pump instructions and your camper’s wiring.
Price Tiers: What You Actually Get
Budget: $35 to $50. These pumps often provide 3.0 to 4.0 GPM, 40 to 45 PSI, a pressure switch, and basic mounting hardware. They can be practical replacements for occasional camping, provided the dimensions and fittings match. The DC HOUSE 33 Series and Gidrox-style pumps occupy the kind of price range where buyers should pay close attention to included accessories and return terms.
Midrange: $50 to $85. This tier commonly includes better documentation, more consistent accessory kits, improved mounting hardware, or a better-established replacement-parts path. WASSERMANN-style 3.5 and 4.0 GPM pumps priced around $55 to $60 illustrate the typical midrange target.
Premium: $85 to $160 or more. Premium pumps may offer stronger service support, quieter operation, specialized marine construction, higher-duty-cycle components, or better rebuildability. A premium price is worthwhile for full-time RV use, frequent boondocking, or difficult installations where downtime is expensive. It is not automatically worthwhile for a lightly used weekend trailer.
Warranty and Replacement Support
Read the warranty terms before comparing two pumps that appear identical. Look for the warranty length, whether registration is required, and what the company covers. A warranty may exclude damage from dry running, freezing, incorrect wiring, contaminated water, or excessive inlet restriction.
Replacement diaphragms, valves, pressure switches, strainers, and fittings can extend the useful life of a pump. If the manufacturer does not sell service parts, replacement may be more practical than repair. Keep your receipt and record the pump’s model number after installation.
Also check the return window. A pump that fits the specifications may still need to be returned if the ports face the wrong direction or the mounting holes do not align.
Delivery and Assembly Requirements
A typical pump replacement takes about 30 to 90 minutes for an accessible installation, not including troubleshooting. Shut off the water supply, disconnect shore power if appropriate, turn off the pump circuit, and open a faucet to release pressure before removing the old pump.
Have plumber’s tape approved for potable-water use, hose clamps, a compatible strainer, wire connectors, a fuse, and short lengths of flexible hose available. Do not use household pipe sealant indiscriminately on plastic fittings; excess material can enter the pump or restrict the inlet.
After installation, inspect every connection, prime the pump according to the instructions, and let it run briefly while checking for leaks. If the pump runs continuously with all faucets closed, look for an air leak on the inlet side, a leaking faucet, a blocked strainer, or an incorrect pressure-switch setting.
Spec Checklist
| Spec | Budget | Mid | Premium |
|---|---|---|---|
| Typical price | $35–$50 | $50–$85 | $85–$160+ |
| Voltage | 12V DC | 12V DC | 12V or 24V DC, as required |
| Flow rating | 3.0–3.5 GPM | 3.5–4.0 GPM | 4.0–5.0+ GPM |
| Shutoff pressure | 40–45 PSI | 45–55 PSI | 45–60 PSI, adjustable on some models |
| Motor draw | About 5–10 amps | About 5–10 amps | Check the model; heavy-duty units may draw more |
| Construction | Diaphragm, often three chamber | Diaphragm with improved mounting and accessories | Heavy-duty diaphragm and serviceable components |
| Best for | Occasional use and simple replacements | Regular RV, boat, and off-grid use | Full-time, high-use, or demanding installations |
Red Flags
- The listing does not clearly state whether the pump is 12V DC, 24V DC, or 120V AC.
- Flow, pressure, amperage, and dimensions are missing or presented without units.
- The product is described for general water transfer but not for potable fresh-water systems.
- The pump has no stated pressure-switch rating or gives a pressure rating above what your camper’s plumbing can handle.
- Reviews repeatedly mention cycling, leaks, difficult priming, overheating, or failed switches.
- The seller does not identify the inlet and outlet sizes, included fittings, fuse requirements, or warranty terms.
- The pump is dramatically cheaper than comparable models but offers no replacement parts or meaningful return policy.
FAQ
What size water pump do I need for a camper?
For one sink and a shower, start with a 3.0 to 3.5 GPM, 12V pump rated around 40 to 45 PSI. Choose about 4.0 GPM if you frequently run two fixtures or have long plumbing runs. Match the pump to your existing wiring, fittings, and pressure limits.
Is a 45 PSI pump enough for an RV shower?
Usually, yes. A 45 PSI pump is a common target for camper plumbing and can provide comfortable shower pressure when the plumbing is clear and the battery is adequately charged. A clogged filter, undersized hose, or low battery can reduce pressure regardless of the pump’s advertised rating.
Should I install an accumulator tank with a camper water pump?
An accumulator tank is optional but useful. It can reduce rapid pump cycling, smooth pulsing at the faucet, and provide a small reserve of pressurized water. It does not increase the pump’s maximum flow, and it must be compatible with your system’s pressure rating.
Why does my new camper water pump keep running?
First check for an open faucet or leaking toilet valve. Then inspect the inlet strainer, tank hose, fittings, and hose clamps for air leaks. A blocked inlet, empty tank, low battery voltage, or pressure switch set above the system’s ability can also prevent the pump from shutting off. Turn off the pump and correct the cause rather than allowing it to run continuously.