Last updated: September 12, 2026
Short answer: yes, you can build a van with only a jigsaw, and plenty of people have. A jigsaw cuts every shape a van throws at you, including curves around wheel wells and the roof hole for a fan. What it will not give you is a long, straight, square rip in plywood. If you only buy one saw, buy the jigsaw. If you buy two, make the second one a circular saw with a straightedge.
It is worth understanding why before you spend money. A van is not a house: almost nothing in it is square, the panels are curved, and you will make more odd-shaped cuts than straight ones. “Odd-shaped” is the jigsaw’s job. “Long and straight” is the circular saw’s. Neither does the other one well.
Quick answer: Our top pick in 2026 is the Ripping 3/4" plywood to width for cabinet sides — our #1 rated choice. See the full ranked comparison, alternatives and buying advice below.
- Jigsaw vs circular saw for a van build: what each one is genuinely good at
- Why a straightedge beats both saws for cabinet carcasses
- Cutting the roof for a fan: this is where the jigsaw is the right tool
- Blades: the part people underbuy
- Cordless vs corded when you are working off a battery bank
- Dust, blade wander, and what commonly goes wrong
- The minimum realistic tool list for a full van conversion
- So which do you actually need?
- Frequently Asked Questions
Jigsaw vs circular saw for a van build: what each one is genuinely good at
A circular saw spins a fixed blade through a straight path. It is fast, leaves a clean edge, and rips a full 4×8 sheet to width in about twenty seconds. It cannot turn, cannot start a cut mid-panel without a risky plunge, and cannot follow a wheel arch.
A jigsaw pushes a narrow blade up and down. It turns freely, it starts from a drilled pilot hole anywhere in a panel, and it will cut sheet metal with the right blade. It is also slower, noisier, and the blade flexes — which is exactly why your “straight” cuts come out wavy and slightly out of square through the thickness of the board.
| Cut you need to make | Best tool | Why |
|---|---|---|
| Ripping 3/4″ plywood to width for cabinet sides | Circular saw + clamped straightedge (or track saw) | Long, straight, square edge that glues and screws tight |
| Subfloor panel to the van’s outline | Jigsaw | Follows the wavy factory floor edge and wheel-well arcs |
| Curves around wheel wells | Jigsaw | Only saw that turns |
| Roof cutout for a 14×14 fan | Jigsaw (metal blade) | Starts from a drilled corner hole, cuts an interior square |
| Round holes for vents, fans, wiring | Hole saw or jigsaw | Hole saw for clean circles under 4″; jigsaw above that |
| Cutting 2×2 or 1×3 furring to length | Miter saw, or circular saw with a speed square | Repeatable square crosscuts |
| Notching plywood around a rib or bracket | Jigsaw | Inside corners and stopped cuts |
| Trimming a door skin or thin aluminum | Jigsaw with a fine metal blade | Controlled, low chip-throw compared to an abrasive wheel |
Why a straightedge beats both saws for cabinet carcasses
See also: Gifts for Van Lifers: Small, Useful and Actually Wanted • Van Toilets Compared: Composting, Urine-Diverting, Cassette and Bucket
The thing nobody tells first-time builders: the problem is not the saw, it is the guide. A freehand circular saw cut wanders almost as badly as a jigsaw cut. What makes it accurate is clamping a straight aluminum angle or factory-edge offcut to the sheet and running the saw’s shoe against it.
A track saw is that idea sold as one product: the saw rides in an extruded rail with a rubber splinter strip, so the blade lands exactly on your pencil line. For building cabinet boxes that actually sit square, a track saw is the single biggest accuracy upgrade you can make, and it is the reason so many finished vans have visible gaps at the cabinet joints while a few do not. If your budget cannot stretch to one, a $60 circular saw and a $25 clamp-on guide gets you 90% of the way.
Square edges matter more here than in a house: van cabinets hang off thin metal ribs and carry load down a bumpy road, so a joint 2 degrees out will open up within a season.
Cutting the roof for a fan: this is where the jigsaw is the right tool
Cutting a 14×14 hole in your roof is the most intimidating step of most builds, and it is a jigsaw job, full stop. The sequence that works:
- Mark the opening from inside, between the roof ribs, and transfer it outside by drilling the four corners.
- Lay painter’s tape along all four lines outside — it protects the paint and gives you a visible line.
- Enlarge the corner holes to about 3/8″ so the blade can turn.
- Fit a fine-tooth bi-metal metal blade, set the jigsaw to zero orbital action, and cut the four straight runs.
- Support the cutout panel on the last side so it does not drop and crease the roof.
- File the burr off every edge, then prime the bare steel with rust-inhibiting primer or cold galvanizing paint before the fan flange goes on.
Safety, plainly: cutting steel throws hot chips that will embed in your eye and burn your skin. Wear sealed safety glasses or goggles — not open-sided ones — plus gloves and long sleeves. Cut edges are razor sharp. And every square inch of bare steel you expose will rust if you leave it, which then bleeds under your fan seal and into your headliner. Deburr, prime, seal. Same rule applies to any hole you cut for wiring pass-throughs or shore power inlets.
Blades: the part people underbuy
Blades do more for cut quality than the saw does. A cheap jigsaw with the right blade beats an expensive one with the wrong blade.
- Wood in plywood: a down-cut blade (reverse tooth) cuts on the pull stroke, so the good face on top stays splinter-free. Use it for finished panels.
- Fast rough wood: a standard up-cut blade with orbital action on 2 or 3. Fine for subfloor and hidden framing.
- Metal: bi-metal, 21–24 TPI, orbital action OFF. The rule is to keep at least three teeth in contact with the material thickness at all times, or the blade grabs and snaps.
- Circular saw in plywood: a 40–60 tooth fine-finish blade, not the 24-tooth framing blade that ships in the box.
Buy jigsaw blades in a multipack — you will break some, and a dull blade is the main cause of wandering and scorched edges.
Cordless vs corded when you are working off a battery bank
Building in a driveway with a wall outlet? Corded is cheaper and never runs flat. Building at a campsite or off your own house battery and inverter? Cordless wins outright — a circular saw is one of the hungriest tools there is, and its startup surge will sag a small inverter or trip it outright. Pick one battery platform and stay on it; a spare pack is worth more than a third brand of tool. Budget two batteries minimum, since a single 5.0Ah pack gets roughly a sheet or two of plywood through a circular saw.
Dust, blade wander, and what commonly goes wrong
- The cut drifts off the line. Almost always a dull blade, pushing too hard, or no guide. Let the saw set the pace.
- The jigsaw cut is not square through the thickness. The blade flexed. Use a thicker/wider blade, slow down, and turn orbital off on anything you can see afterward.
- Tear-out on the good face. Wrong blade direction — use down-cut in a jigsaw, and cut plywood good-face-down with a circular saw, since that blade exits upward.
- Plywood dust everywhere inside the van. Cut outside. Sawdust behind insulation panels holds moisture and is miserable to clean out later.
- Metal chips on the roof. Sweep or magnet them off immediately. Left in the rain, each one leaves a rust freckle in your paint.
The minimum realistic tool list for a full van conversion
You need fewer tools than YouTube suggests, but more than one saw. This is what actually gets a van from empty shell to finished, grouped by what you can defensibly spend.

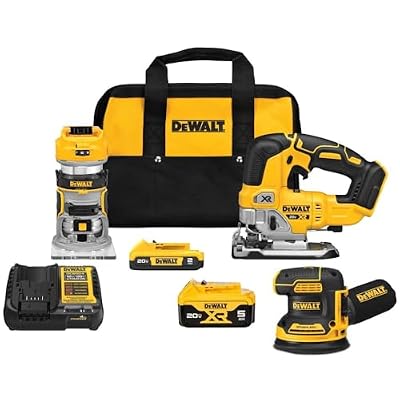
DEWALT 20V MAX XR Jig Saw, 3,200 Blade Speed, Cordless, Brushless Motor, LED Light, Bare Tool Only (DCS334B)


| Tool | Budget build (bare minimum) | Mid tier (most builders) | Comfortable |
|---|---|---|---|
| Curves & metal cutting | Corded jigsaw | Cordless jigsaw kit | Cordless jigsaw + hole saw set |
| Straight rips | Circular saw + clamped straightedge | Circular saw + clamp guide | Track saw |
| Crosscuts | Hand saw + speed square | Circular saw + speed square | Sliding miter saw |
| Driving screws | Corded drill | Cordless drill/driver combo | Drill + impact driver, same battery |
| Holes in metal | Step drill bit | Step bit + cobalt bit set | Step bit + hole saw arbor kit |
| Sanding / cleanup | Sanding block | Random orbital sander | Orbital sander + shop vac |
| Measuring & layout | Tape, speed square, chalk | + long straightedge, clamps | + digital angle finder |
| Safety | Sealed glasses, gloves, ear plugs | + N95 for insulation dust | + half-mask respirator |
Notice what is not on the list: a table saw. It is a wonderful tool and a terrible fit for a van build, because you are cutting big sheets to fit an irregular shell, not milling small parts. Notice also that clamps appear at every tier — they are what turn a cheap saw into an accurate one. If you are still costing out the project, our breakdown of what a conversion actually costs puts tools in context against materials, and the build-order checklist tells you which cuts come first so you are not buying everything in week one.
So which do you actually need?
Buy the jigsaw first. It is the tool that unlocks the jobs you cannot do any other way — the roof fan cutout, the wheel-well curves, the subfloor template. Then add a circular saw and a $25 clamp-on guide when you start cabinets, or skip straight to a track saw if accuracy matters more to you than budget. Using a jigsaw for a whole van is possible and slow; using only a circular saw is genuinely not possible.
Frequently Asked Questions
Can I do an entire van conversion with just a jigsaw?
Yes, and many people have. A jigsaw will make every cut a van build requires, including long rips, if you are patient and clamp a straightedge for the blade shoe to follow. The trade-offs are real though: rips take several times longer, the cut edge will not be perfectly square through the board thickness, and cabinet joints will show small gaps. For a simple bed-plus-storage build it is fine. For a full galley with face frames, add a circular saw.
Is a track saw worth it for one van build?
For most single builds, no — a circular saw with a clamped straightedge produces a very similar cut for a quarter of the price. A track saw earns its cost if you are cutting a lot of sheet goods, plan to build more than one van, care about furniture-grade joints, or are working alone in a tight driveway where wrestling clamps repeatedly is painful. Many builders rent one for the two days of cabinet cutting instead of buying.
What blade do I use to cut my van roof for a fan?
A bi-metal jigsaw blade rated for sheet metal, roughly 21 to 24 teeth per inch, with the saw’s orbital action switched completely off. Keep at least three teeth touching the metal at any moment or the blade will catch and snap. Go slowly, let the blade cut rather than forcing it, and expect to use two or three blades on one opening. Deburr and prime every cut edge afterward to stop rust.
Cordless or corded saws for a van build?
Corded is cheaper and never runs out of power, so it is the better choice if you are building next to a wall outlet. Cordless is the right call if you are working at a campsite or off your own house battery and inverter, because a circular saw’s startup surge can trip a small inverter or sag your system. Commit to one battery platform and own at least two packs so you are never waiting on a charger.
Do I need to treat the bare metal after cutting the roof?
Absolutely, and it is not optional. Every cut you make exposes raw steel that will start oxidizing within days, and rust that starts under a fan flange spreads where you cannot see it until it shows up as a stain on your ceiling. File the burrs off, wipe the edge clean with solvent, then apply a rust-inhibiting primer or cold galvanizing compound before you bed the fan in sealant. It takes fifteen minutes and saves the roof.
Ready to decide? Our #1 pick for 2026 is the Ripping 3/4" plywood to width for cabinet sides.
Live price & availability on Amazon.