- Top Pick: Victron Energy SmartSolar MPPT Solar Charge Controller 100V, 50A, 12/24V
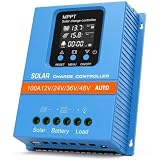
- Best Value: Solar Charge Controller 100A 12V 24V 36V 48V Intelligent Recognition LCD Display Battery Intelligent Regulator Maximum 100V Input Dual USB for Lead Acid/Lithium Battery (SA100A)
- Premium Choice: Victron Energy SmartSolar MPPT 100V 30 amp 12/24-Volt Solar Charge Controller (Bluetooth)
Last updated: September 18, 2026
Choosing an MPPT charge controller is less about buying the highest amp rating and more about matching the controller to your solar array, battery bank, and system voltage. A controller that is too small may limit solar production or overheat; one that is dramatically oversized can waste money and still be incompatible with your panels or battery chemistry.
The most common mistakes are adding panel wattages without checking voltage, sizing from the controller’s maximum number instead of its continuous rating, and assuming that a controller marked “100A” will accept any 100-amp solar array. Buyers also overlook cold-weather panel voltage, battery charging requirements, wire size, enclosure quality, and whether the product is a genuine MPPT controller rather than a basic PWM unit with ambitious labeling.
As an Amazon Associate we earn from qualifying purchases at no extra cost to you. Product prices and availability are accurate as of the date shown and are subject to change.



This guide explains how to choose MPPT charge controller size using practical numbers, compatibility checks, and realistic price expectations for a home, cabin, RV, or small off-grid power system.
Decide These 3 Things First
- Your solar array size: Add the rated wattage of every panel. A four-panel array with 200-watt panels is an 800-watt array.
- Your battery-bank voltage: Most small systems are 12V or 24V. Larger systems commonly use 48V. The nominal voltage affects how many amps the controller must deliver.
- Your battery chemistry and charging voltage: Lead-acid, AGM, gel, and lithium batteries have different charging profiles. Lithium batteries may also require a controller with a lithium setting and communication features.
For a first estimate, divide array wattage by battery voltage, then add a margin of about 20% to 25%:
Controller amps = solar watts ÷ battery voltage × 1.25
For example, a 600-watt array on a 12V battery bank calculates to 50 amps. With a 25% margin, a 60A controller is a sensible target. On a 24V bank, the same array needs only 25 amps before the margin, making a 30A or 40A controller more appropriate.
Size and Capacity
See also: How to Install a 12v Fridge Securely (2026): Step-by-Step • How to Test Portable Power Station Capacity (2026): Step-by-Step
“Size” has two meanings: the controller’s charging-current rating and its allowable solar-input voltage. Both matter.
A 30A controller can usually handle approximately 400 watts on a 12V system or 800 watts on a 24V system, depending on the manufacturer’s stated limits. A 50A model may accommodate roughly 700 watts at 12V or 1,400 watts at 24V. These are planning figures, not universal ratings; always verify the product’s maximum PV power for your battery voltage.
The controller’s PV voltage rating must exceed the array’s cold-weather open-circuit voltage, or Voc. Panel voltage rises as temperatures fall. If three panels have a Voc of 45V each and are connected in series, the nominal total is 135V before cold-weather adjustment. A 100V controller would be unsuitable, even if the array produces less than 100V on a warm day.
Common options include 75V, 100V, and 150V input ratings. A 75V model, such as a 15A 12/24V controller, can suit a small one- or two-panel array when the series voltage remains safely below its limit. A 100V, 30A model is a flexible choice for modest 12V or 24V systems. A 100V, 50A unit is better suited to a larger array, provided its maximum PV wattage and battery-voltage limits match your design.
Do not treat a listing that says “100A” as proof that it supports 100 amps of solar charging. Some inexpensive products use confusing terminology, quote a short-term or theoretical maximum, or fail to clearly state maximum PV wattage. Look for a complete specification sheet.
Material and Enclosure Quality
An MPPT controller converts excess panel voltage into useful charging current, and that conversion creates heat. The enclosure should protect the electronics while allowing heat to escape.
For indoor utility rooms, a rigid plastic housing can be adequate if it is mounted vertically with clearance around the vents. For garages, workshops, boats, and RV compartments, a reinforced enclosure with a metal heat sink or substantial internal cooling surface is generally preferable. Aluminum is common because it transfers heat efficiently, although the presence of aluminum alone does not guarantee better performance.
Check the stated operating temperature, humidity rating, terminal-cover design, and ingress protection rating where available. A controller installed in a damp or dusty location should have more environmental protection than one mounted inside a dry electrical cabinet. Avoid placing any model directly above a battery, where corrosive vapors may damage terminals and circuit boards.
Allow at least 4 to 6 inches of open space around the controller unless the manual specifies otherwise. A compact controller measuring about 6 by 4 inches may be convenient, but a larger 50A or 60A unit may need a deeper enclosure and heavier wiring. Measure the mounting surface before ordering.
Construction and Wiring
Good construction shows up in the details: firmly attached terminals, clear polarity markings, strain relief, protected circuit boards, and a mounting plate that does not flex. The terminals must accept the wire gauge required by the charging current. A 15A controller may use smaller conductors, while a 50A or 60A controller often needs substantially thicker copper cable and a properly rated fuse or breaker.
Install a fuse or breaker between the controller and battery as specified by the manufacturer. The fuse protects the wiring, not just the controller. Keep battery cables short where possible; a long run can create voltage drop that causes inaccurate charging behavior.
Look for reverse-polarity protection, over-temperature protection, overcharge protection, and short-circuit protection. These safeguards do not make incorrect wiring safe, but they reduce the chance that one mistake will destroy the equipment.
Bluetooth or a front LCD display can make setup and troubleshooting easier. Bluetooth is especially useful when the controller is mounted in a cabinet or difficult-to-see location. However, a display is not evidence of MPPT performance. Confirm that the unit uses genuine maximum power point tracking and provides a documented charging profile.
Charging Performance and Battery Compatibility
MPPT controllers are most useful when panel voltage is significantly higher than battery voltage, when conditions change throughout the day, or when panels are installed some distance from the battery. The controller continuously adjusts the operating point of the array and converts available voltage into charging current.
For lead-acid batteries, confirm adjustable absorption, float, and equalization settings when required by the battery manufacturer. Gel batteries generally need a different profile from flooded lead-acid batteries. Lithium batteries usually need a lithium charging profile, adjustable voltage settings, and ideally a way to disable automatic equalization.
Do not connect a lithium battery without checking whether its battery-management system and the controller’s charging behavior are compatible. A controller should not be expected to replace a battery’s built-in protection system.
Efficiency claims are useful only when they are supported by a clear specification sheet and defined test conditions. Instead of relying on a large percentage printed on a product page, prioritize correct voltage limits, an appropriate continuous-current rating, temperature compensation, reliable settings, and a usable monitoring system.
Price Tiers
Budget: about $35 to $80. These controllers often include an LCD screen, USB ports, basic battery presets, and ratings from 20A to 100A. A low-cost 100A listing priced around $43.68 deserves especially careful inspection: verify its real maximum PV wattage, continuous output rating, wire-terminal capacity, battery-voltage support, and whether the rating applies to solar input or load output. Budget models can work for small systems, but documentation and quality control vary.
Midrange: about $90 to $220. This tier commonly includes better thermal design, clearer specifications, Bluetooth monitoring, more accurate charging profiles, and stronger terminals. A genuine 30A or 50A controller from an established manufacturer is often a better purchase than an anonymous controller with an unusually high amp number.
Premium: about $220 to $500 or more. Premium controllers may offer higher input-voltage limits, robust heat management, programmable charge settings, remote monitoring, networking, and better support for multiple battery chemistries. They make the most sense for larger off-grid systems, expensive lithium batteries, difficult installations, or buyers who want long-term monitoring and serviceability.
Warranty and Support
Look for at least a one-year warranty, with two to five years being more reassuring for a permanent installation. Read the exclusions: some warranties do not cover incorrect wiring, water damage, lightning, reverse polarity, or use outside the stated temperature range.
Manufacturer support matters because controller setup can involve battery-specific voltage values, firmware, and communication settings. A product should provide a readable manual, wiring diagram, fault-code explanations, and a clear process for warranty claims. If the listing has no manual, no manufacturer address, and no complete electrical specifications, treat the low price as a risk rather than a bargain.
Delivery and Assembly
Unlike furniture, an MPPT controller usually requires no assembly beyond mounting and wiring, but installation time should still be part of the buying decision. A small 15A unit may weigh around 1 to 2 pounds and mount easily inside a cabinet. A 50A or larger controller may weigh 3 to 8 pounds and require a solid mounting board, heavier cables, a battery fuse, and room for ventilation.
Before ordering, confirm that the package includes mounting hardware, terminal covers, temperature sensors, and communication cables if those items are important to your installation. Delivery packaging should protect the terminals and display. Inspect the unit for cracked housings, bent terminals, or moisture before connecting it.
For systems above roughly 1,000 watts, long cable runs, or a 48V battery bank, consider having a qualified installer review the design. Incorrect DC wiring can cause fire even when the controller itself is correctly rated.
Spec Checklist
| Spec | Budget | Mid | Premium |
|---|---|---|---|
| Typical price | $35–$80 | $90–$220 | $220–$500+ |
| Common current ratings | 20A–100A listed | 30A–60A | 50A–100A |
| PV input voltage | Often 50V–100V; verify carefully | 75V–150V | 100V–250V, depending on model |
| Suitable array planning range | About 200–800W | About 400–1,500W | About 800–3,000W+ |
| Monitoring | LCD; basic USB on some models | LCD or Bluetooth | Bluetooth, remote monitoring, or networking |
| Enclosure | Plastic; basic ventilation | Reinforced plastic or metal heat sink | Heavy-duty thermal design and protected terminals |
| Warranty target | At least 1 year | 2–3 years | 3–5 years |
Red Flags
- A product lists “100A” but does not state maximum PV watts at 12V, 24V, and 48V.
- The advertised PV voltage is lower than the array’s cold-weather Voc.
- The listing calls the product “solar compatible” without explicitly identifying MPPT technology.
- There is no wiring diagram, battery charging profile, operating-temperature range, or manual.
- The controller has USB ports and an LCD but unusually tiny terminals for its claimed current.
- The product promises compatibility with every battery type without adjustable charging settings.
- Cooling vents are blocked by the mounting design, or the manual provides no clearance guidance.
- The seller offers no meaningful warranty or replacement process.
FAQ
How do I calculate the right MPPT controller size?
Divide total solar-panel watts by battery-bank voltage, then multiply by 1.20 to 1.25. A 400W array on a 12V bank needs about 33 amps before the margin, so a 40A controller is a reasonable target. Confirm the manufacturer’s maximum PV wattage and input-voltage limits before buying.
Is a higher-amp MPPT controller always better?
No. Oversizing by a modest amount can provide room for future panels, but a much larger controller costs more and may require heavier wiring. The controller must also be compatible with the array’s voltage and the battery bank’s charging profile.
Can I use a 100V controller with any solar panels?
No. Add the Voc of panels wired in series and adjust for the lowest expected temperature. The resulting cold-weather voltage must remain below the controller’s maximum PV input voltage. Parallel wiring changes current rather than adding series voltage, but the controller’s total PV current and wattage limits still apply.
What size controller is best for a 12V battery?
It depends on the array. A 15A controller suits roughly 180 watts of solar, a 30A model roughly 360 watts, and a 50A model roughly 600 watts before applying a safety margin. Use the manufacturer’s specific wattage chart, especially with lithium batteries or arrays that may produce more than their nominal rating in cold, bright conditions.
Ready to decide? Our #1 pick for 2026 is the Typical price.
Live price & availability on Amazon.