Last updated: October 7, 2026
How to level a travel trailer on uneven ground
Level a travel trailer side to side first, using wheel ramps or blocks under the low-side tires; then chock the tires, unhitch if appropriate, and level front to back with the tongue jack. Keep every tire supported, use only stable equipment within its load rating, and don’t use the stabilizer jacks to lift the trailer.
Before you start: choose a safe spot and setup
See also: Granblue Fantasy GBF Tier List: Best Characters • Frostwyrm to Avalanchewyrm Guide: Frost Evolution Event
Park on the firmest, most nearly level ground available. Avoid soft shoulders, holes, steep cross-slopes, and ground that may become muddy. Check that the trailer and tow vehicle are aligned, the parking brake is set, and there’s room to extend steps and slides. If the site is too steep or soft for stable support, move to another spot rather than trying to compensate with a taller stack.
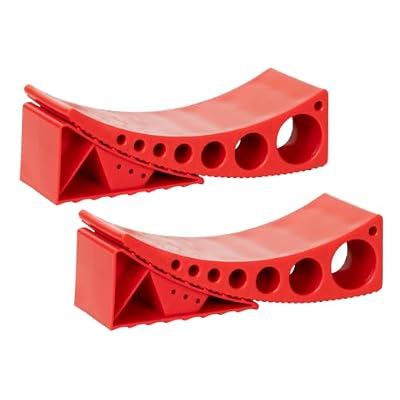
Andersen Hitches 2-Pack Camper Leveler Blocks for RVs and Trailers Up to 30000 lbs Precise 1/2 to 4 Inch Leveling Made in USA
Included for 'How to Level a Travel Trailer on Uneven Ground (Step-by-Step)' as a relevant option in this category; details come from the product listing.
View on Amazon
Andersen Hitches 2-Pack Camper Leveler Blocks with Rubber Mats and Duffel Bag for RVs and Trailers Up to 30000 lbs
Included for 'How to Level a Travel Trailer on Uneven Ground (Step-by-Step)' as a relevant option in this category; details come from the product listing.
View on Amazon
CARMTEK Camper Leveler Premium Kit - Curved RV Levelers with Camper Wheel Chocks, Rubber Mats and Carry Bag | Faster Camper Leveling Than RV Leveling Blocks
Included for 'How to Level a Travel Trailer on Uneven Ground (Step-by-Step)' because the listing specifies Curved RV Levelers with Camper Wheel Chocks and Rubber Mats and Carry Bag, details this guide uses to compare options.
View on Amazon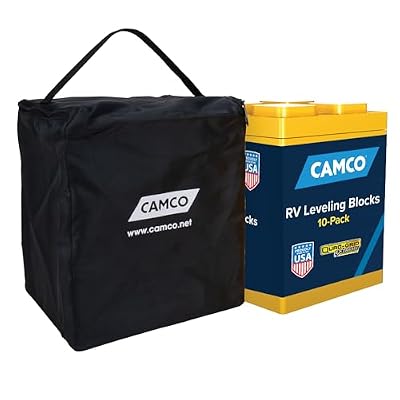
Camco RV Leveling Blocks - Features Interlocking Nested Design & Storage Bag for RV Storage and Organization - Each Leveling Block Measures 8.5" x 8.5" x 1" - 10-Pack, Design May Vary (44510)
Included for 'How to Level a Travel Trailer on Uneven Ground (Step-by-Step)' because the listing specifies Each Leveling Block Measures 8.5" x 8.5" x 1" and 10-Pack, details this guide uses to compare options.
View on AmazonUse a small level, a bubble level mounted inside the trailer, or a digital level on a consistent flat surface. Confirm the manufacturer’s instructions for your trailer, tires, jack, and leveling equipment; their limits take precedence over general guidance.
What can correct the slope?
The table gives practical planning ranges, not universal safety ratings. Actual capacity and permitted height depend on the specific product, trailer, tire load, and ground. Check labels and manuals before use.
| Support method | Typical working height | Best suited to | Important limit |
|---|---|---|---|
| Single-layer leveling blocks | About 1–3 in | Small corrections on firm, fairly flat ground | Use interlocking blocks rated for the load; don’t make a loose tower. |
| Stacked, interlocking blocks | About 3–5 in, only when the maker permits that stack | Moderate corrections where a broad, stable base is possible | More height means more chance of shifting; follow the product’s stacking and capacity limits. |
| Purpose-built tire leveling ramp | Commonly about 2–4 in | Single-axle trailers or a pair of wheels that can climb together | Ramp capacity and tire spacing matter; use the model’s instructions. |
| Wide, load-rated cribbing | Varies by design | Firm, level bearing surfaces when approved for the application | Never substitute scraps, bricks, or narrow pieces that can roll, split, or sink. |
As a practical rule, correct only the amount the equipment is designed to support. If the low side needs more than roughly 4–5 inches of lift, or a ramp/block stack would be tall or unstable, find a more level campsite. Those numbers are conservative planning cues, not a guarantee that a particular setup is safe.
Step-by-step: side to side, then front to back
1. Measure the side-to-side difference
With the trailer still hitched, place a level across the floor or another manufacturer-approved reference point. Identify which side is low and estimate the correction needed. Don’t measure from trim or a countertop unless you know it is level with the trailer frame.
2. Position the ramp or blocks at the low-side tires
For a single-axle trailer, put the ramp or approved block platform in line with the tire that needs to rise. For a tandem-axle trailer, use equipment intended to support the wheel arrangement; both tires may need coordinated support. Follow the ramp maker’s placement instructions, and keep the support centered beneath the tire path.
Don’t place loose blocks in front of a tire as a makeshift ramp. They can shoot out or tip. If using blocks, build a broad, interlocked platform on firm ground and use only a configuration the manufacturer permits.
3. Drive onto the support slowly
Have a spotter guide you, move at walking speed, and stop when the trailer is level side to side. Set the tow vehicle’s parking brake. If the tire passes the target height, pull forward or backward and reset the support rather than attempting a sharp correction while perched on it.
4. Chock before unhitching
Place snug wheel chocks on both sides of a tire on the ground, or use an approved chocking arrangement for the trailer’s axle configuration. On a slope, chock before disconnecting the coupler. Keep the chocks in contact with the tires without forcing them under so hard that they lift a tire. Recheck that the trailer cannot roll before unhitching.
5. Level front to back with the tongue jack
With the trailer securely chocked, disconnect the tow vehicle and raise or lower the tongue jack until the trailer is level front to back. The tongue jack belongs beneath the trailer’s designated coupler/jack mounting point, not under the frame at an arbitrary location. On dirt, place a purpose-made jack foot or a wide, solid support pad beneath it to spread the load and reduce sinking. The pad must sit flat and remain stable.
6. Lower stabilizers and recheck
Once level, lower the stabilizer jacks until they make firm contact. They steady the trailer; they are not lifting jacks and should not be used to raise a wheel or correct a major slope. Recheck level after stabilizers are down, since they can slightly shift the trailer, and again after slides are extended if your owner’s manual calls for that sequence.
Soft or sloped dirt: prevent sinking and rolling
On soft ground, a narrow jack foot can press into the soil, tilt, or sink as the trailer’s weight shifts. Use a wide, purpose-made support pad rated for the load, set it on the firmest available ground, and make sure it is fully supported rather than bridging a hole. A scrap of thin plywood is not a dependable substitute for a load-rated pad.
For wheel chocks, choose a size and material suitable for the tire and ground conditions, and place them on firm ground close against the tire. If the soil is loose, a chock that slides is not doing its job. Reposition to firmer ground if needed; don’t rely on the tow vehicle’s transmission or parking brake to hold an unhitched trailer.
Never put a hand, foot, or any part of your body beneath a trailer supported only by a tongue jack, stabilizer, or improvised stack. Keep people clear while moving onto ramps, and don’t crawl under the trailer to adjust a support.
Worked example: estimating the correction
Suppose a 6-foot-wide trailer is about 2 inches lower on the left than the right. The slope is approximately 2 inches over 72 inches, or 1 inch of rise per 36 inches of width. That is a modest correction: a correctly rated ramp or approved block setup with about 2 inches of lift may be enough. This calculation estimates the difference; it does not tell you whether a particular ramp, tire, or campsite is safe. Recheck with a level after positioning.
Common mistakes to avoid
- Leveling front to back before side to side: Once unhitched, raising the tongue can complicate side-to-side corrections. Do the wheel-side correction while hitched.
- Using stabilizers as lifting jacks: This can bend or damage them and may destabilize the trailer.
- Building a tall, narrow stack: A high stack can shift or collapse. Use interlocking, load-rated equipment within its stated limits.
- Forgetting to chock before unhitching: Chocks help prevent the trailer from rolling as the tongue jack takes the load.
- Ignoring what happens after setup: Check supports and level again if the ground is soft, rain is expected, or the trailer settles.
For a safe setup, the sequence is simple: raise the low side with approved wheel support, chock securely, level front to back at the designated tongue-jack point, then set the stabilizers. If the required lift exceeds the equipment’s permitted setup or the ground won’t hold a broad support, relocate rather than adding height.